Simplifying Ticketing and Customer Support on RServiceDesk Portal — A Case Study
In this case study we will see how a ticket is being created, managed and resolved in RServiceDesk.
So let's get started.


What is RServiceDesk?
RServiceDesk is a B2B ticketing and customer support management product where an organization track and manage incoming tickets from multiple channels into one single view.
Very important note: In this case study, To demonstrate how RServiceDesk functions, we will use JWD (Jio World Drive) as an example of an organisation, Shruti Shah as a customer, and Umesh Iyer as an agent
Raising / Creating a Ticket
Shruti Shah owns a shop on the second floor of Jio World Drive, right next to the elevator. One day, she noticed the elevator wasn't working right. She wanted to report the problem to the JWD support team, and she had three ways to submit a ticket.
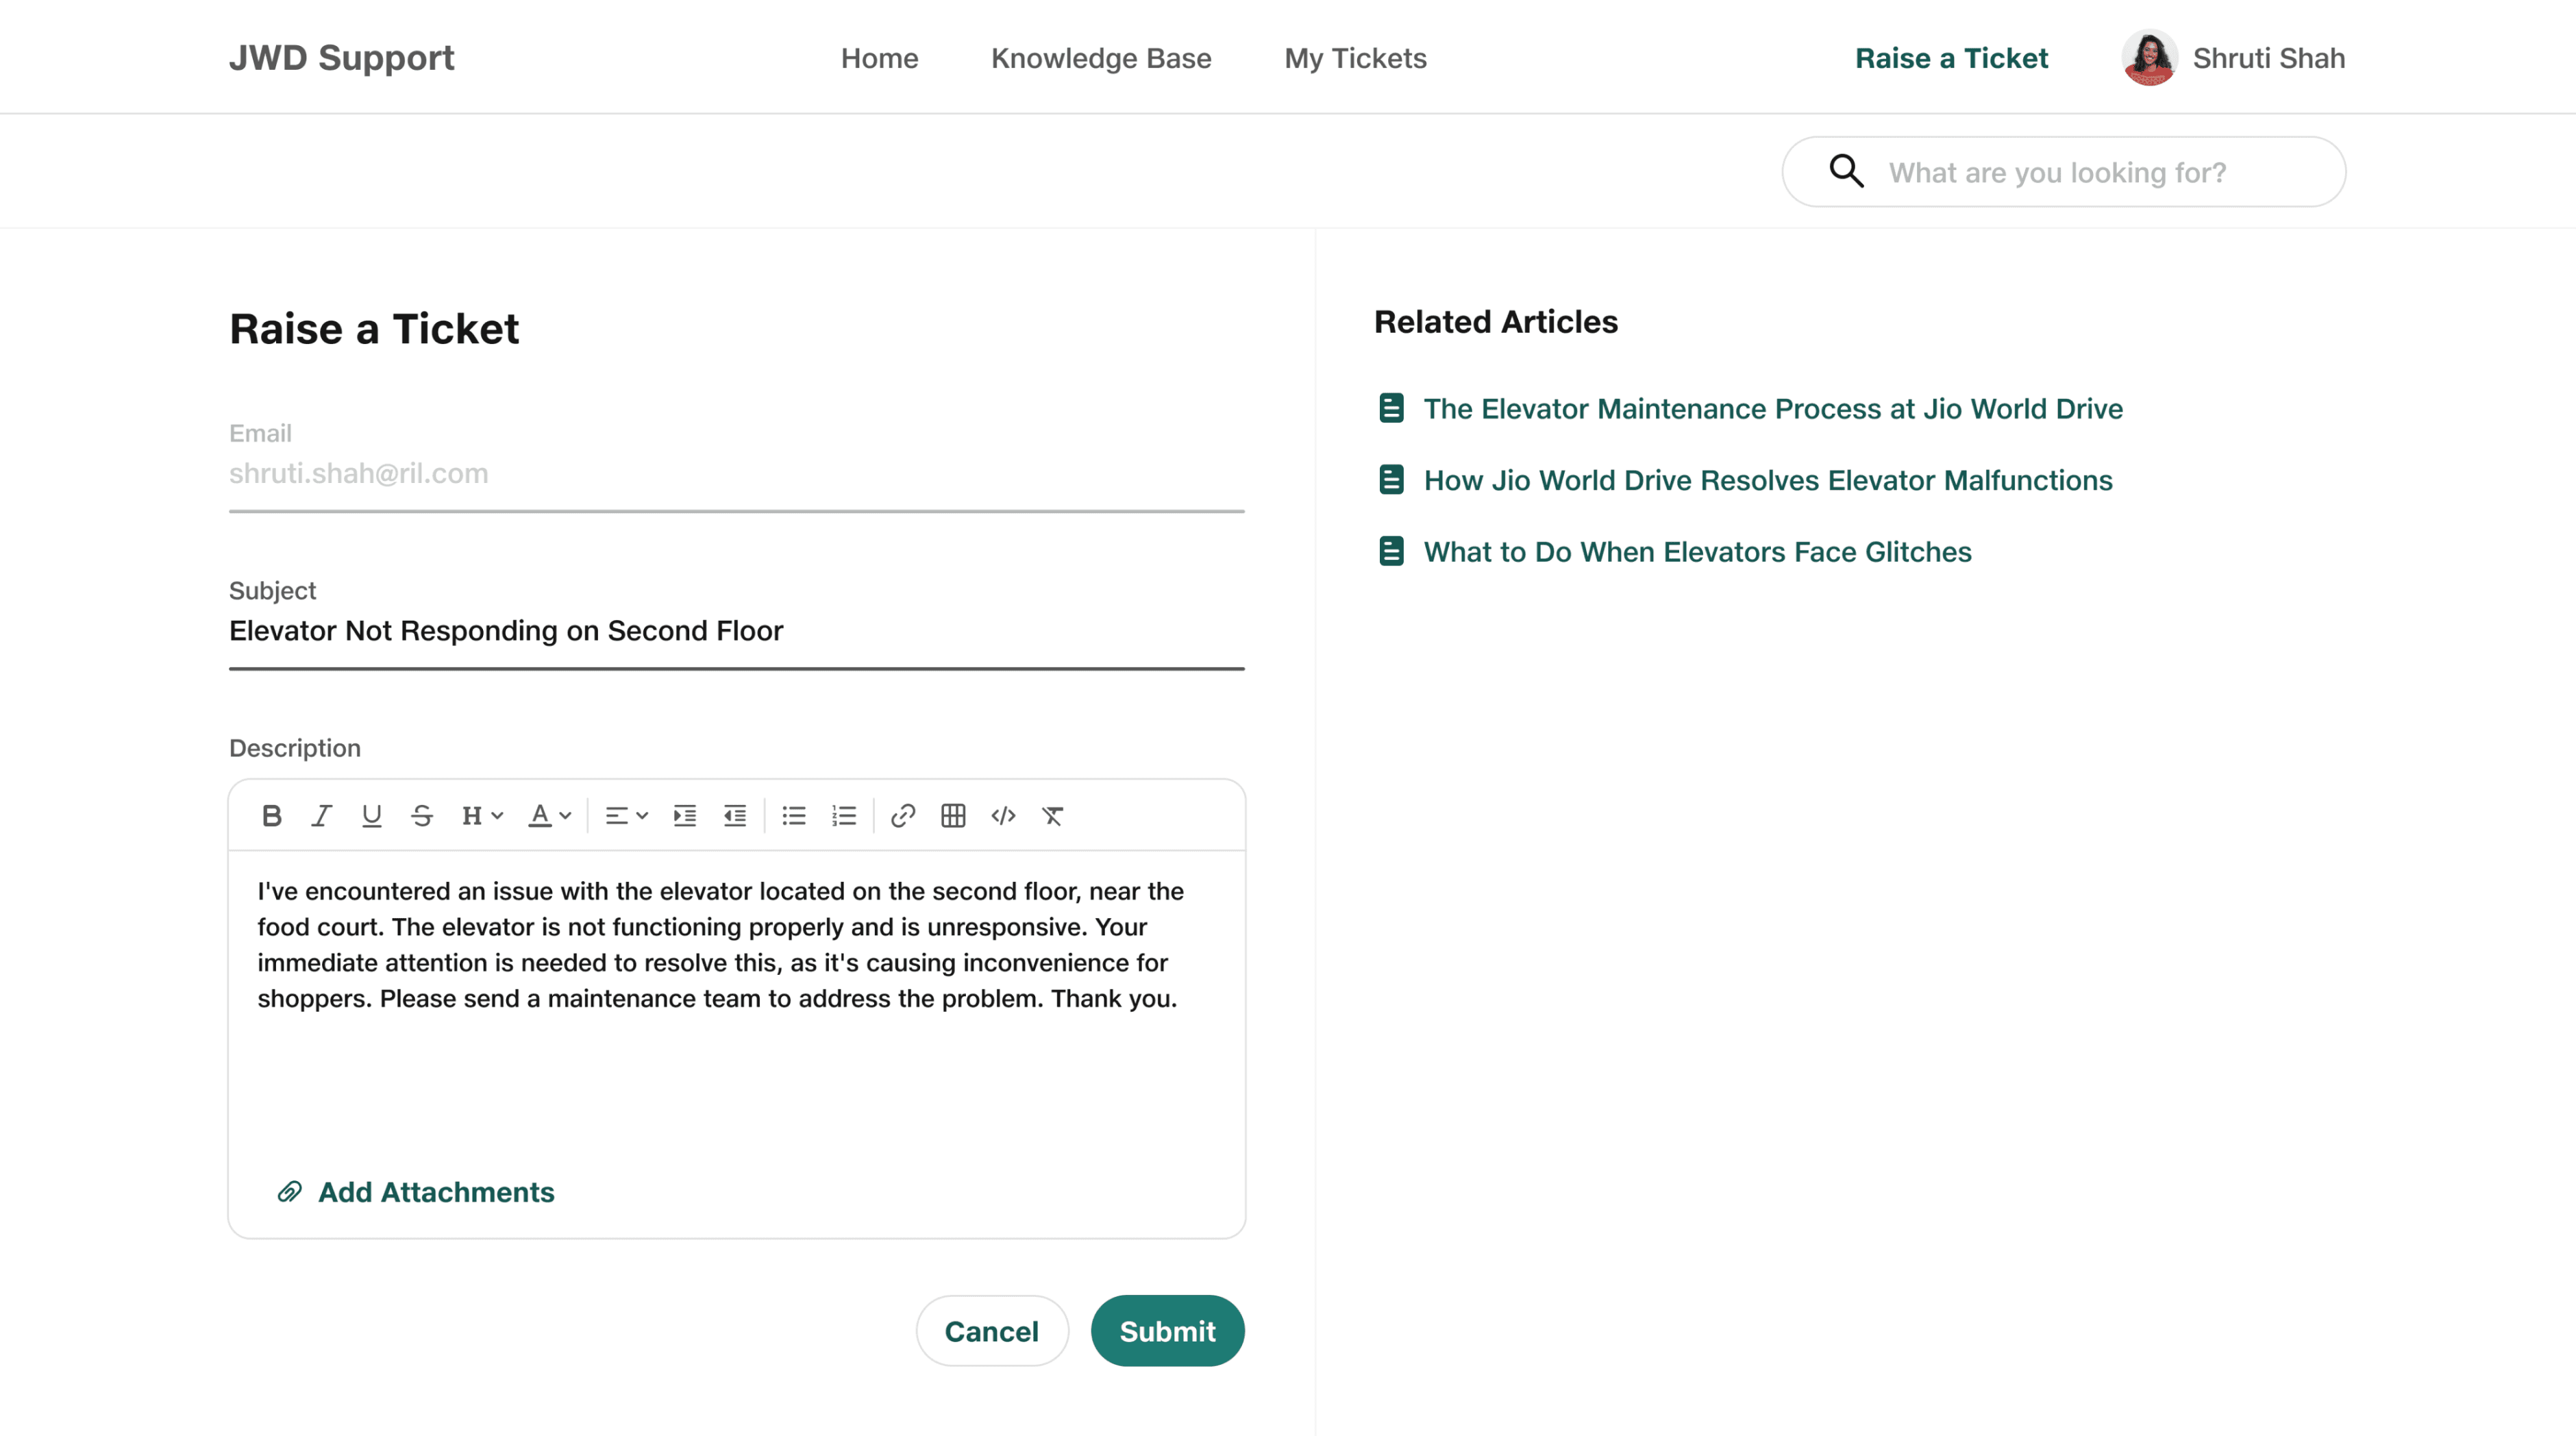
By Website: Under support page of JWD website she can fill the Raise a Ticket form
By Email: Email the issue to provided email and a ticket will create in portal
By Call: Call support team and agent will create a ticket behalf of her
By Website
Below the JWD website's support page. We'll call this the "Customer Portal" from now on, as it's where Shruti can submit and track her support tickets.
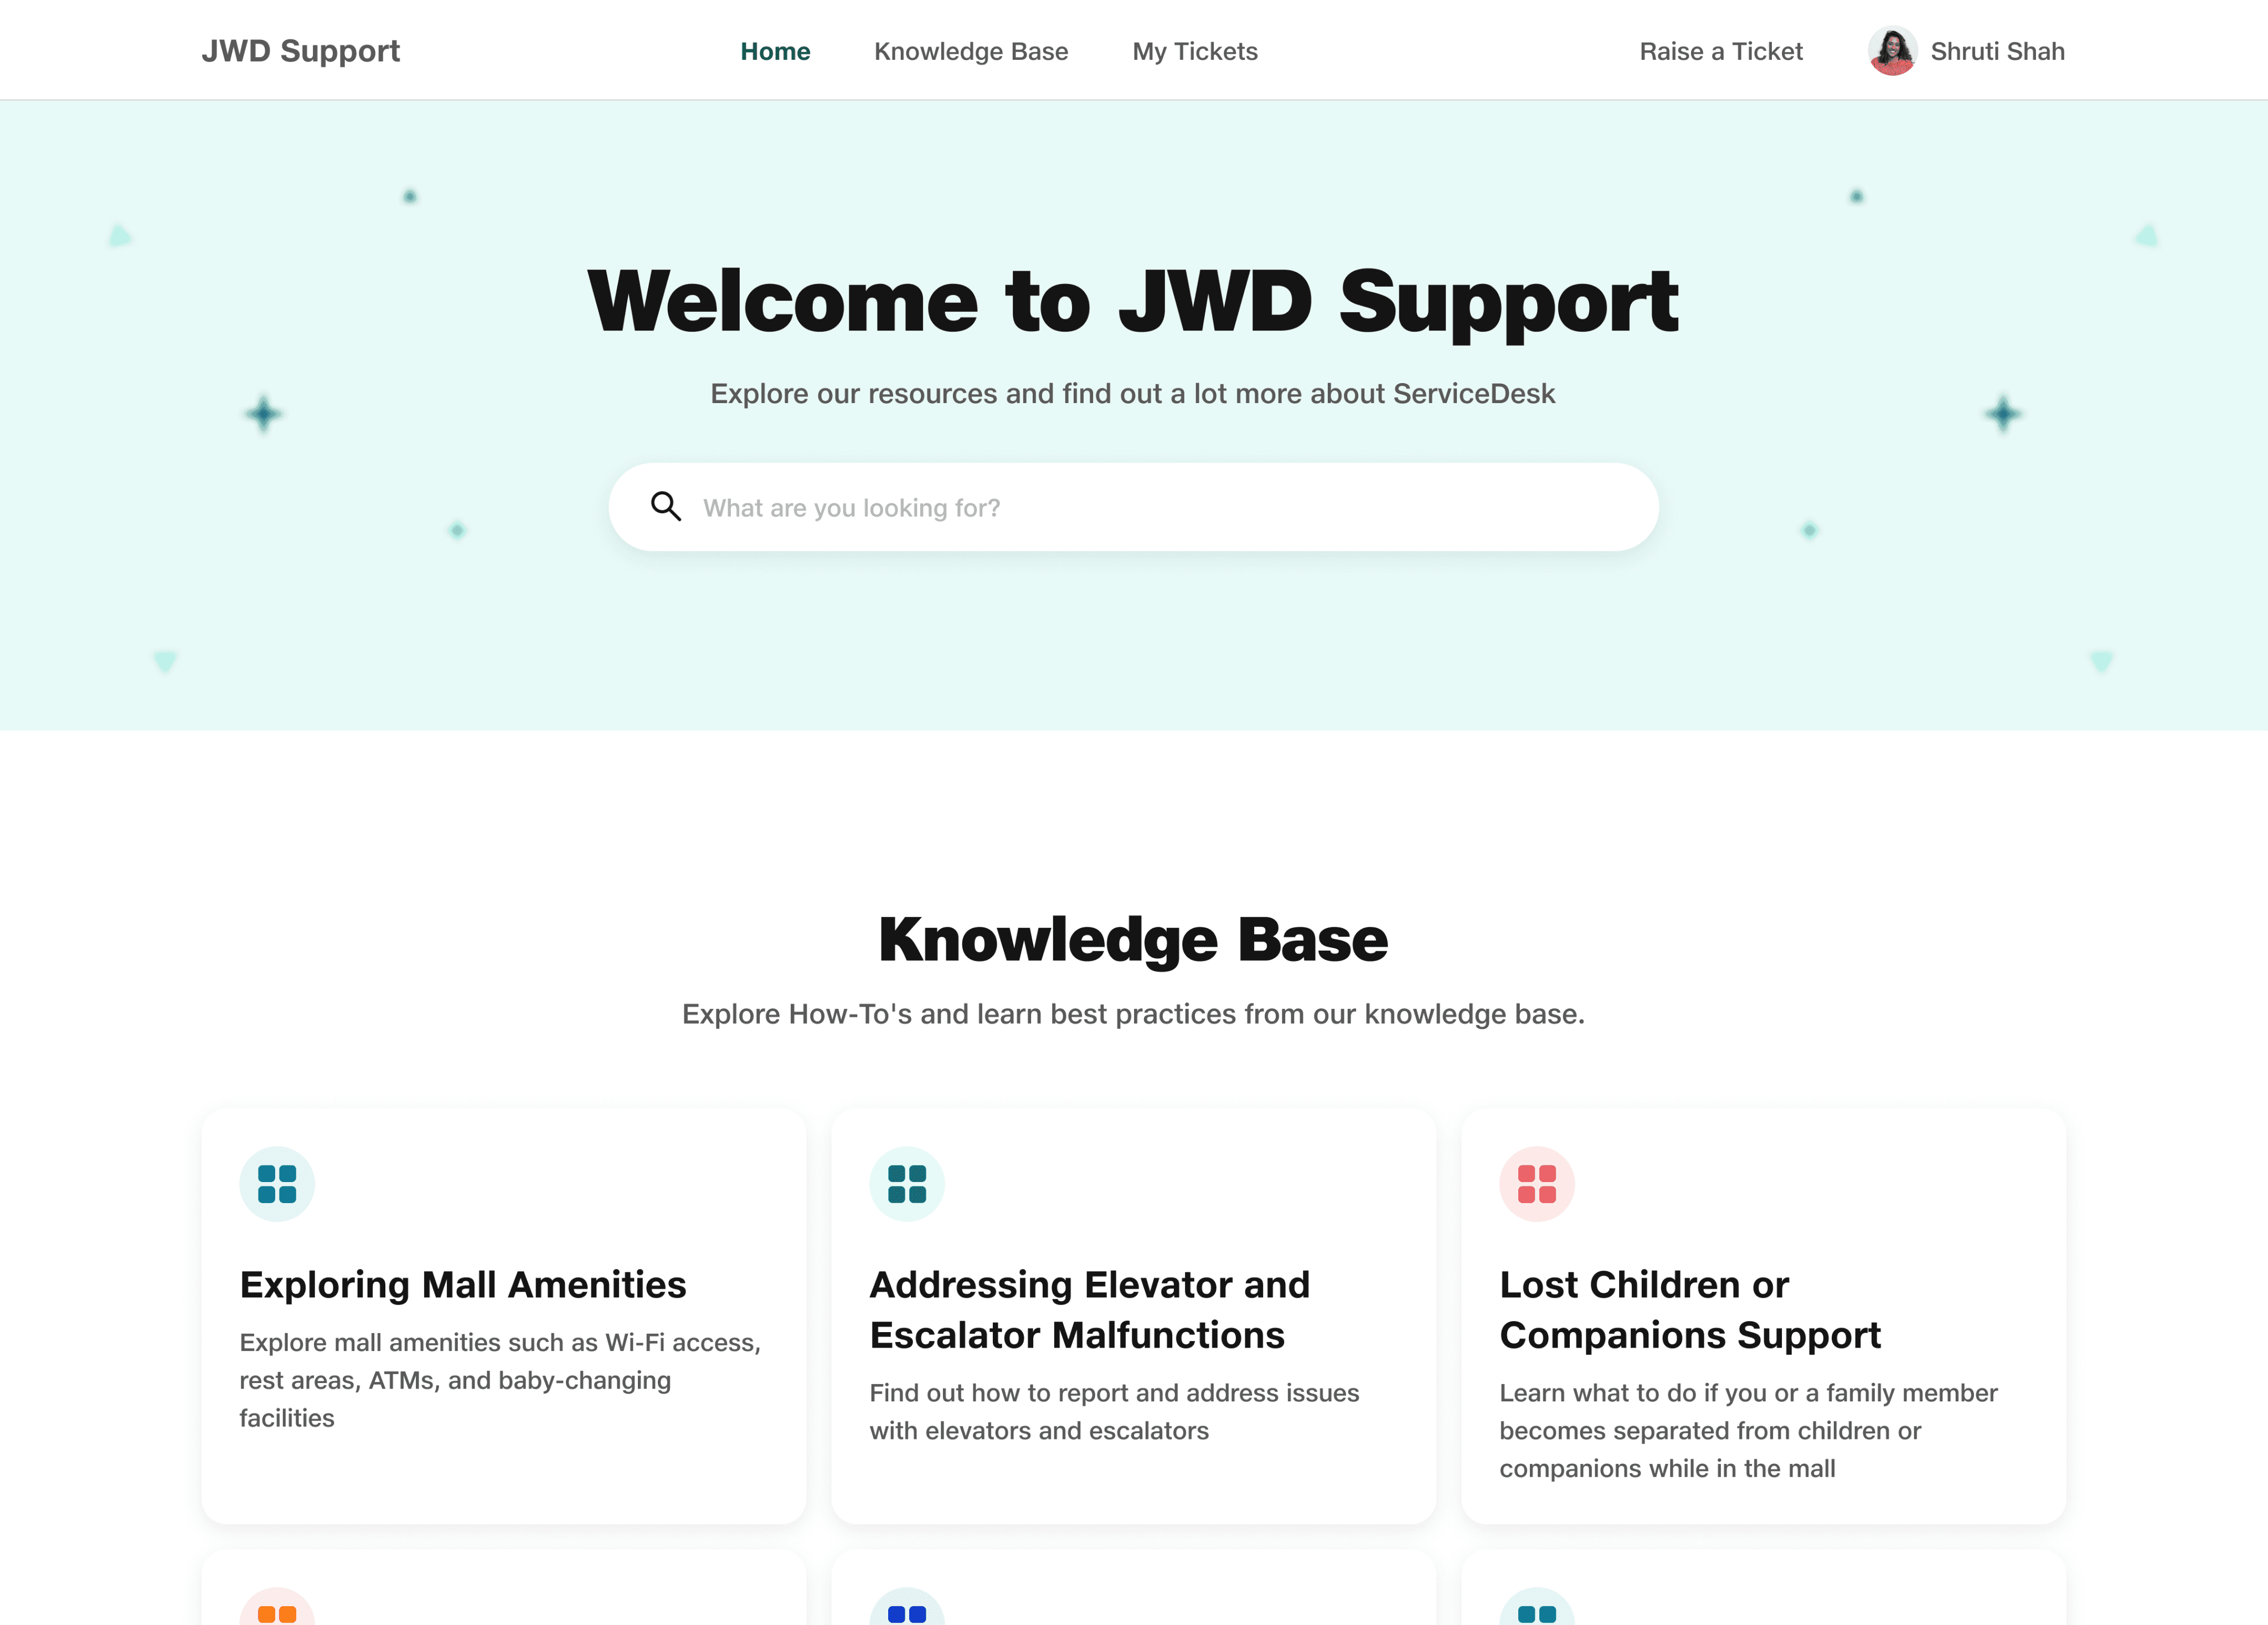
When she clicks the Raise a Ticket button, a form will appear. She can fill in the basic information and submit it. Once submitted, the ticket will be created in the RServiceDesk portal.
By Email
For submitting a ticket Shruti has to mail the given support email address and a ticket will be created on RServiceDesk Portal.
By Call
For submitting a ticket Shruti has to call the given support number and explain the issue to agent and he will create a ticket and assign to available agent.
Now, let's assume that Shruti called the support team to address the issue. Let's see how the agent
will create a ticket.
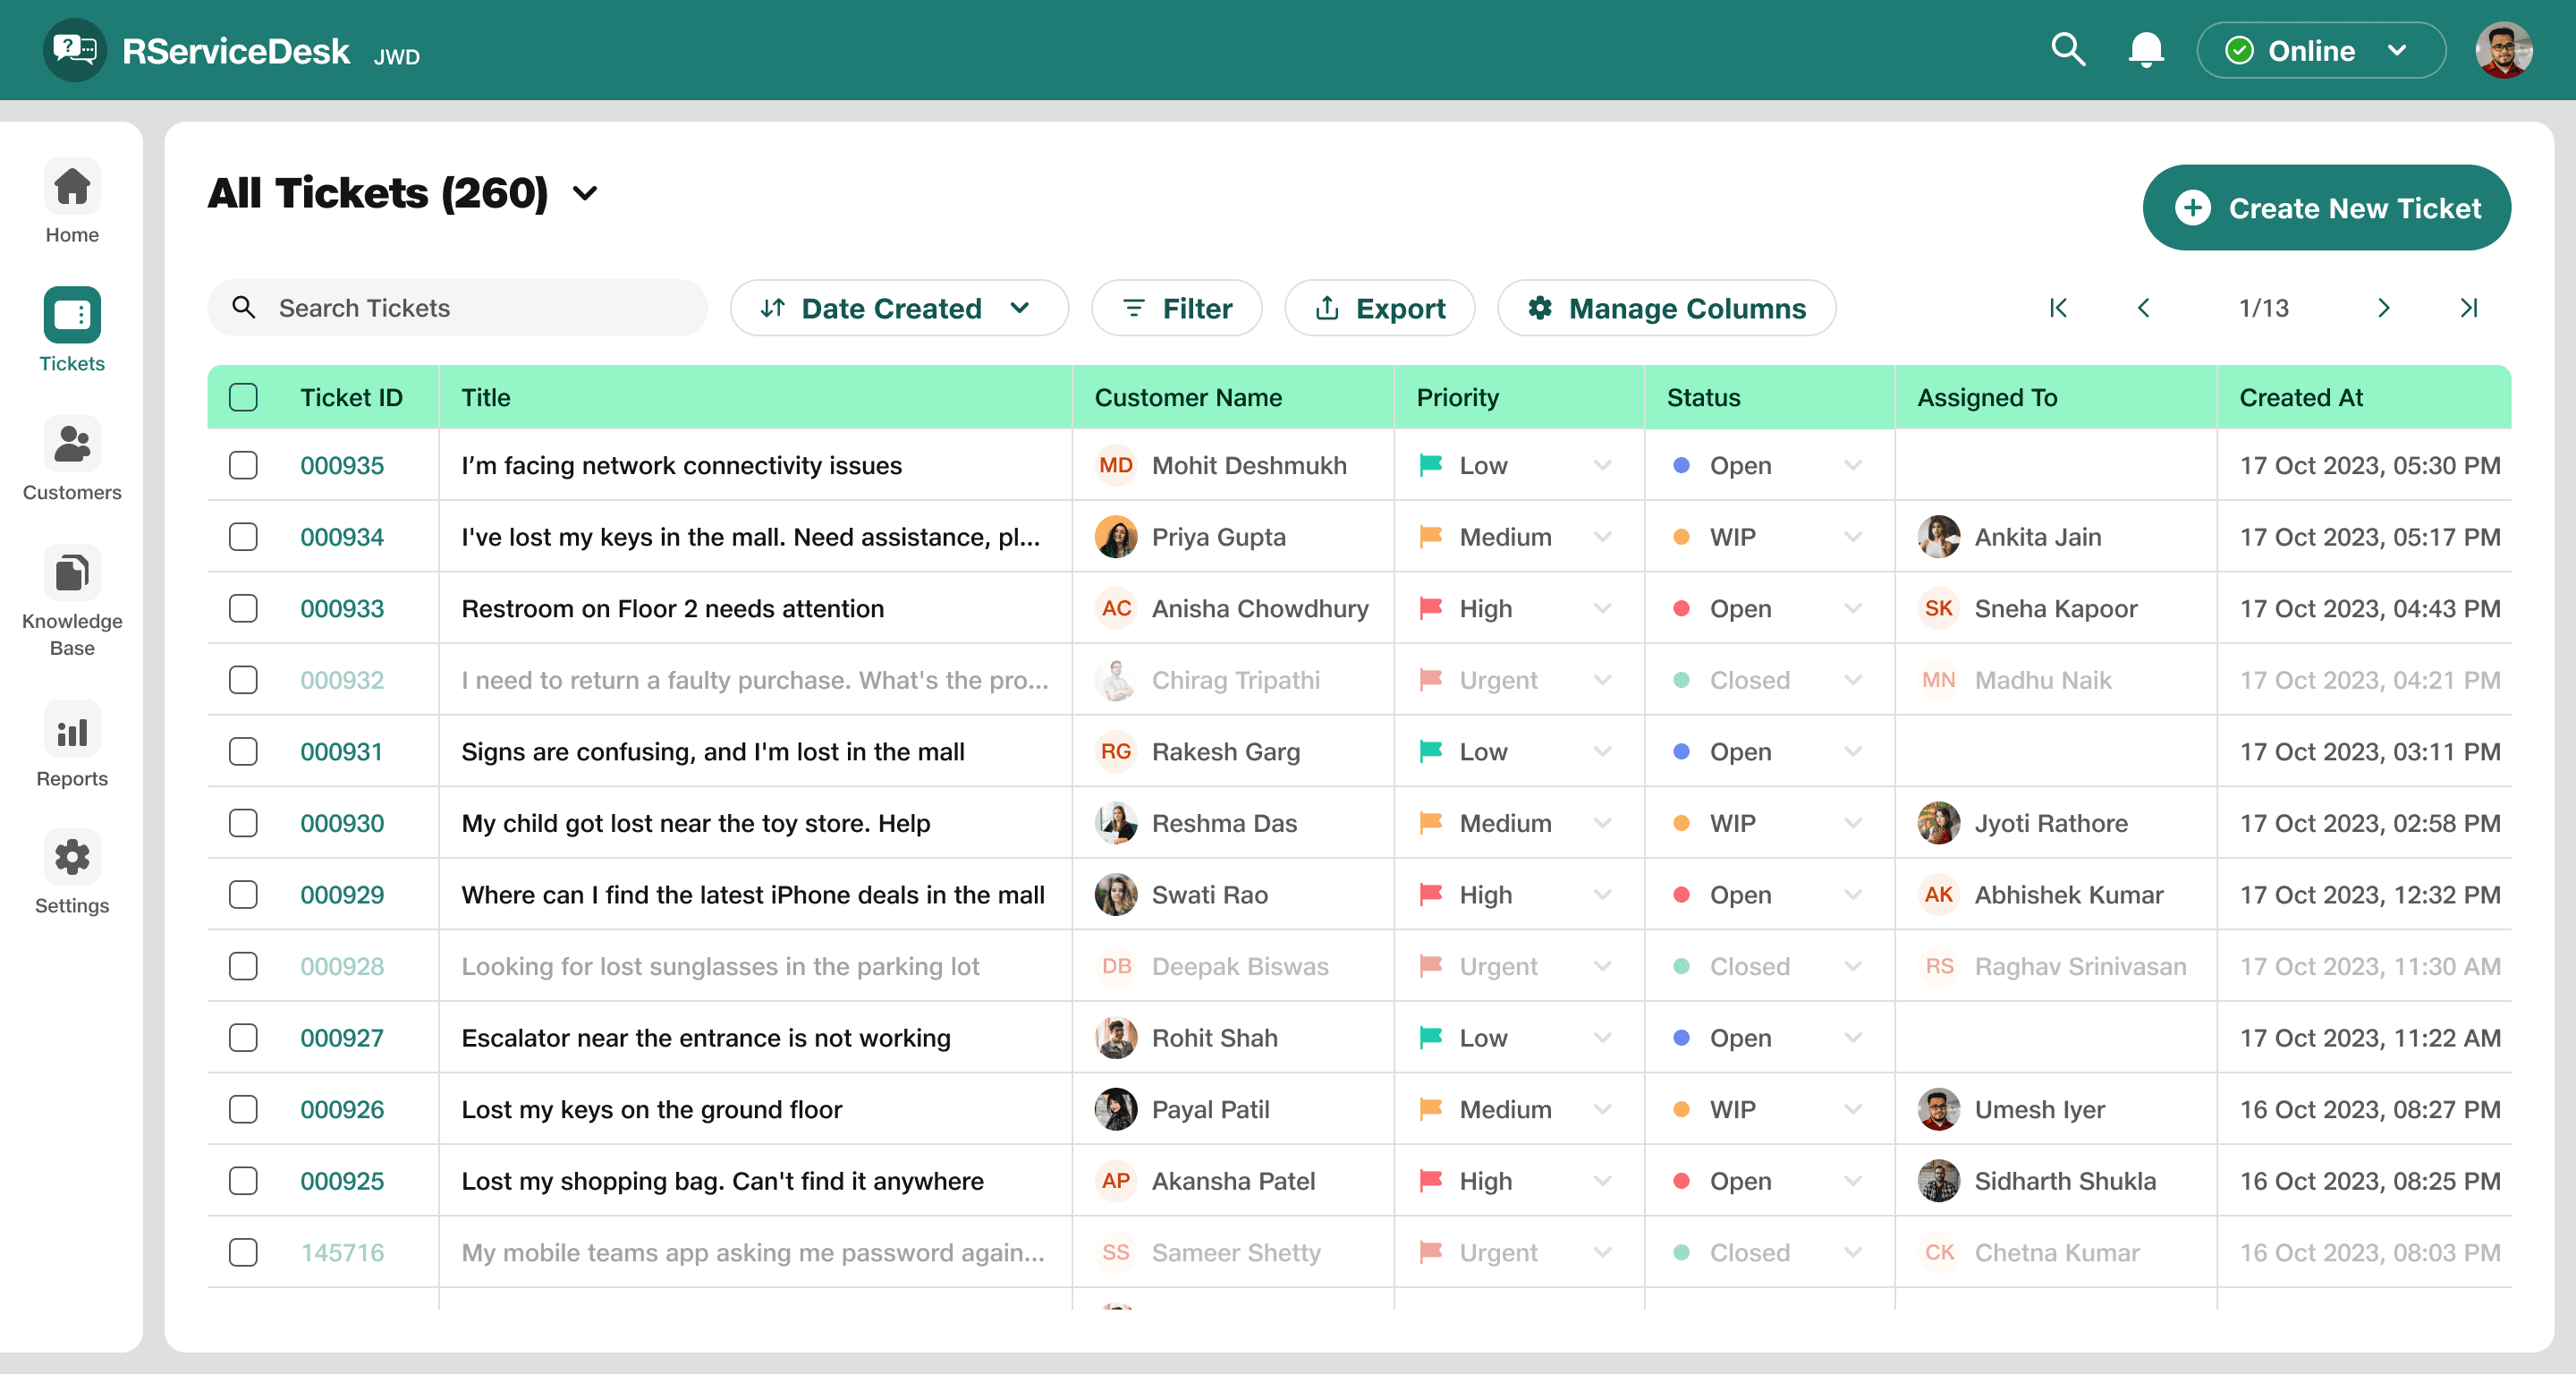
Below is RServiceDesk portal and for creating a ticket for Shruti, agent has to click on
Create New Ticket button.
RServiceDesk Portal
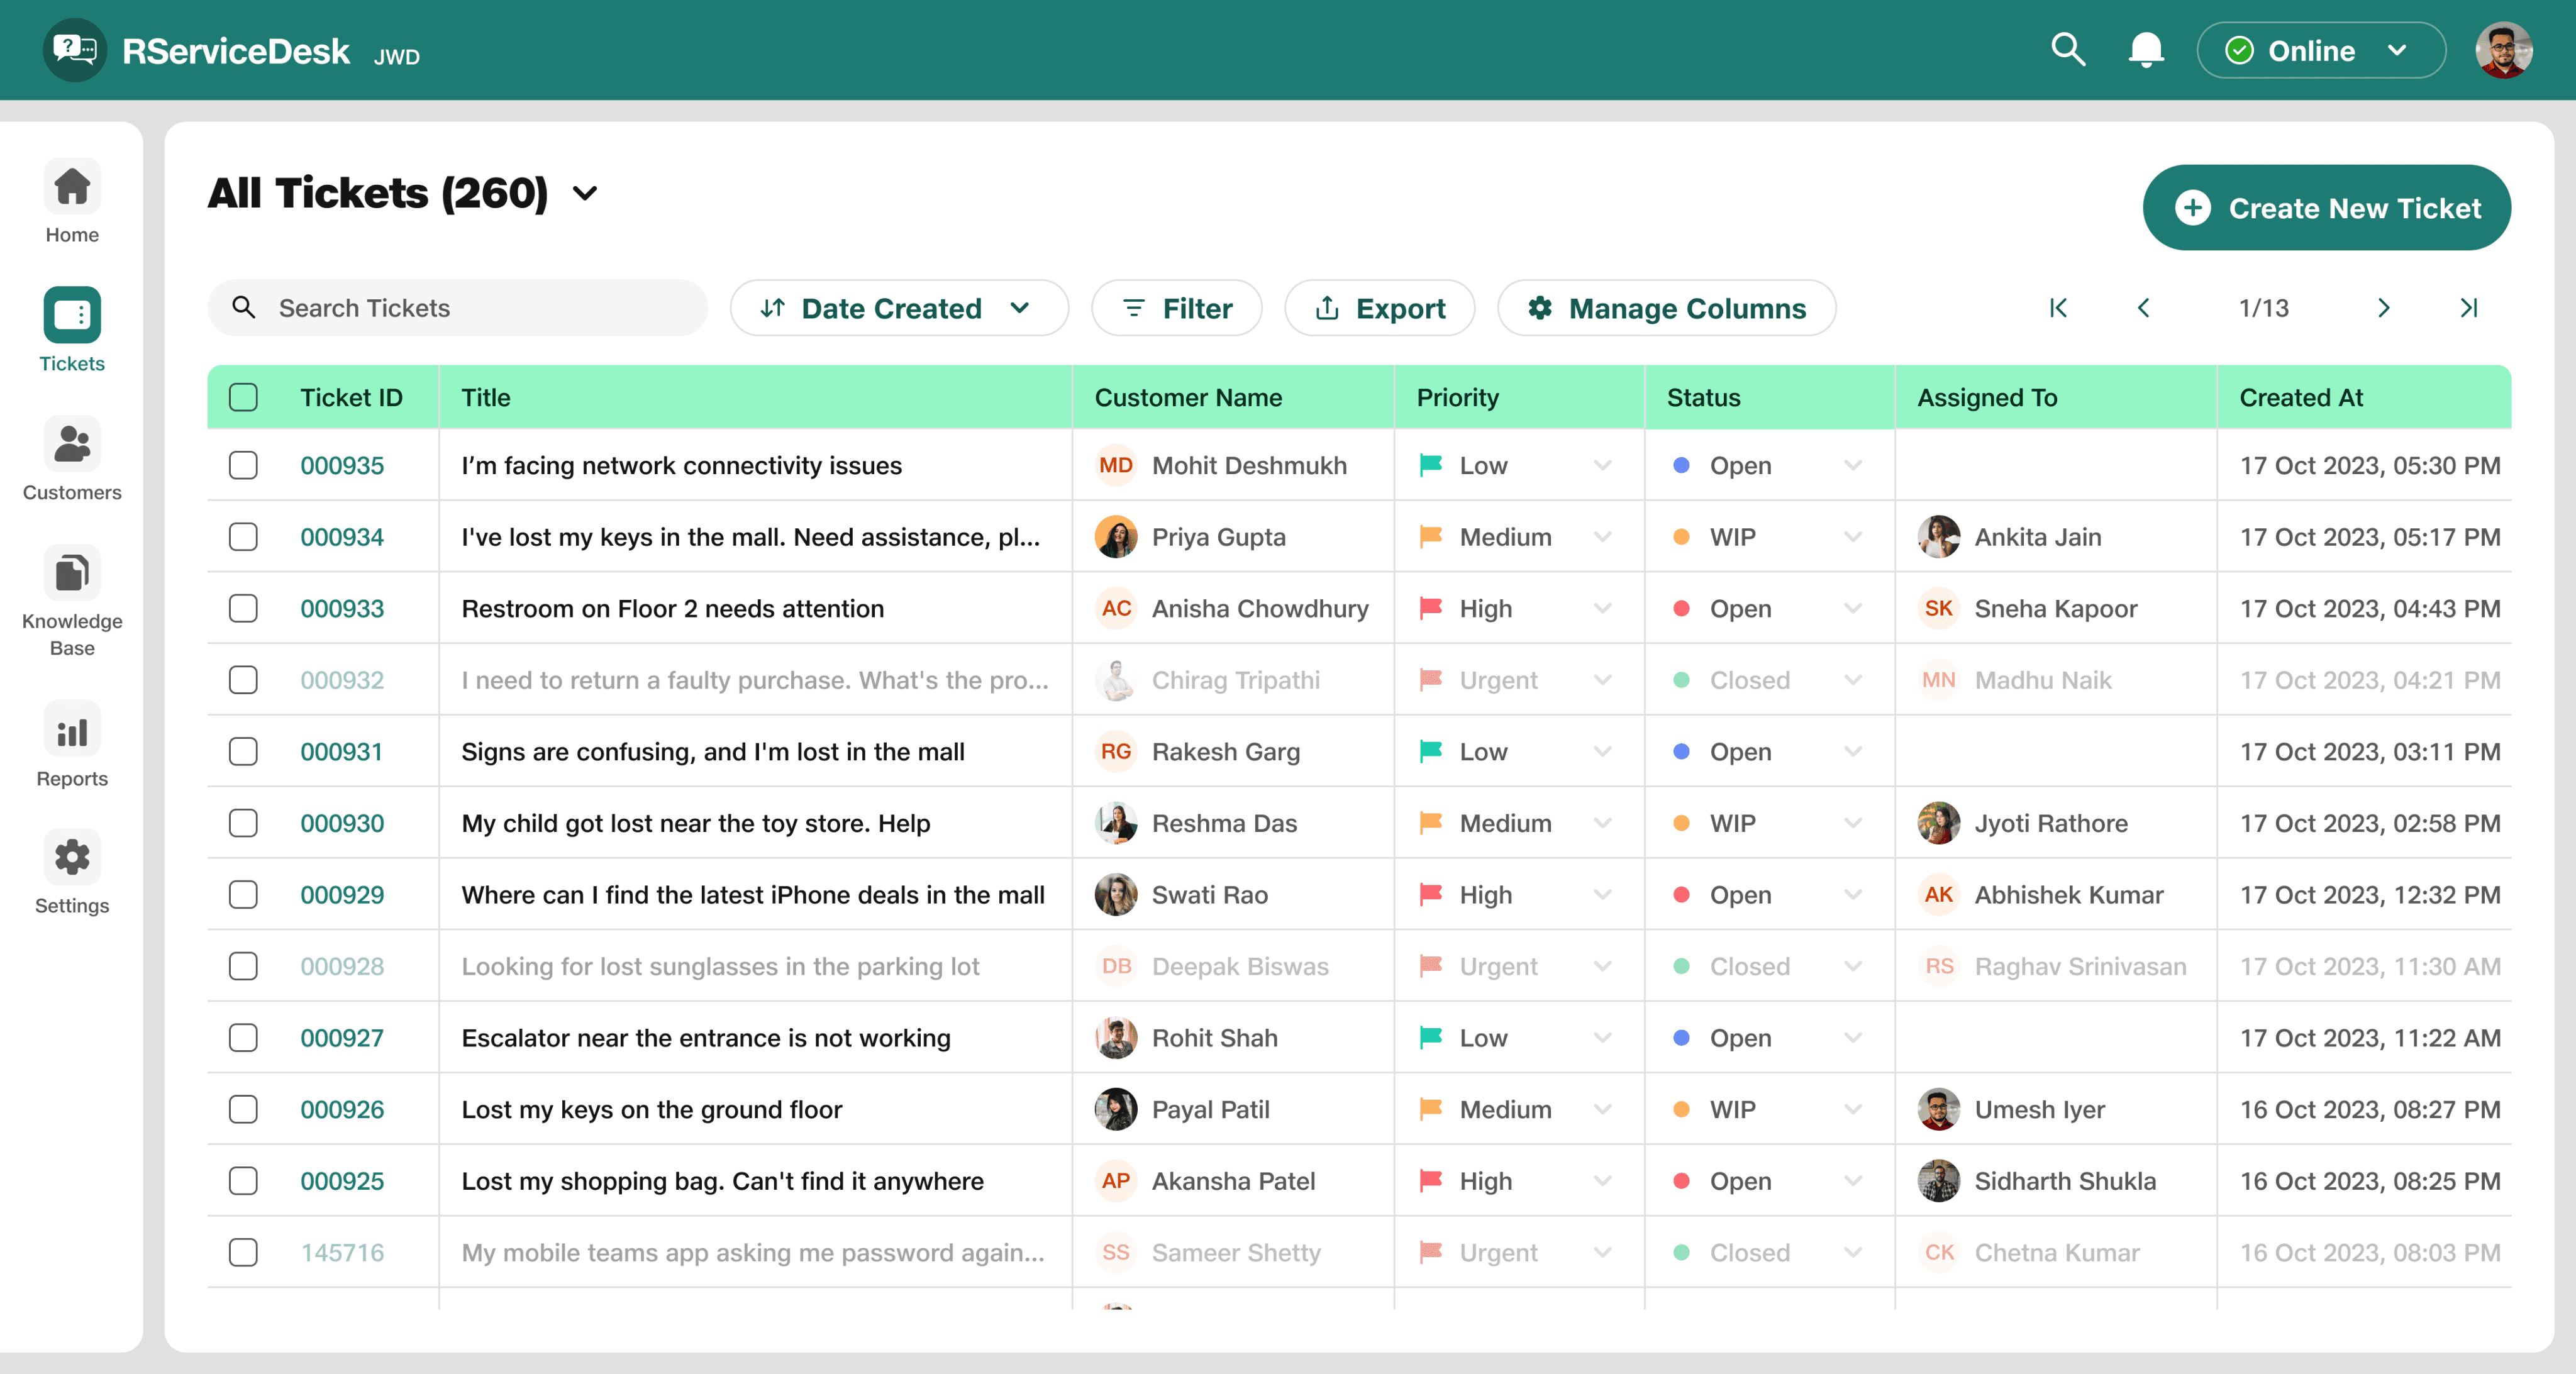
Create New Ticket Button
After clicking on the Create New Ticket button, a side panel will appear, allowing the agent to fill in all the details and assign the ticket to an available agent (Umesh Iyer in our case)
and submit it.
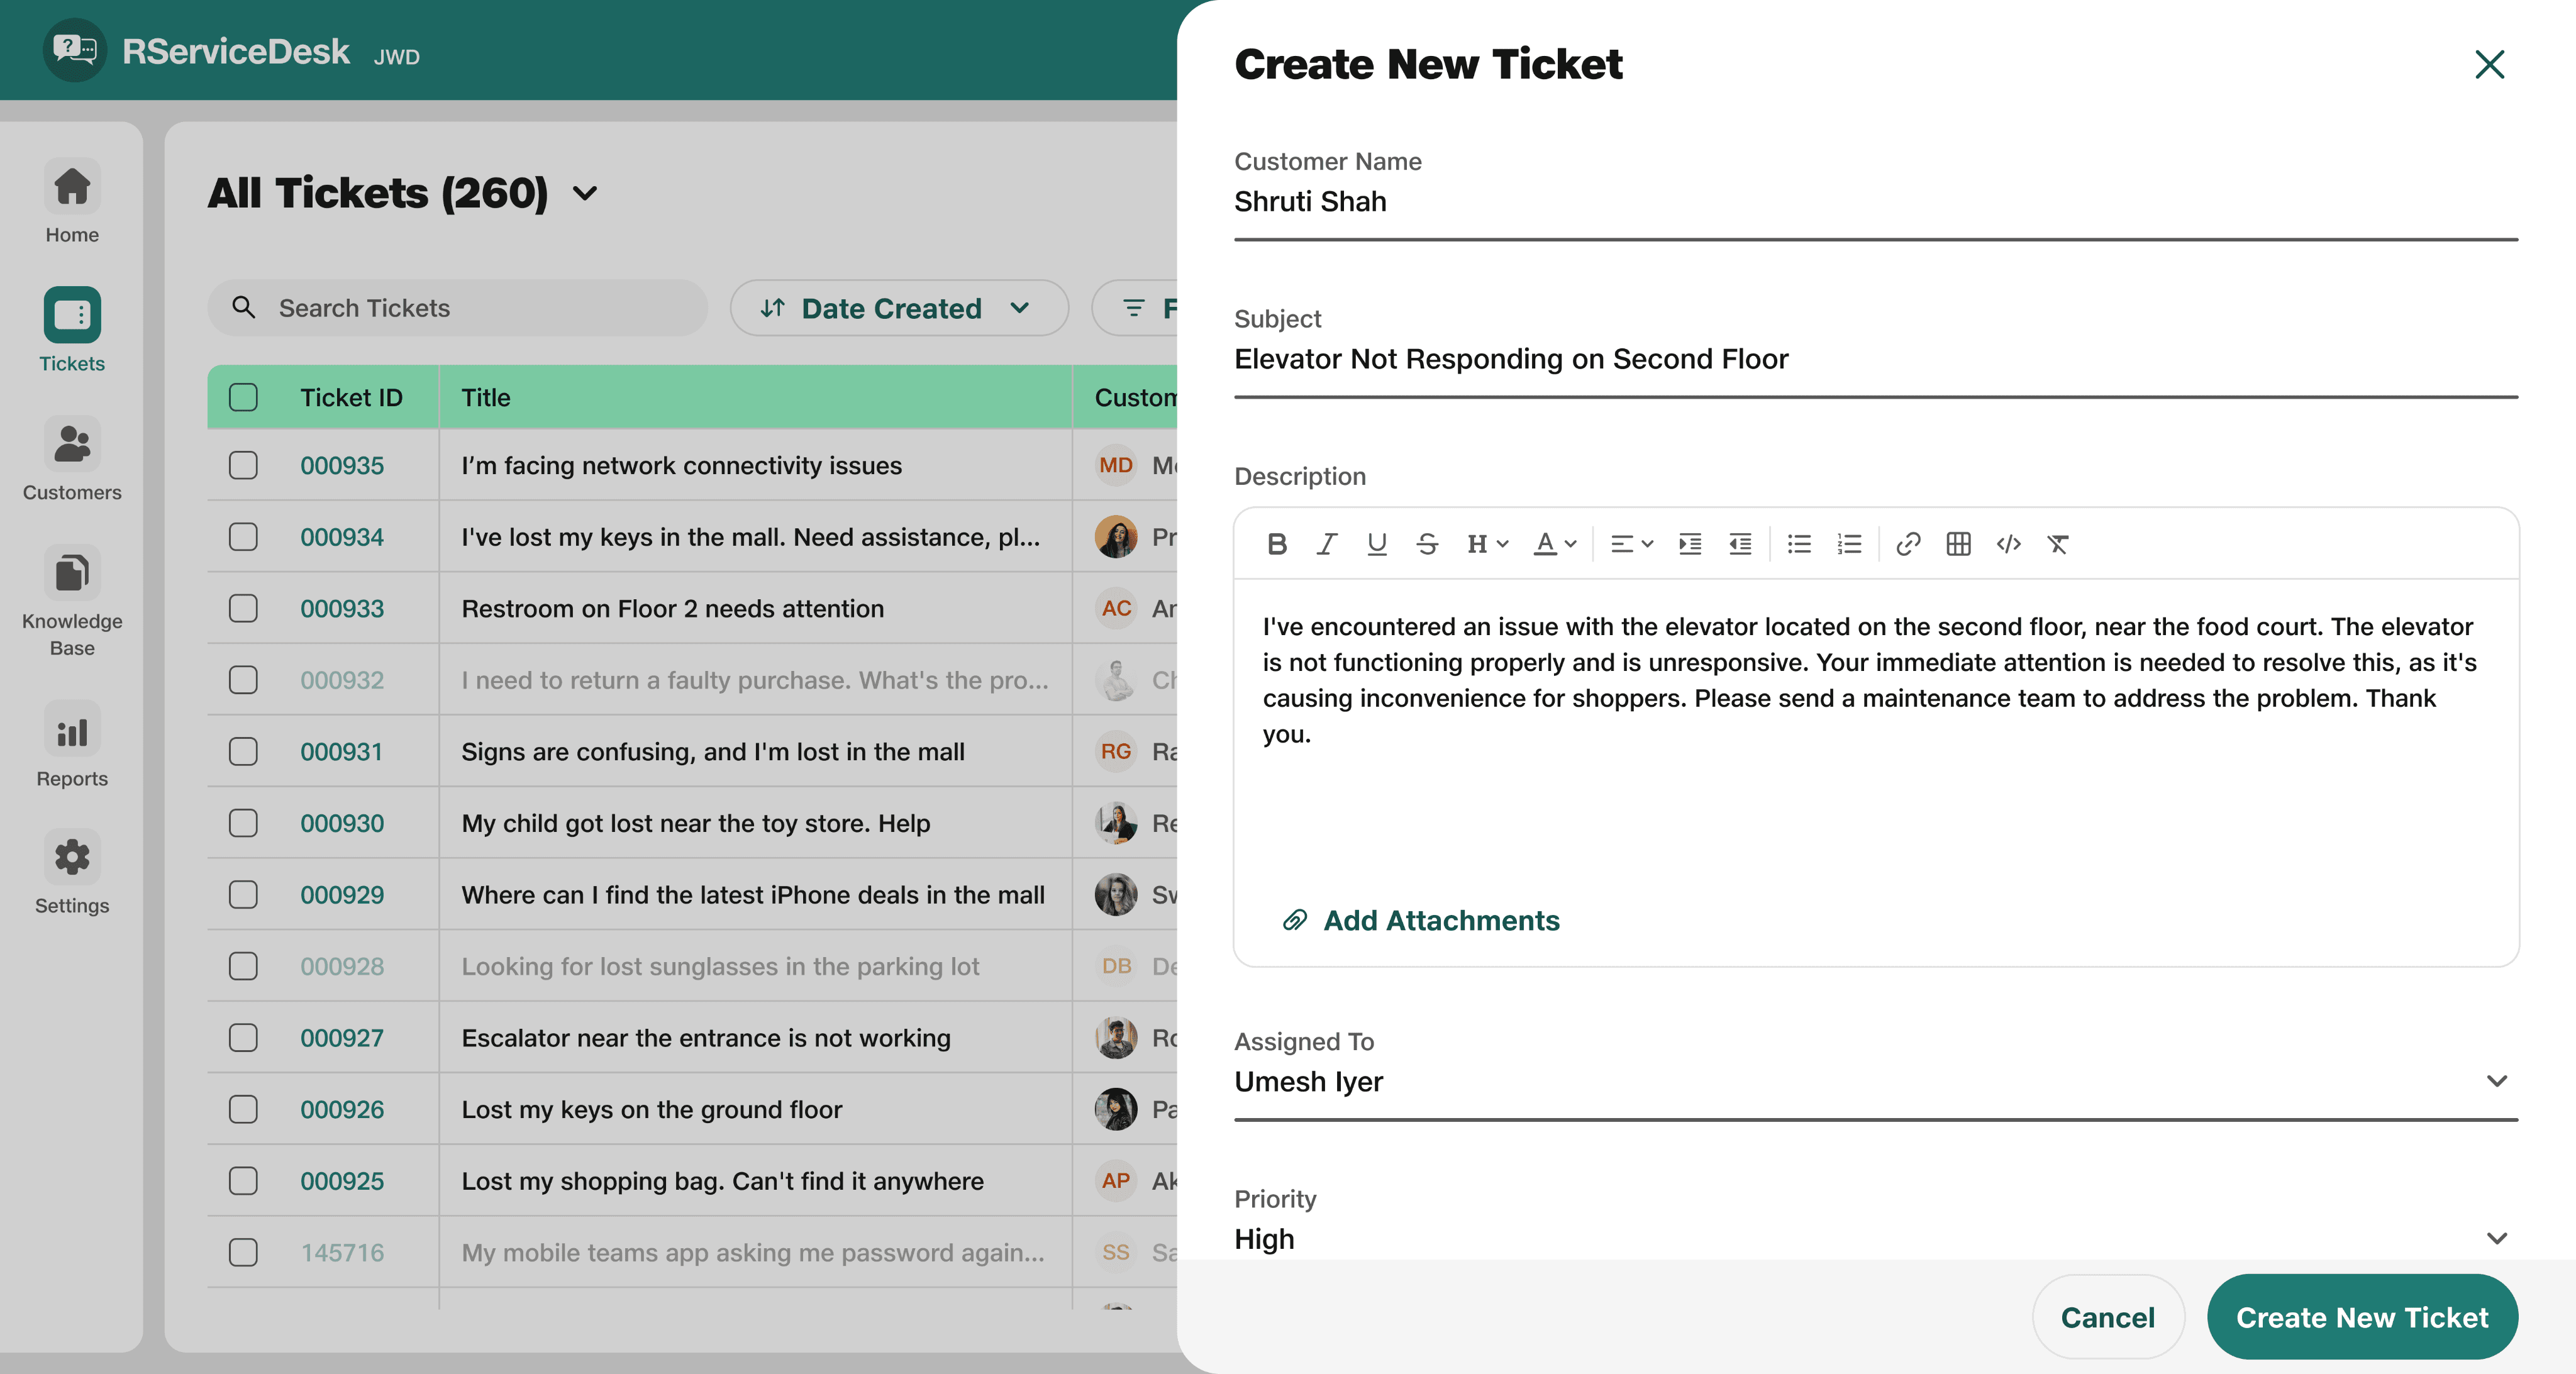
Details has been filled and ticket assigned to Umesh Iyer
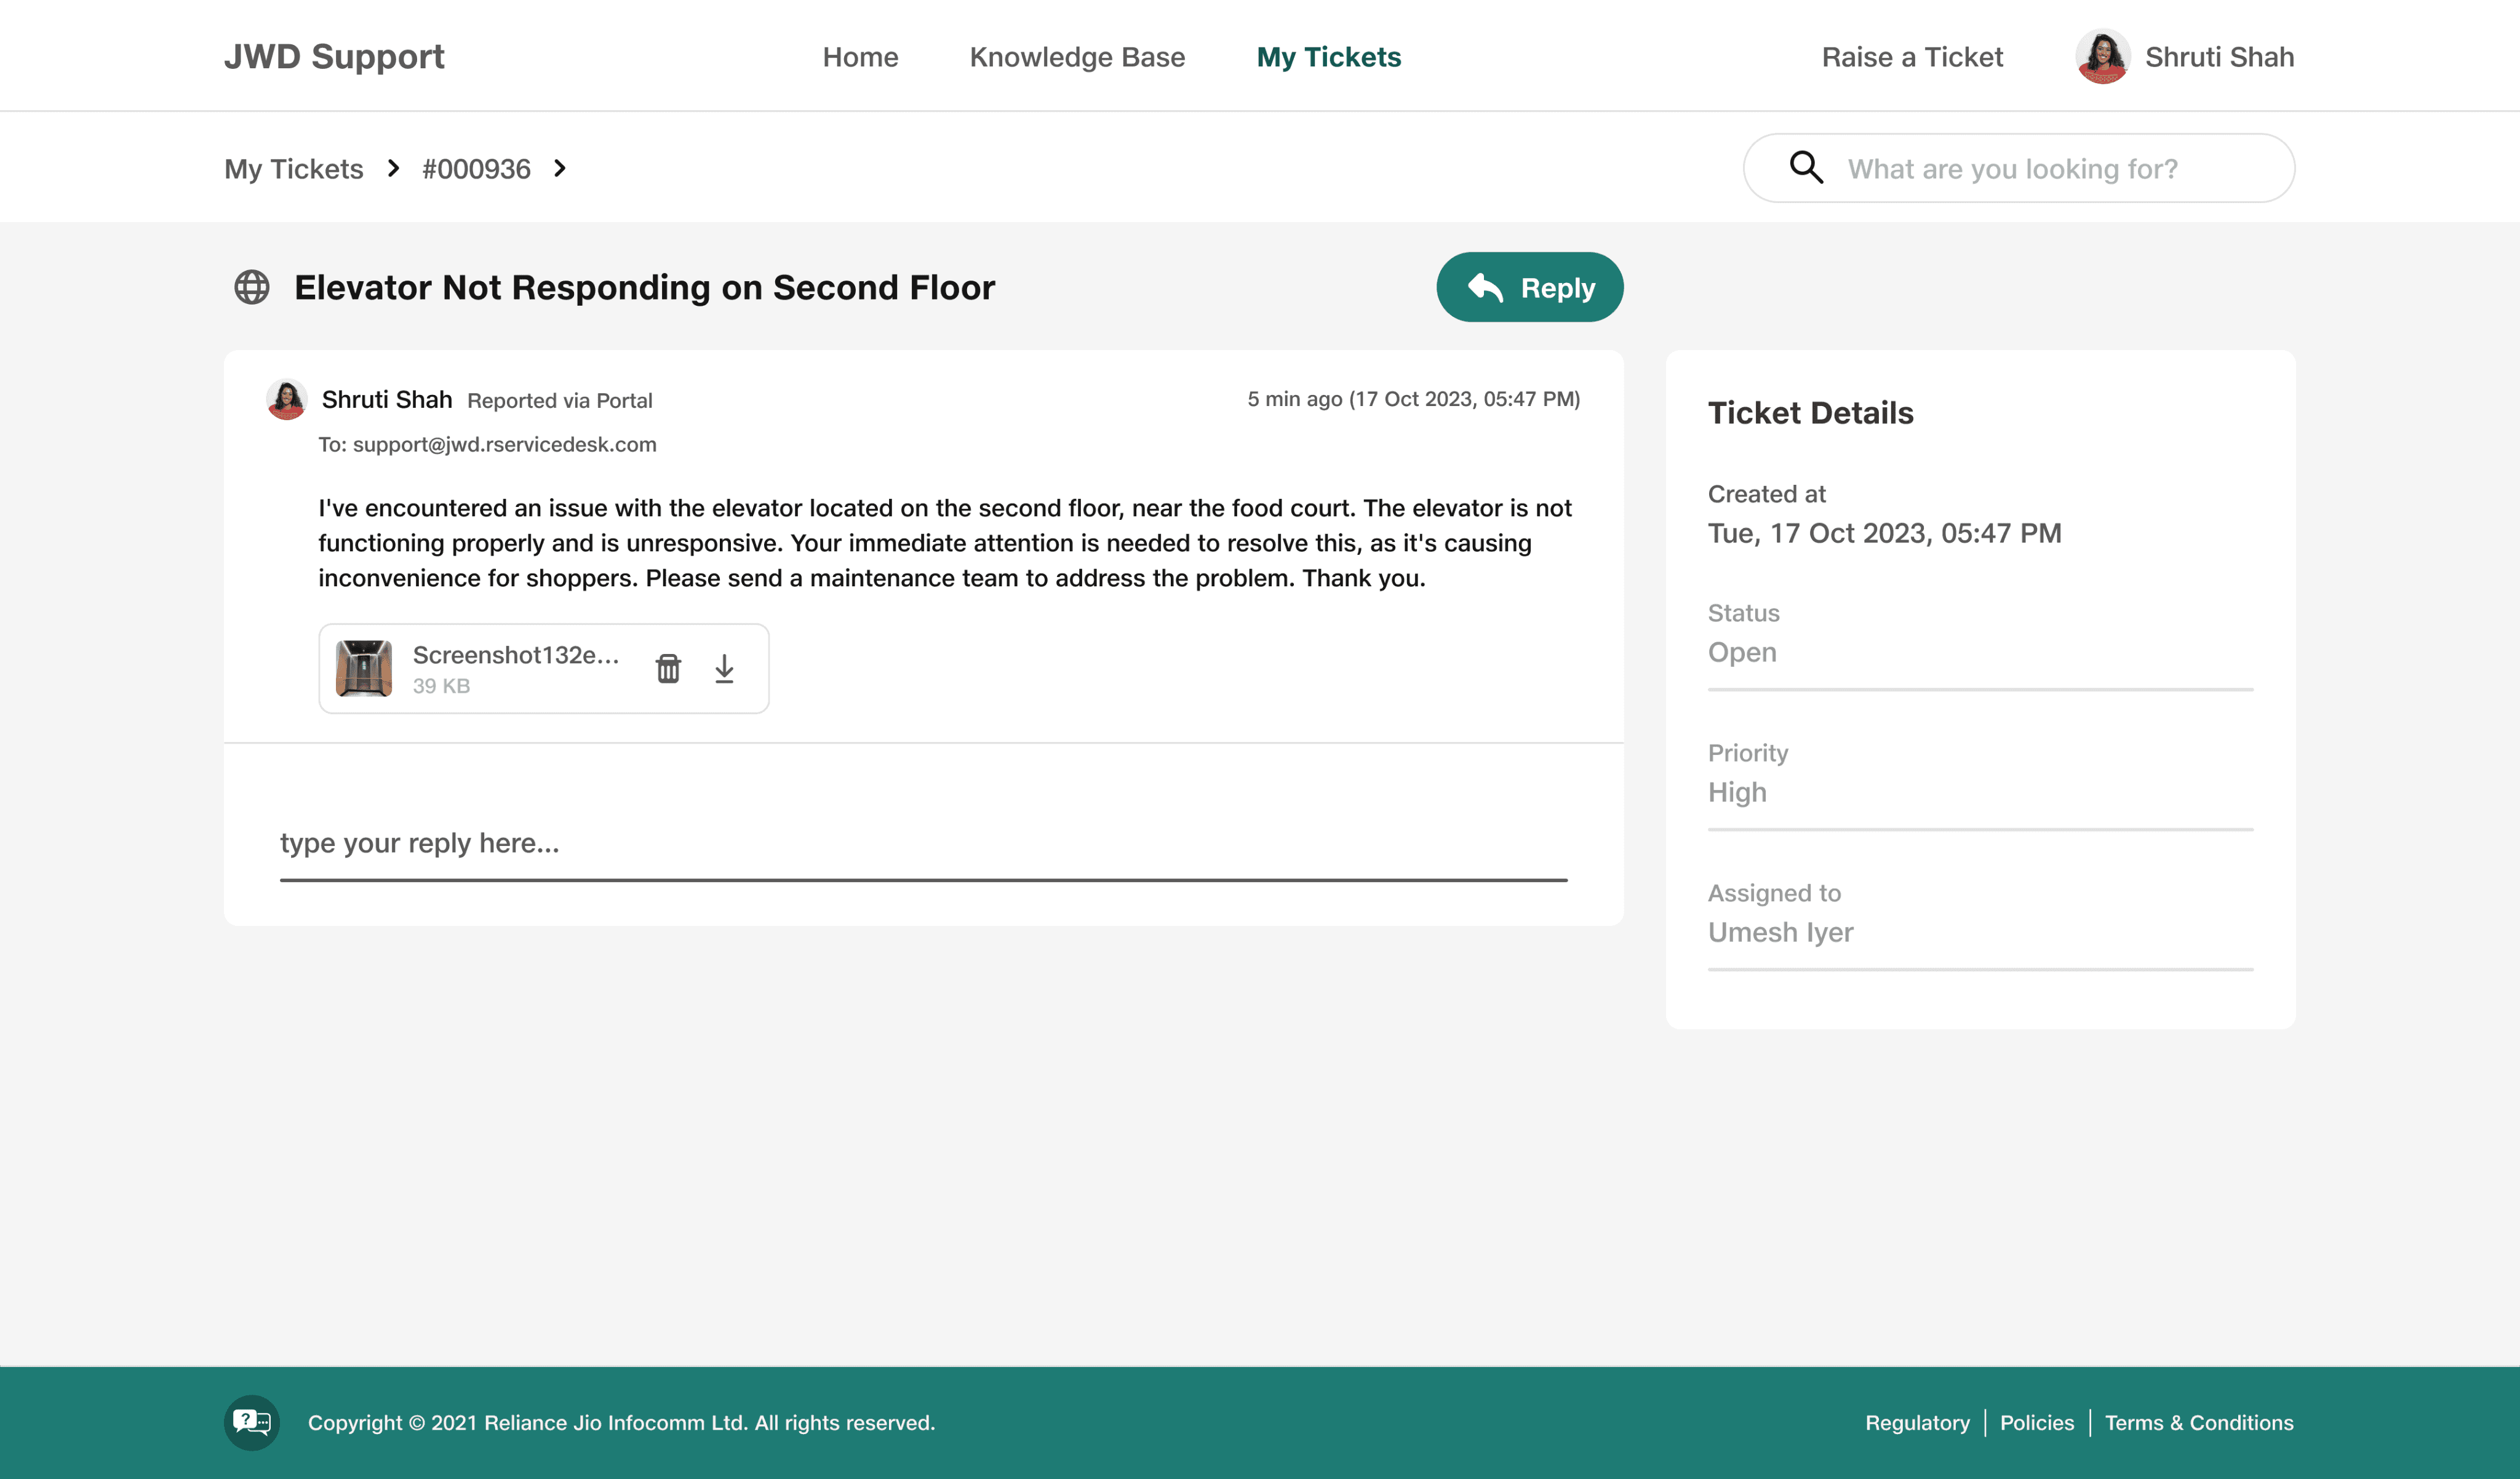
Once the ticket is created, it will be displayed in both RServiceDesk and the Customer Portal.
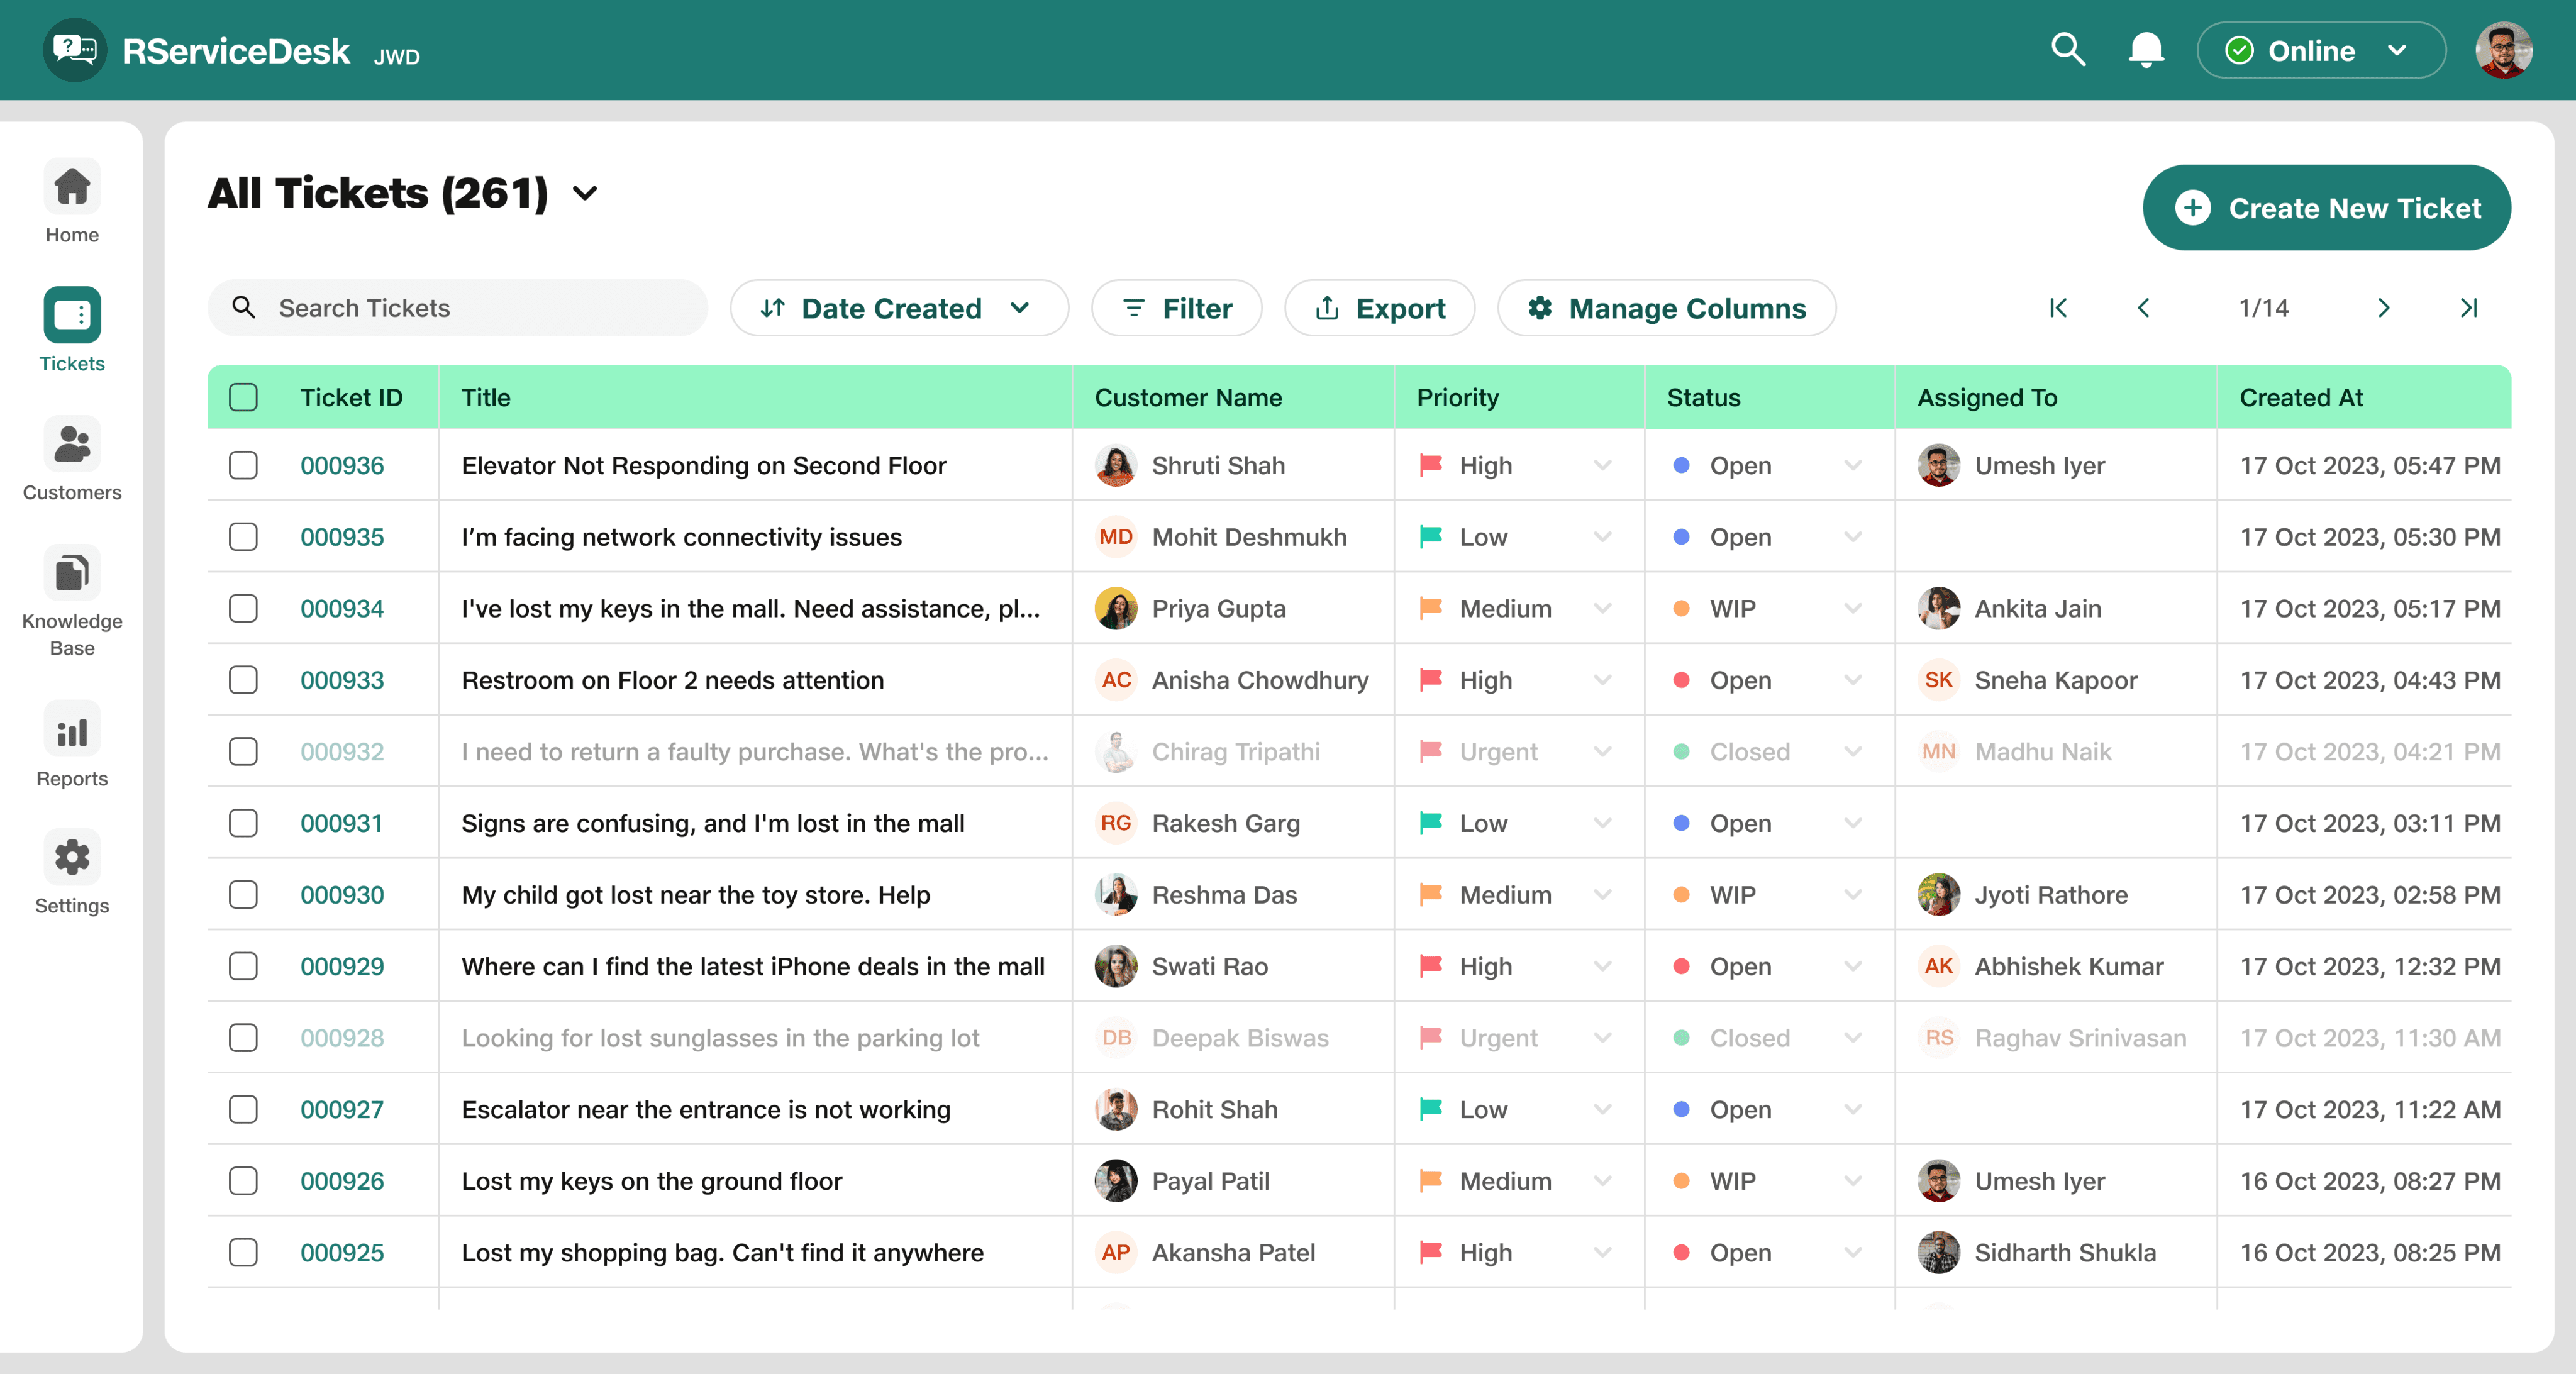
Ticket on RServiceDesk Portal

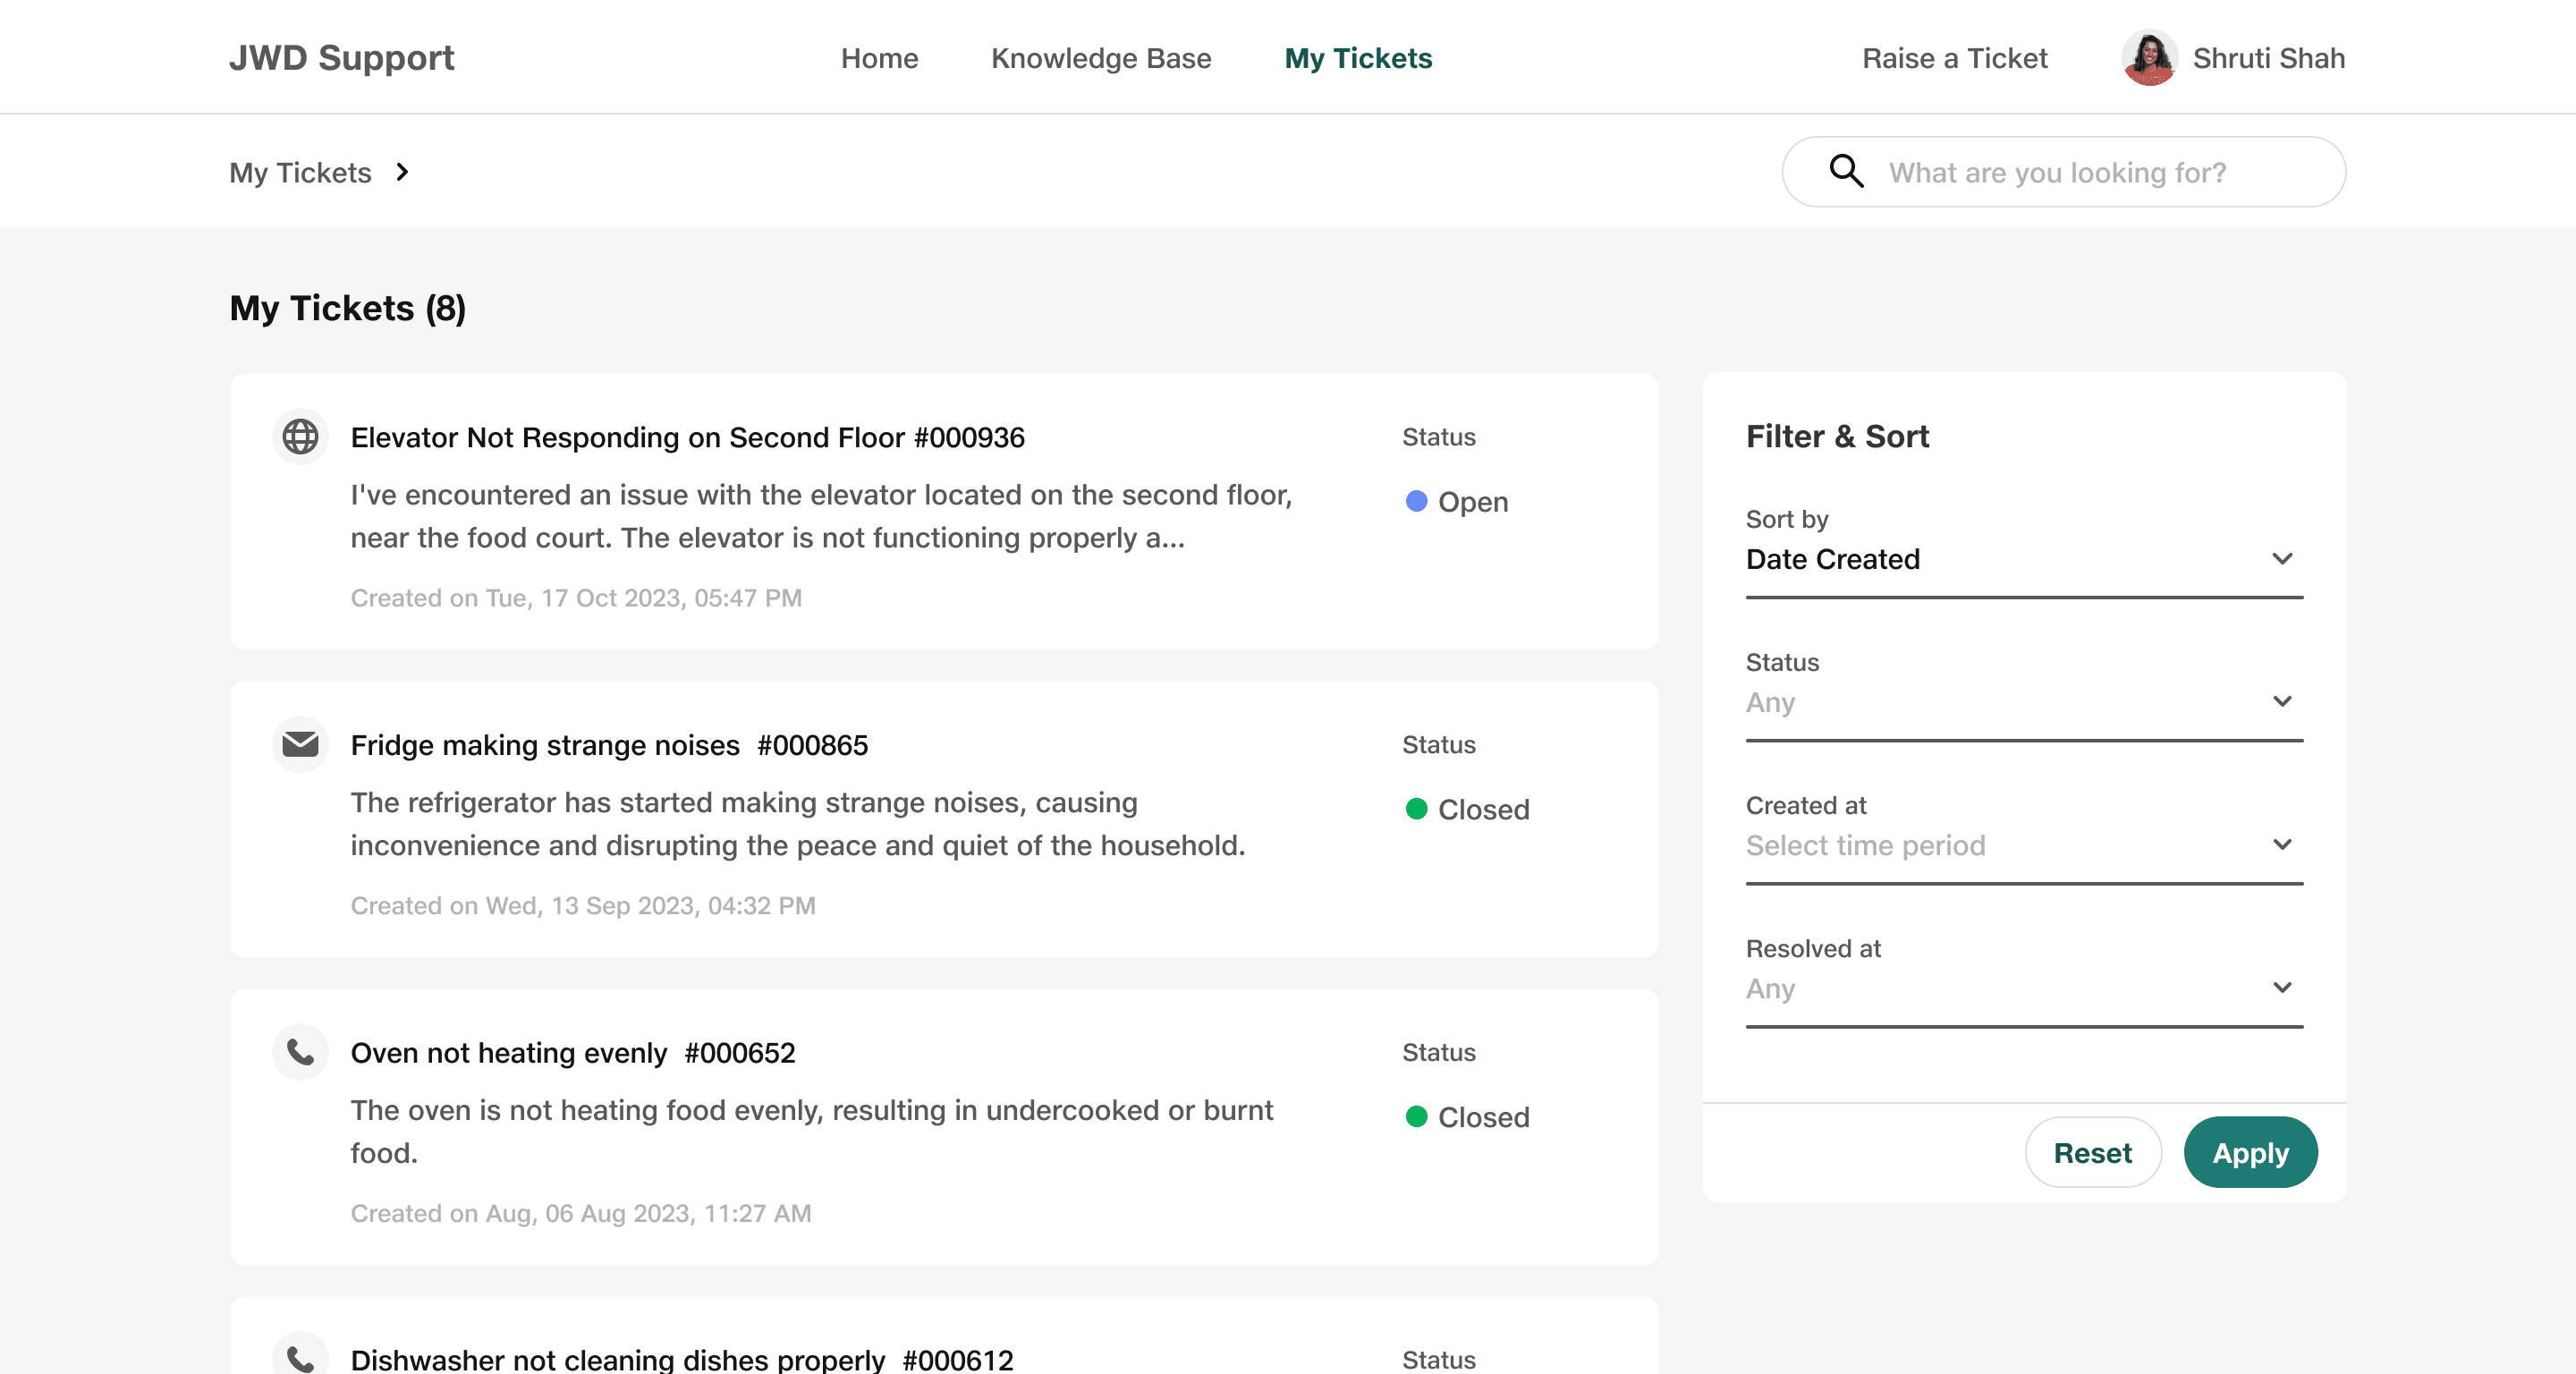
Customer Portal
Ticket on Customer Portal
Above is Customer Portal, Where Shruti can see her latest and previous tickets
Ticket Details Page
Now, we will explore the ticket details page of RServiceDesk, where the agent (Umesh) can reply to the customer, adjust ticket priority, status, and other parameters. Additionally, we will examine the ticket details page of the Customer Portal, where customer (Shruti) can reply to the agent and track her ticket.

Click on the ticket ID to see the ticket details
Ticket Details Page - RServiceDesk Portal
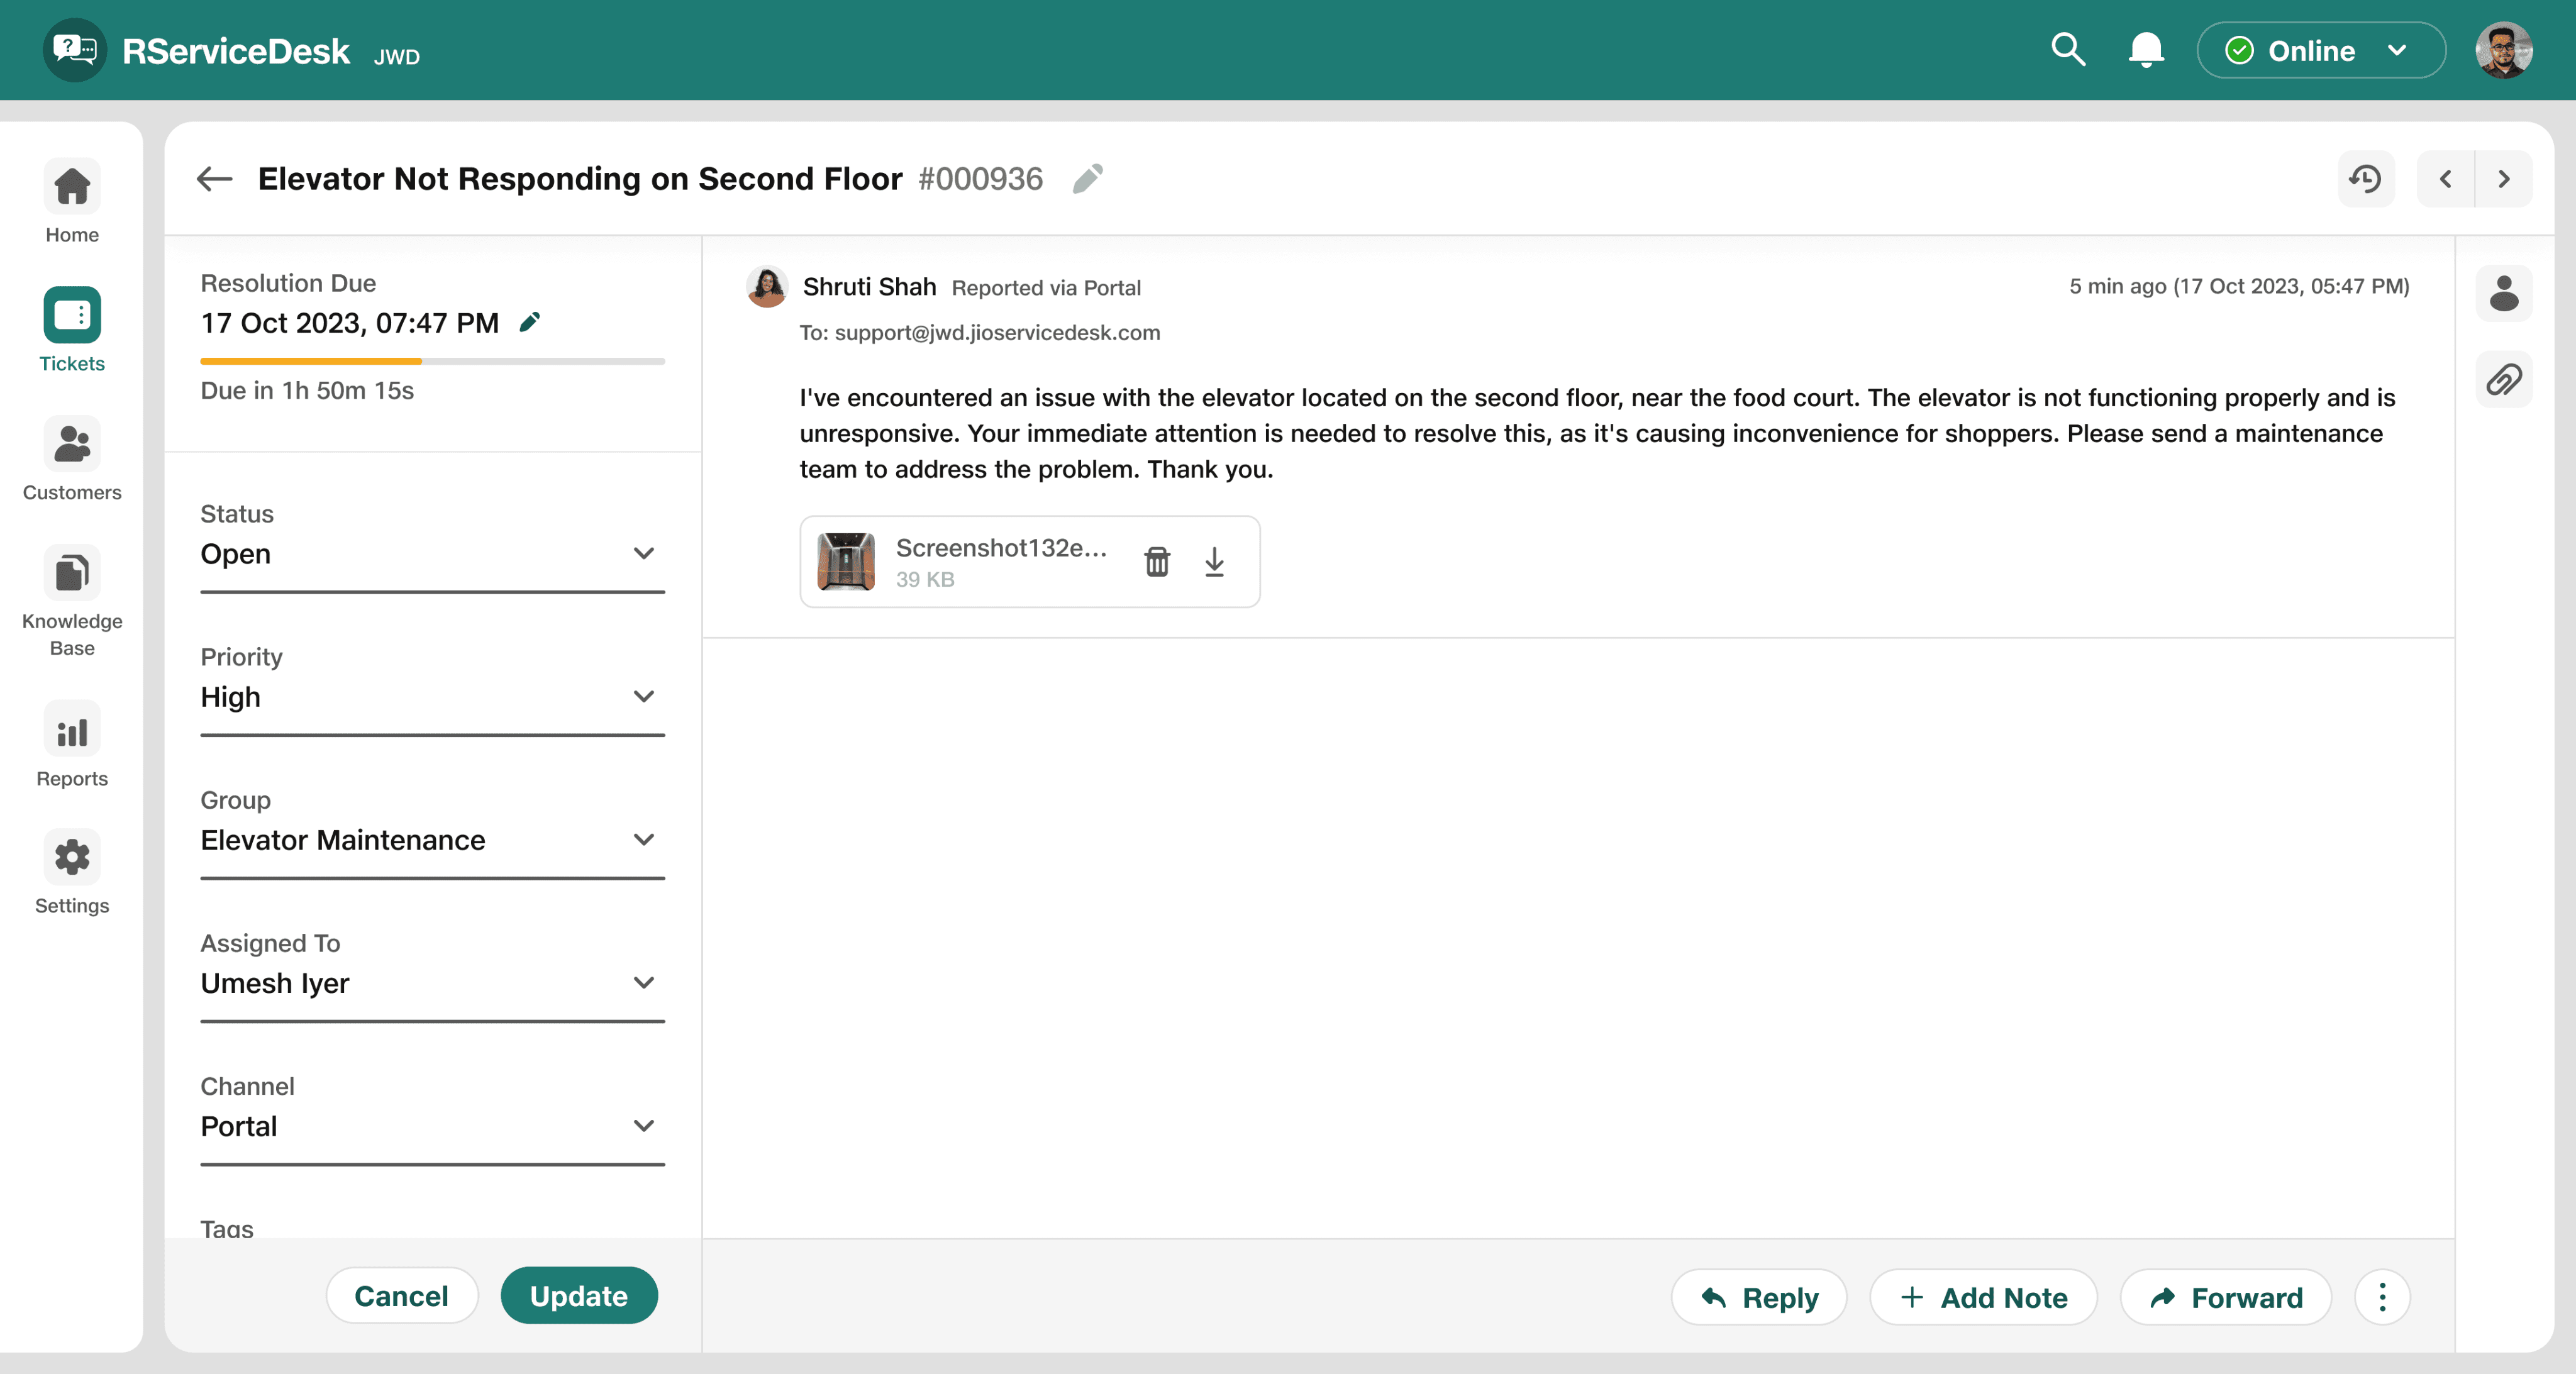

Shruti’s message
Ticket has been assigned
to group
Ticket has been assigned
to agent within that group
Reply, Forward Ticket.
Private note can be added for another agent, Note won’t be visible to customer

Click on the card to see the ticket details
Customer Portal
Ticket Details Page - Customer Portal
Notification on RServiceDesk Portal
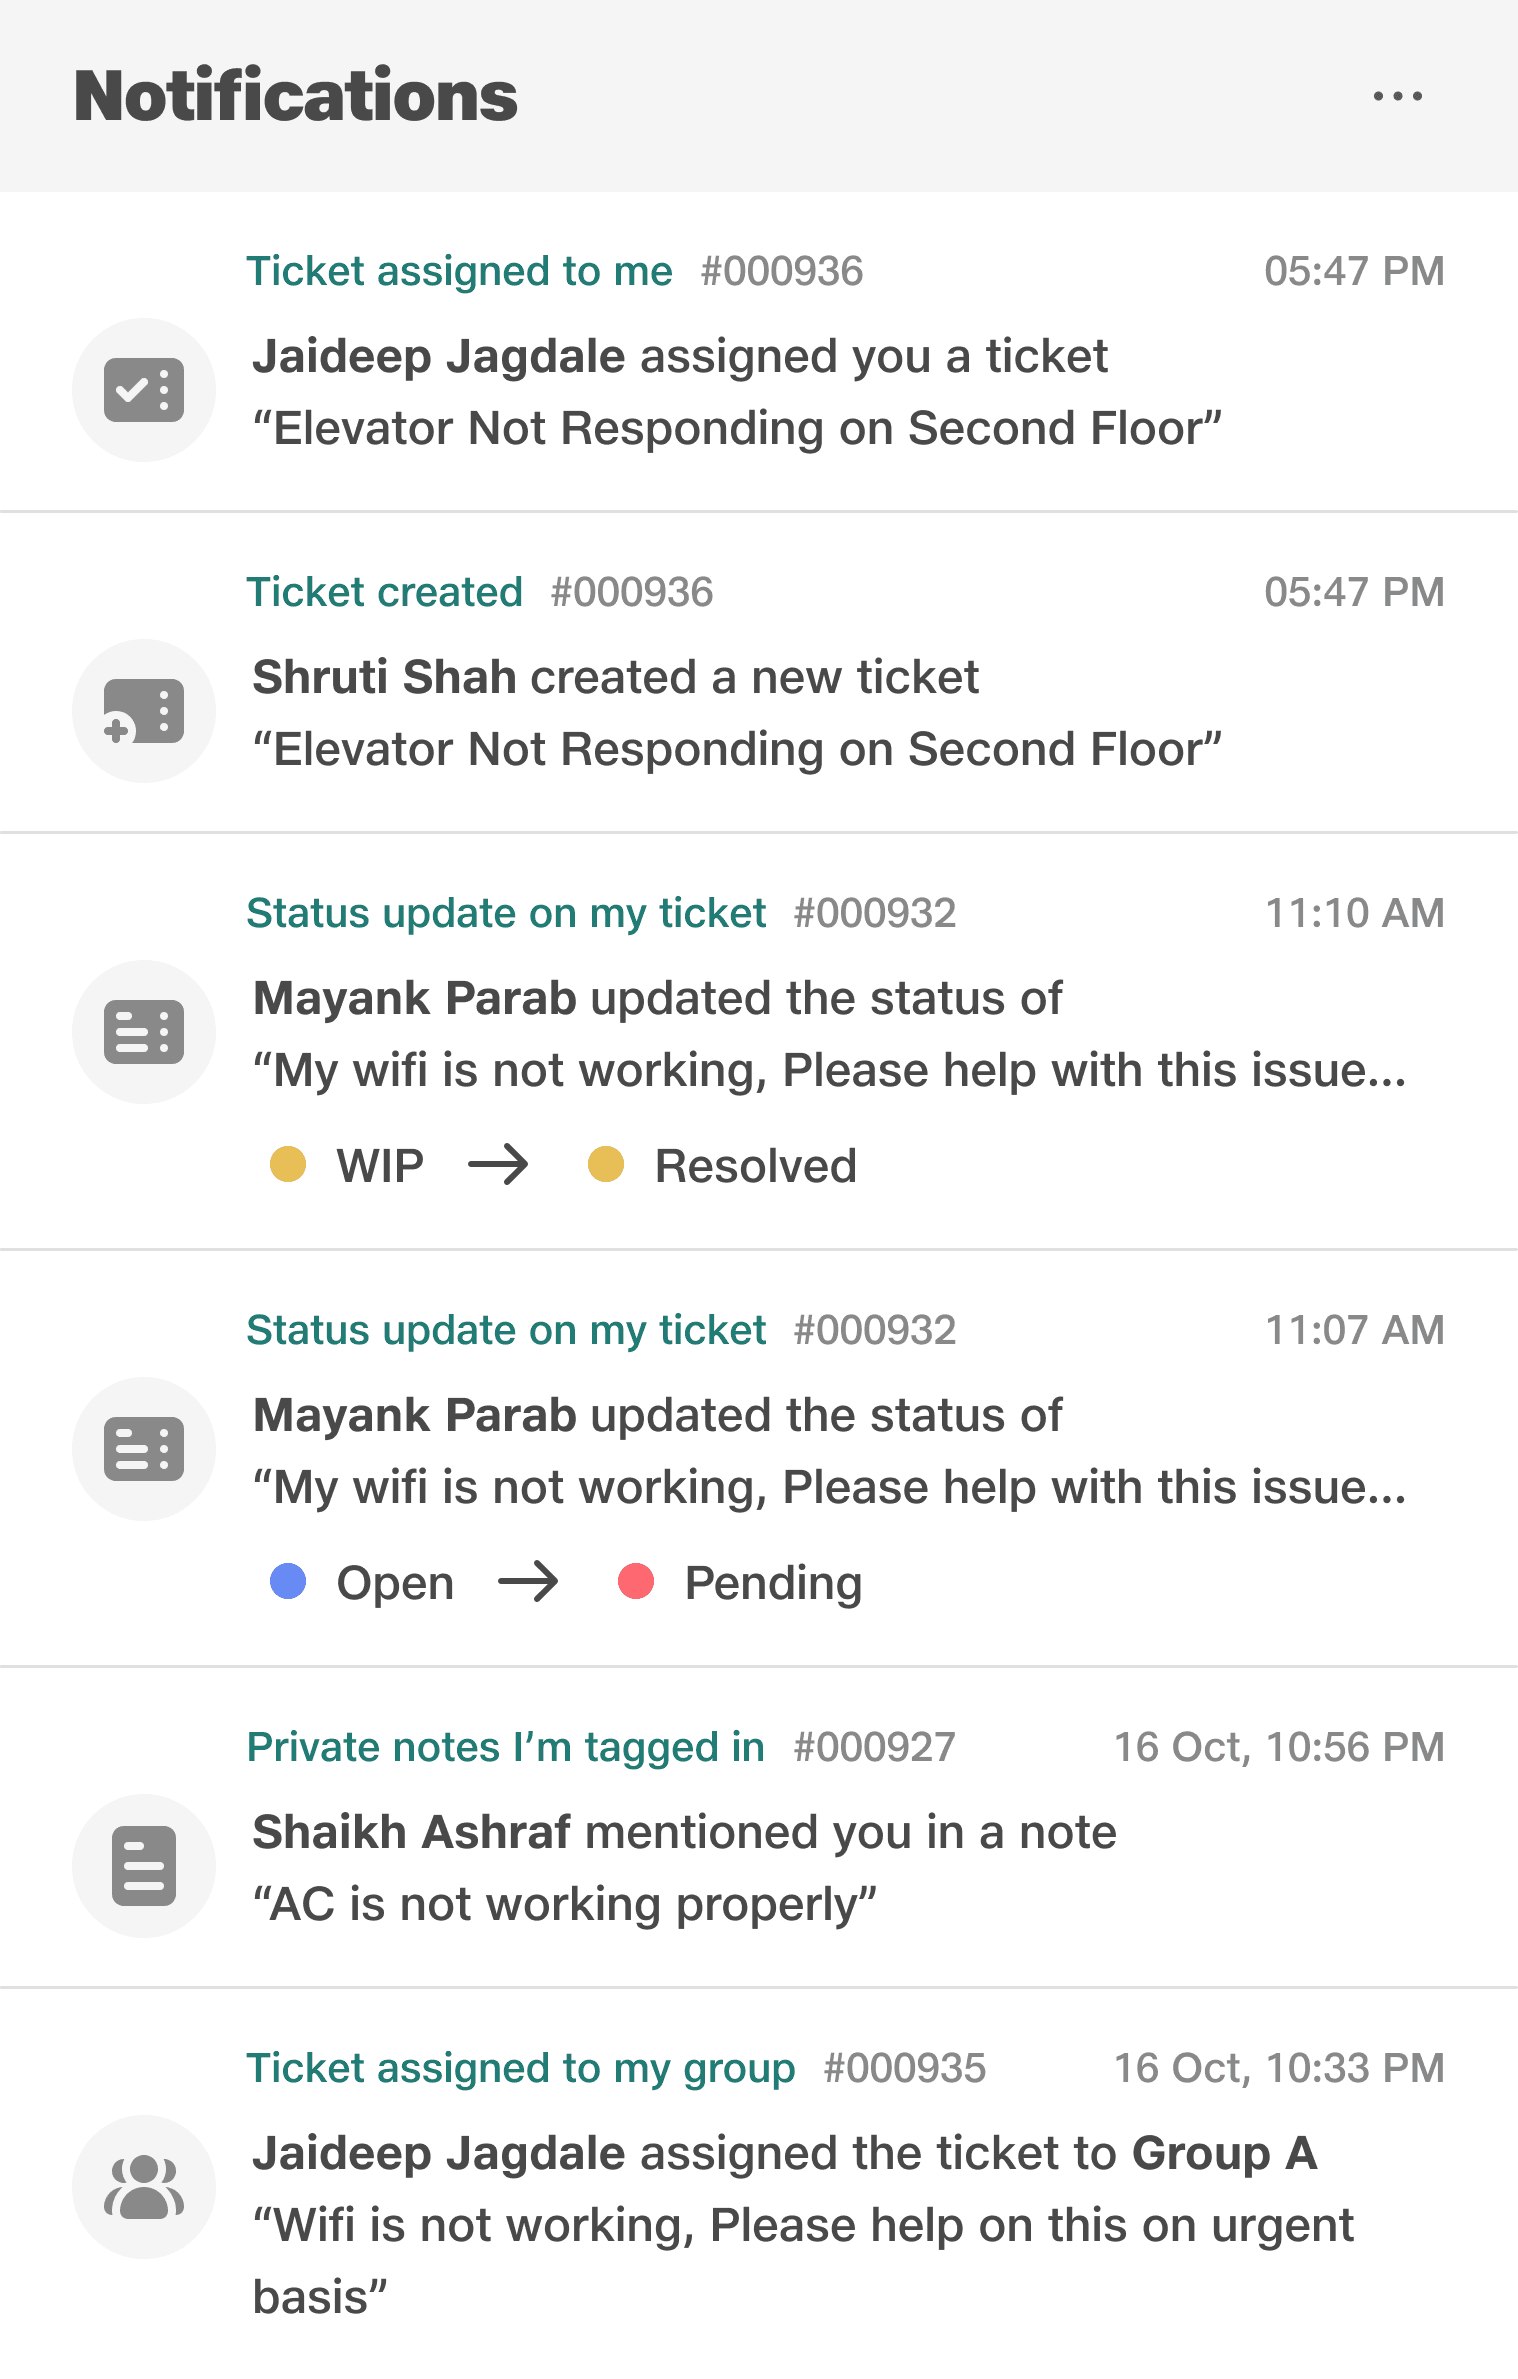
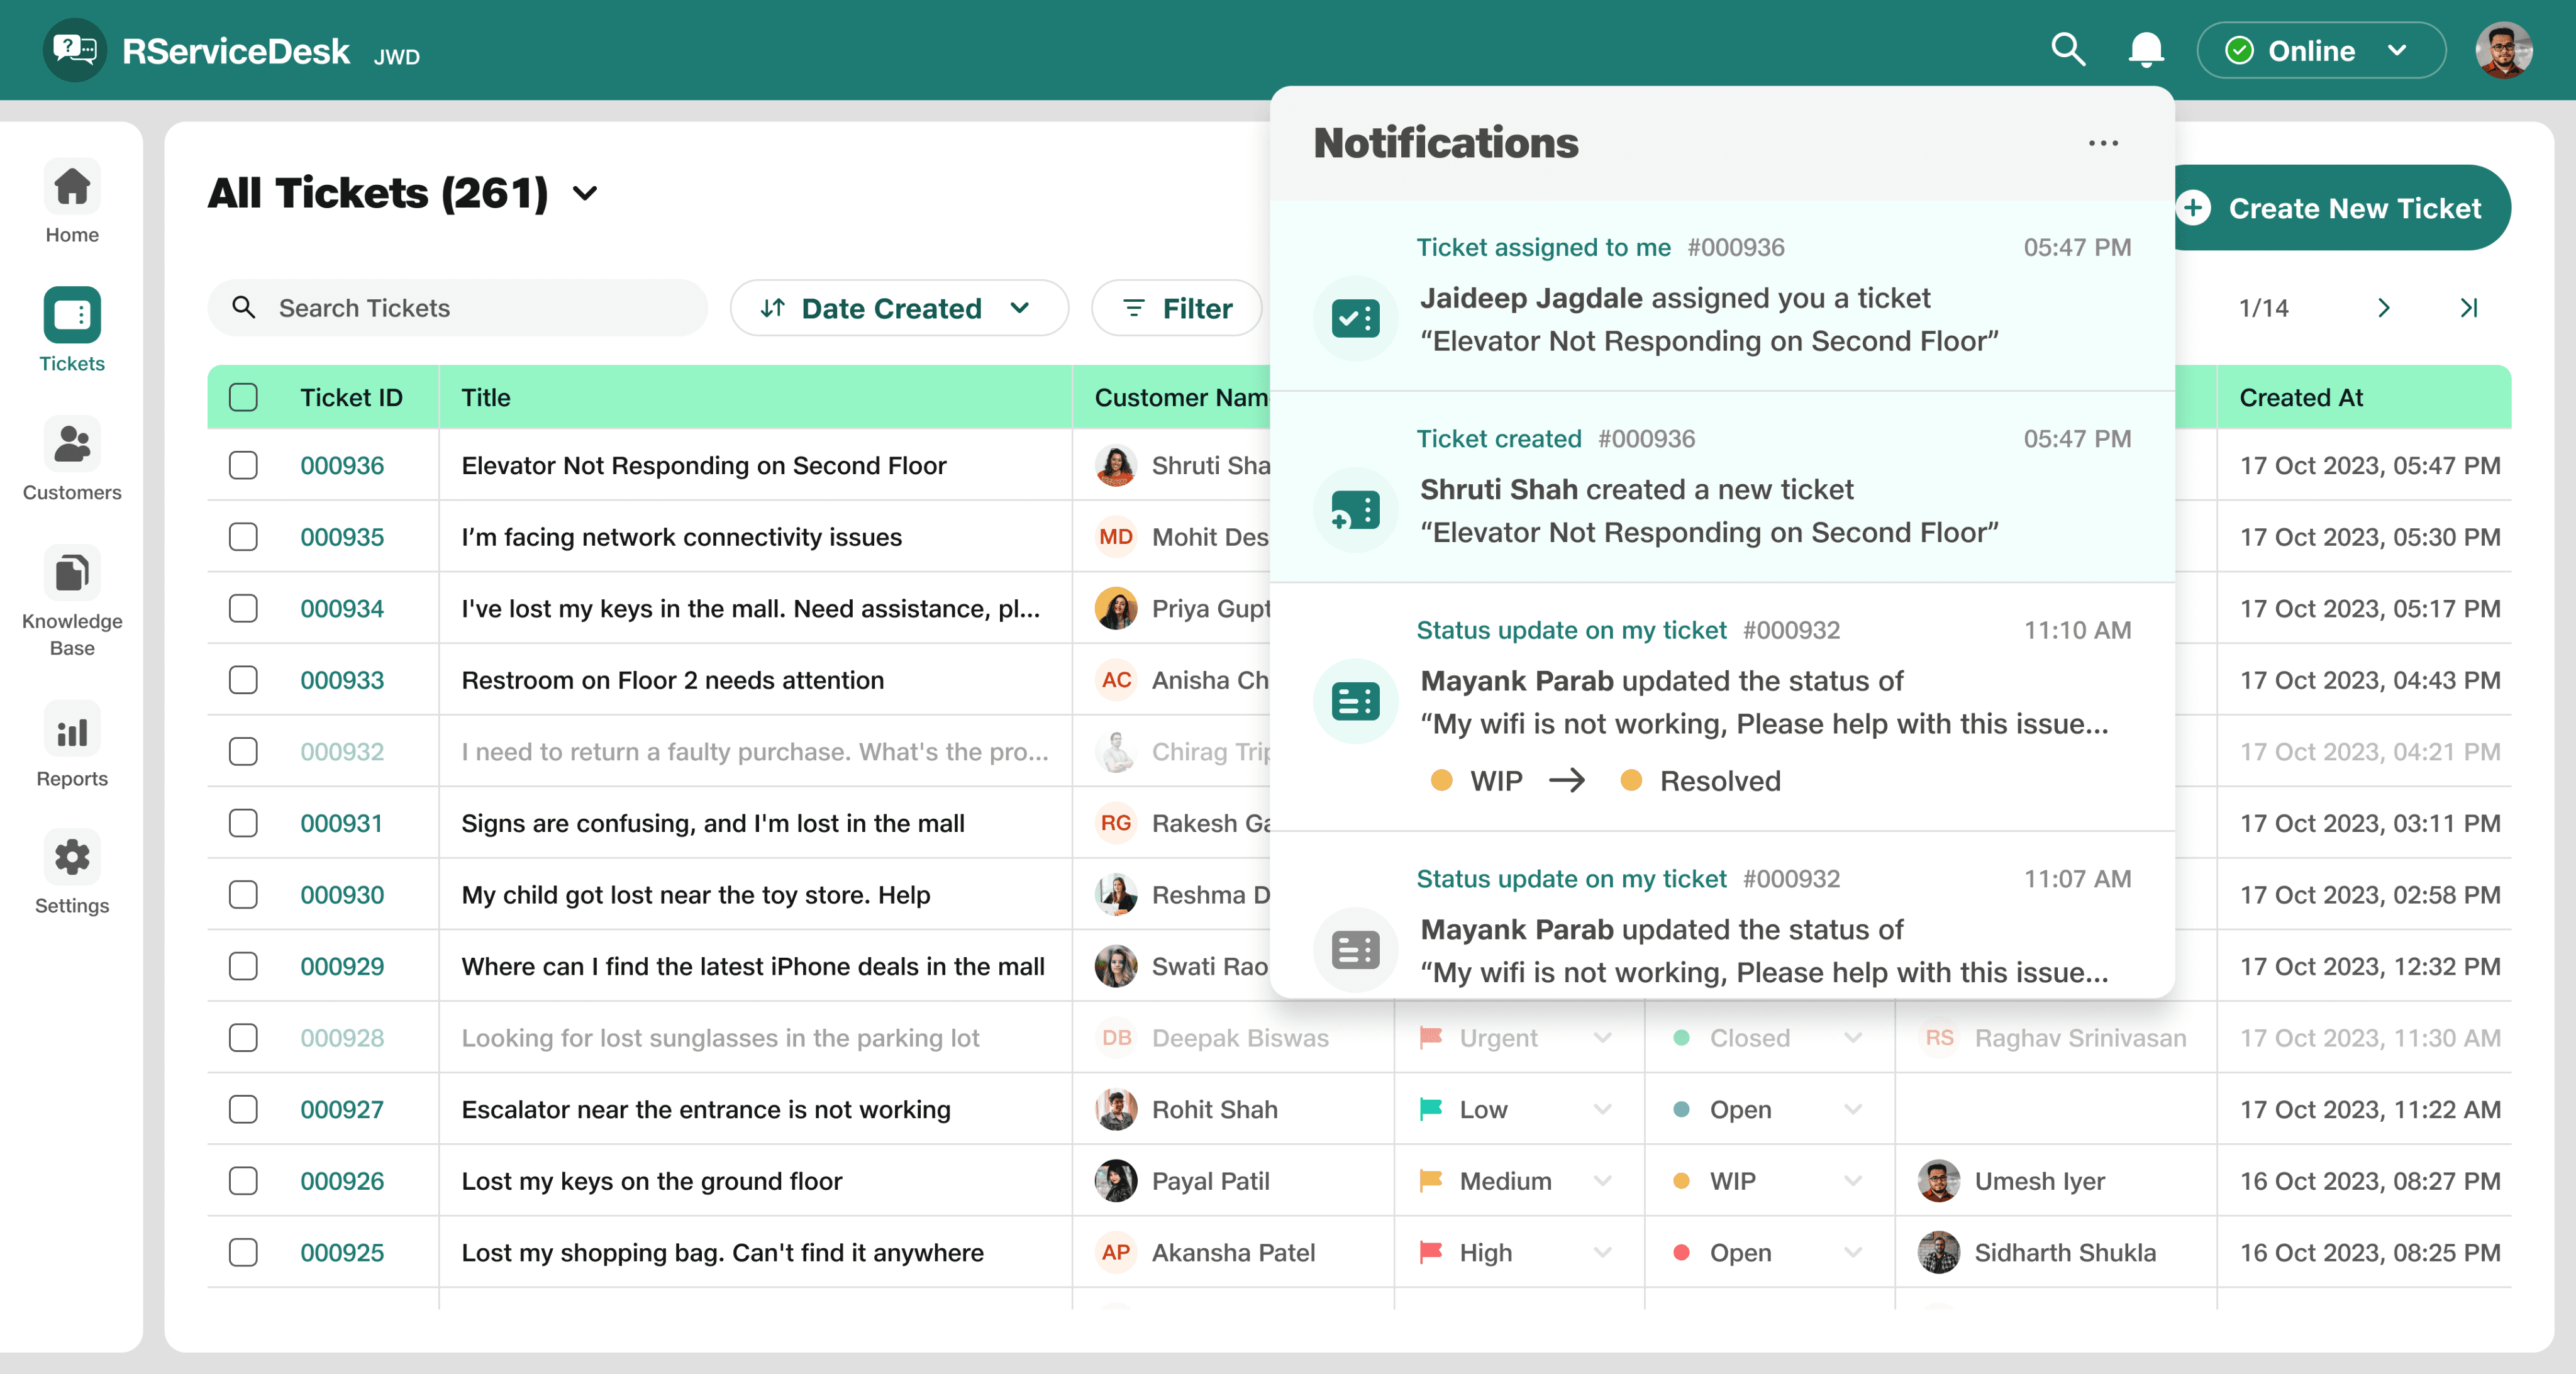
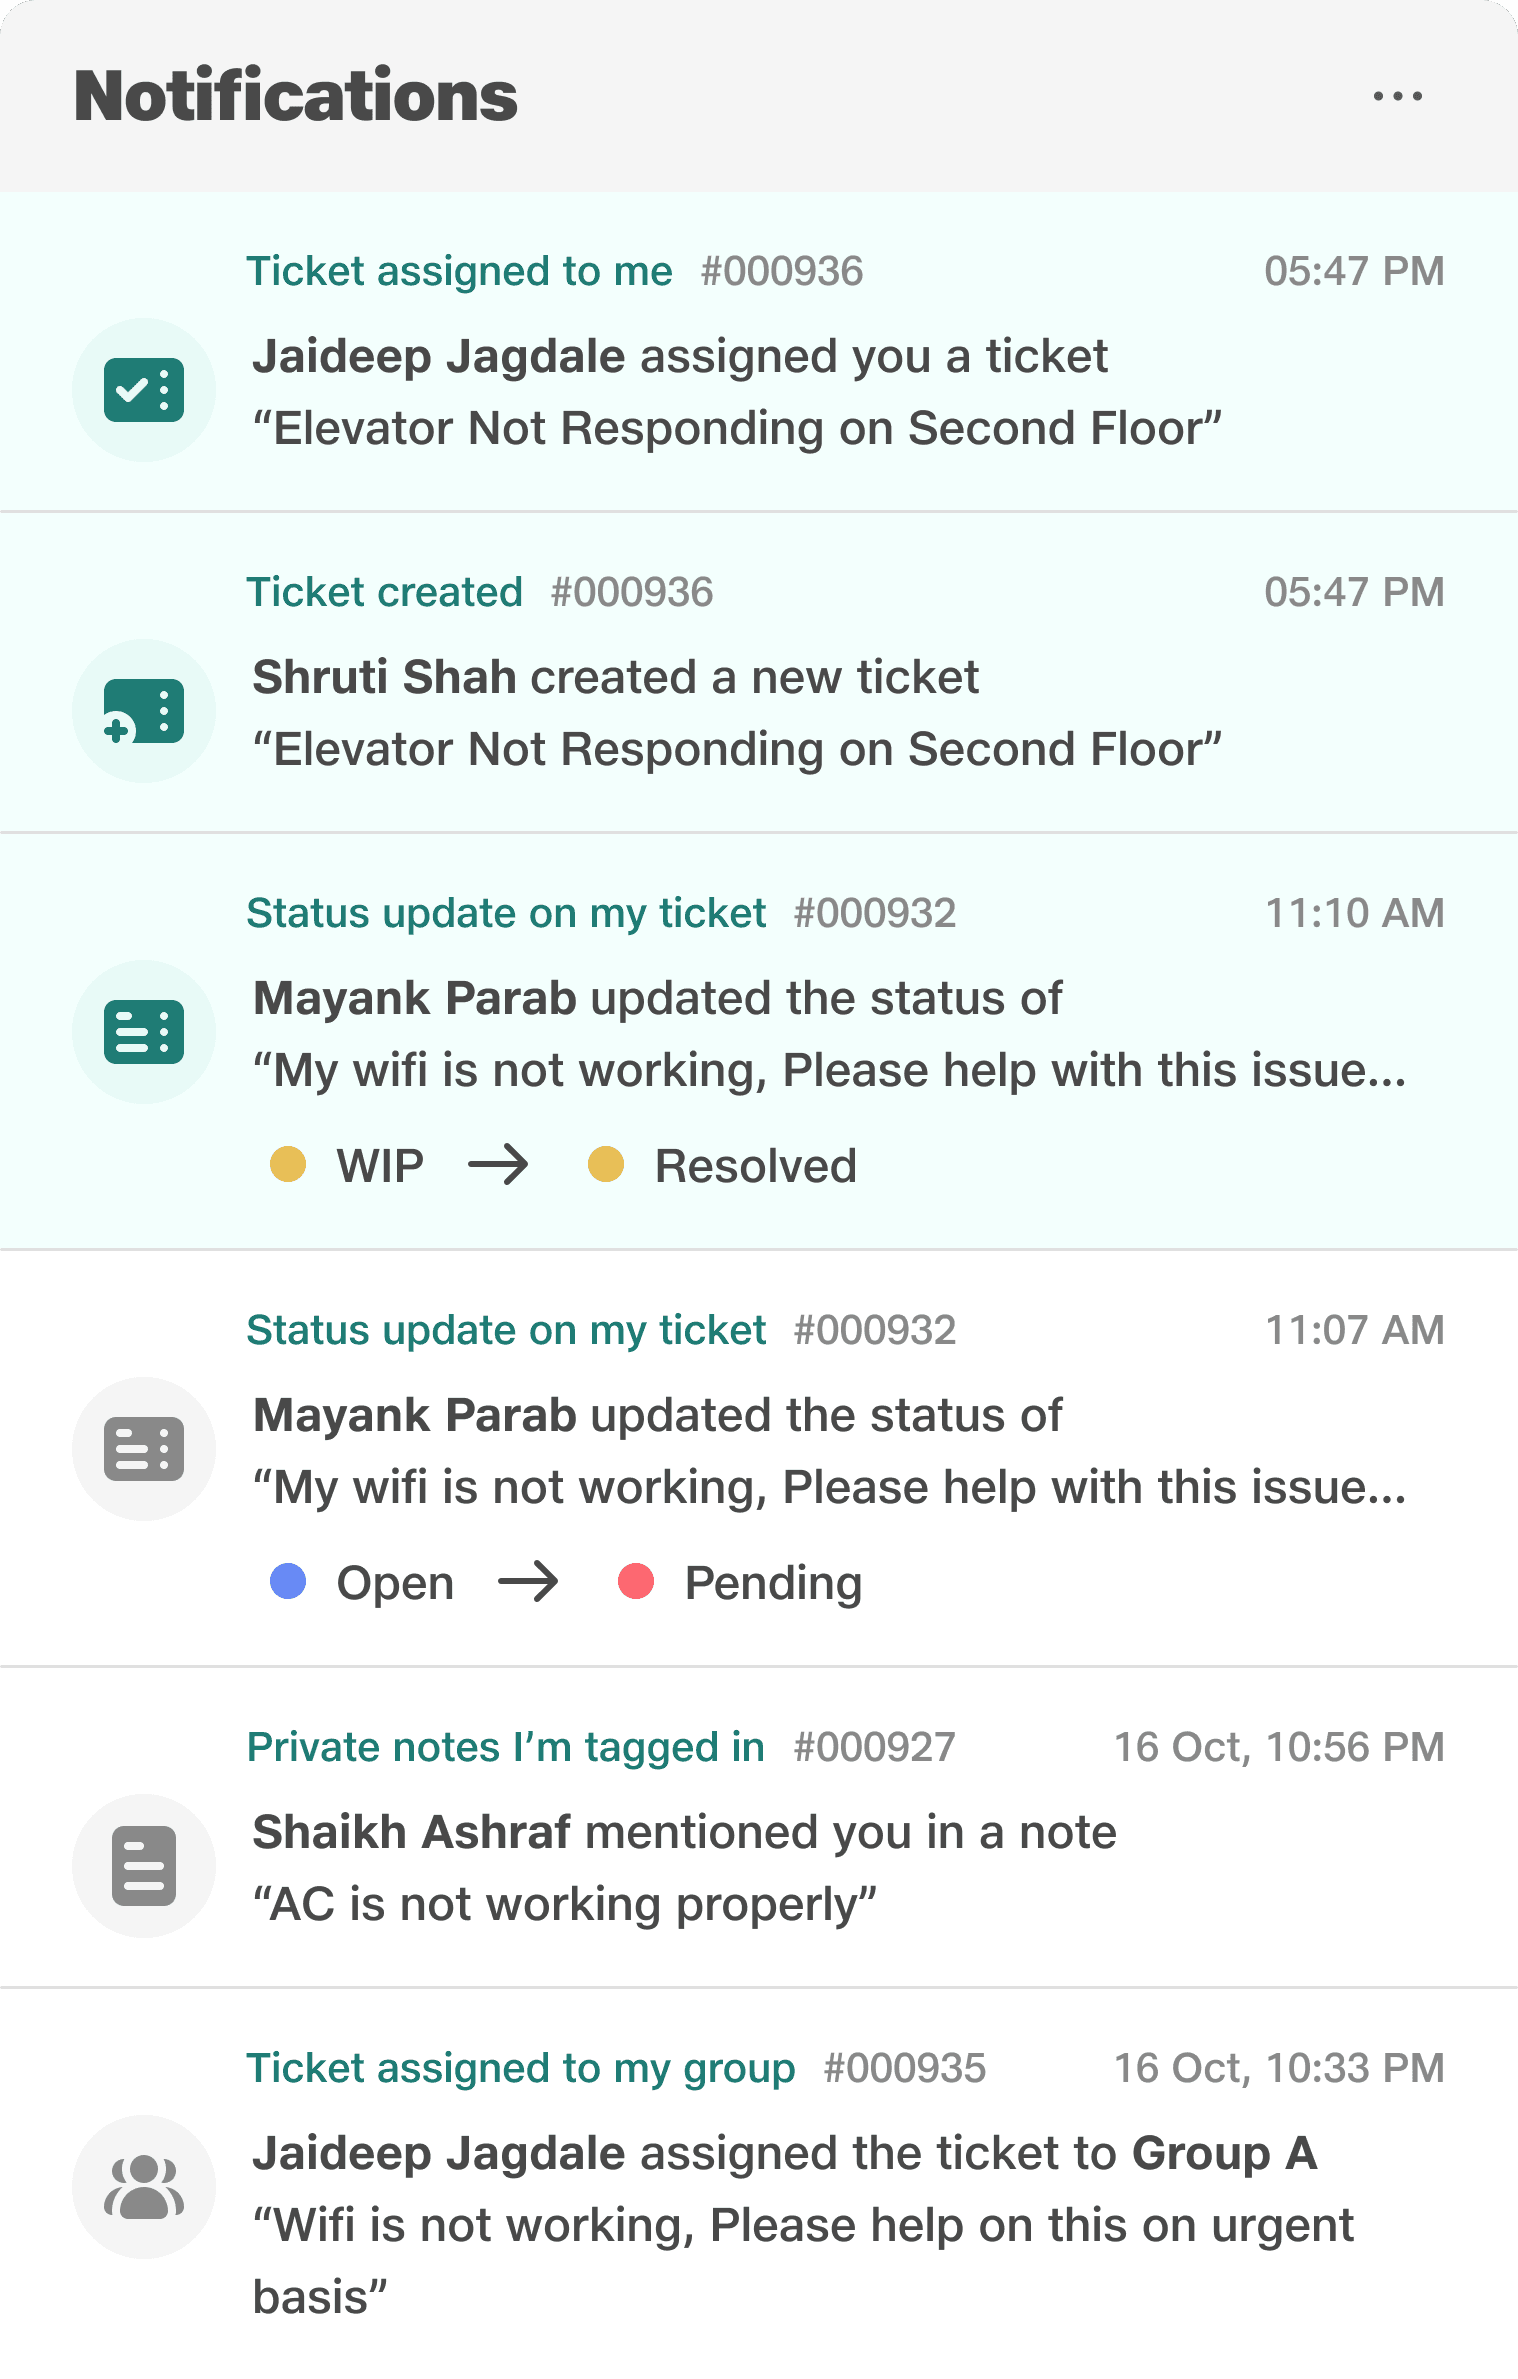
Now we will see how agent (Umesh) will receive notification if he got assigned any ticket
Notifications

1
If, Shruti emailed the issue hence ticket created by her
2
That ticket assigned to Umesh by another agent/admin Jaideep
Notification panel with settings
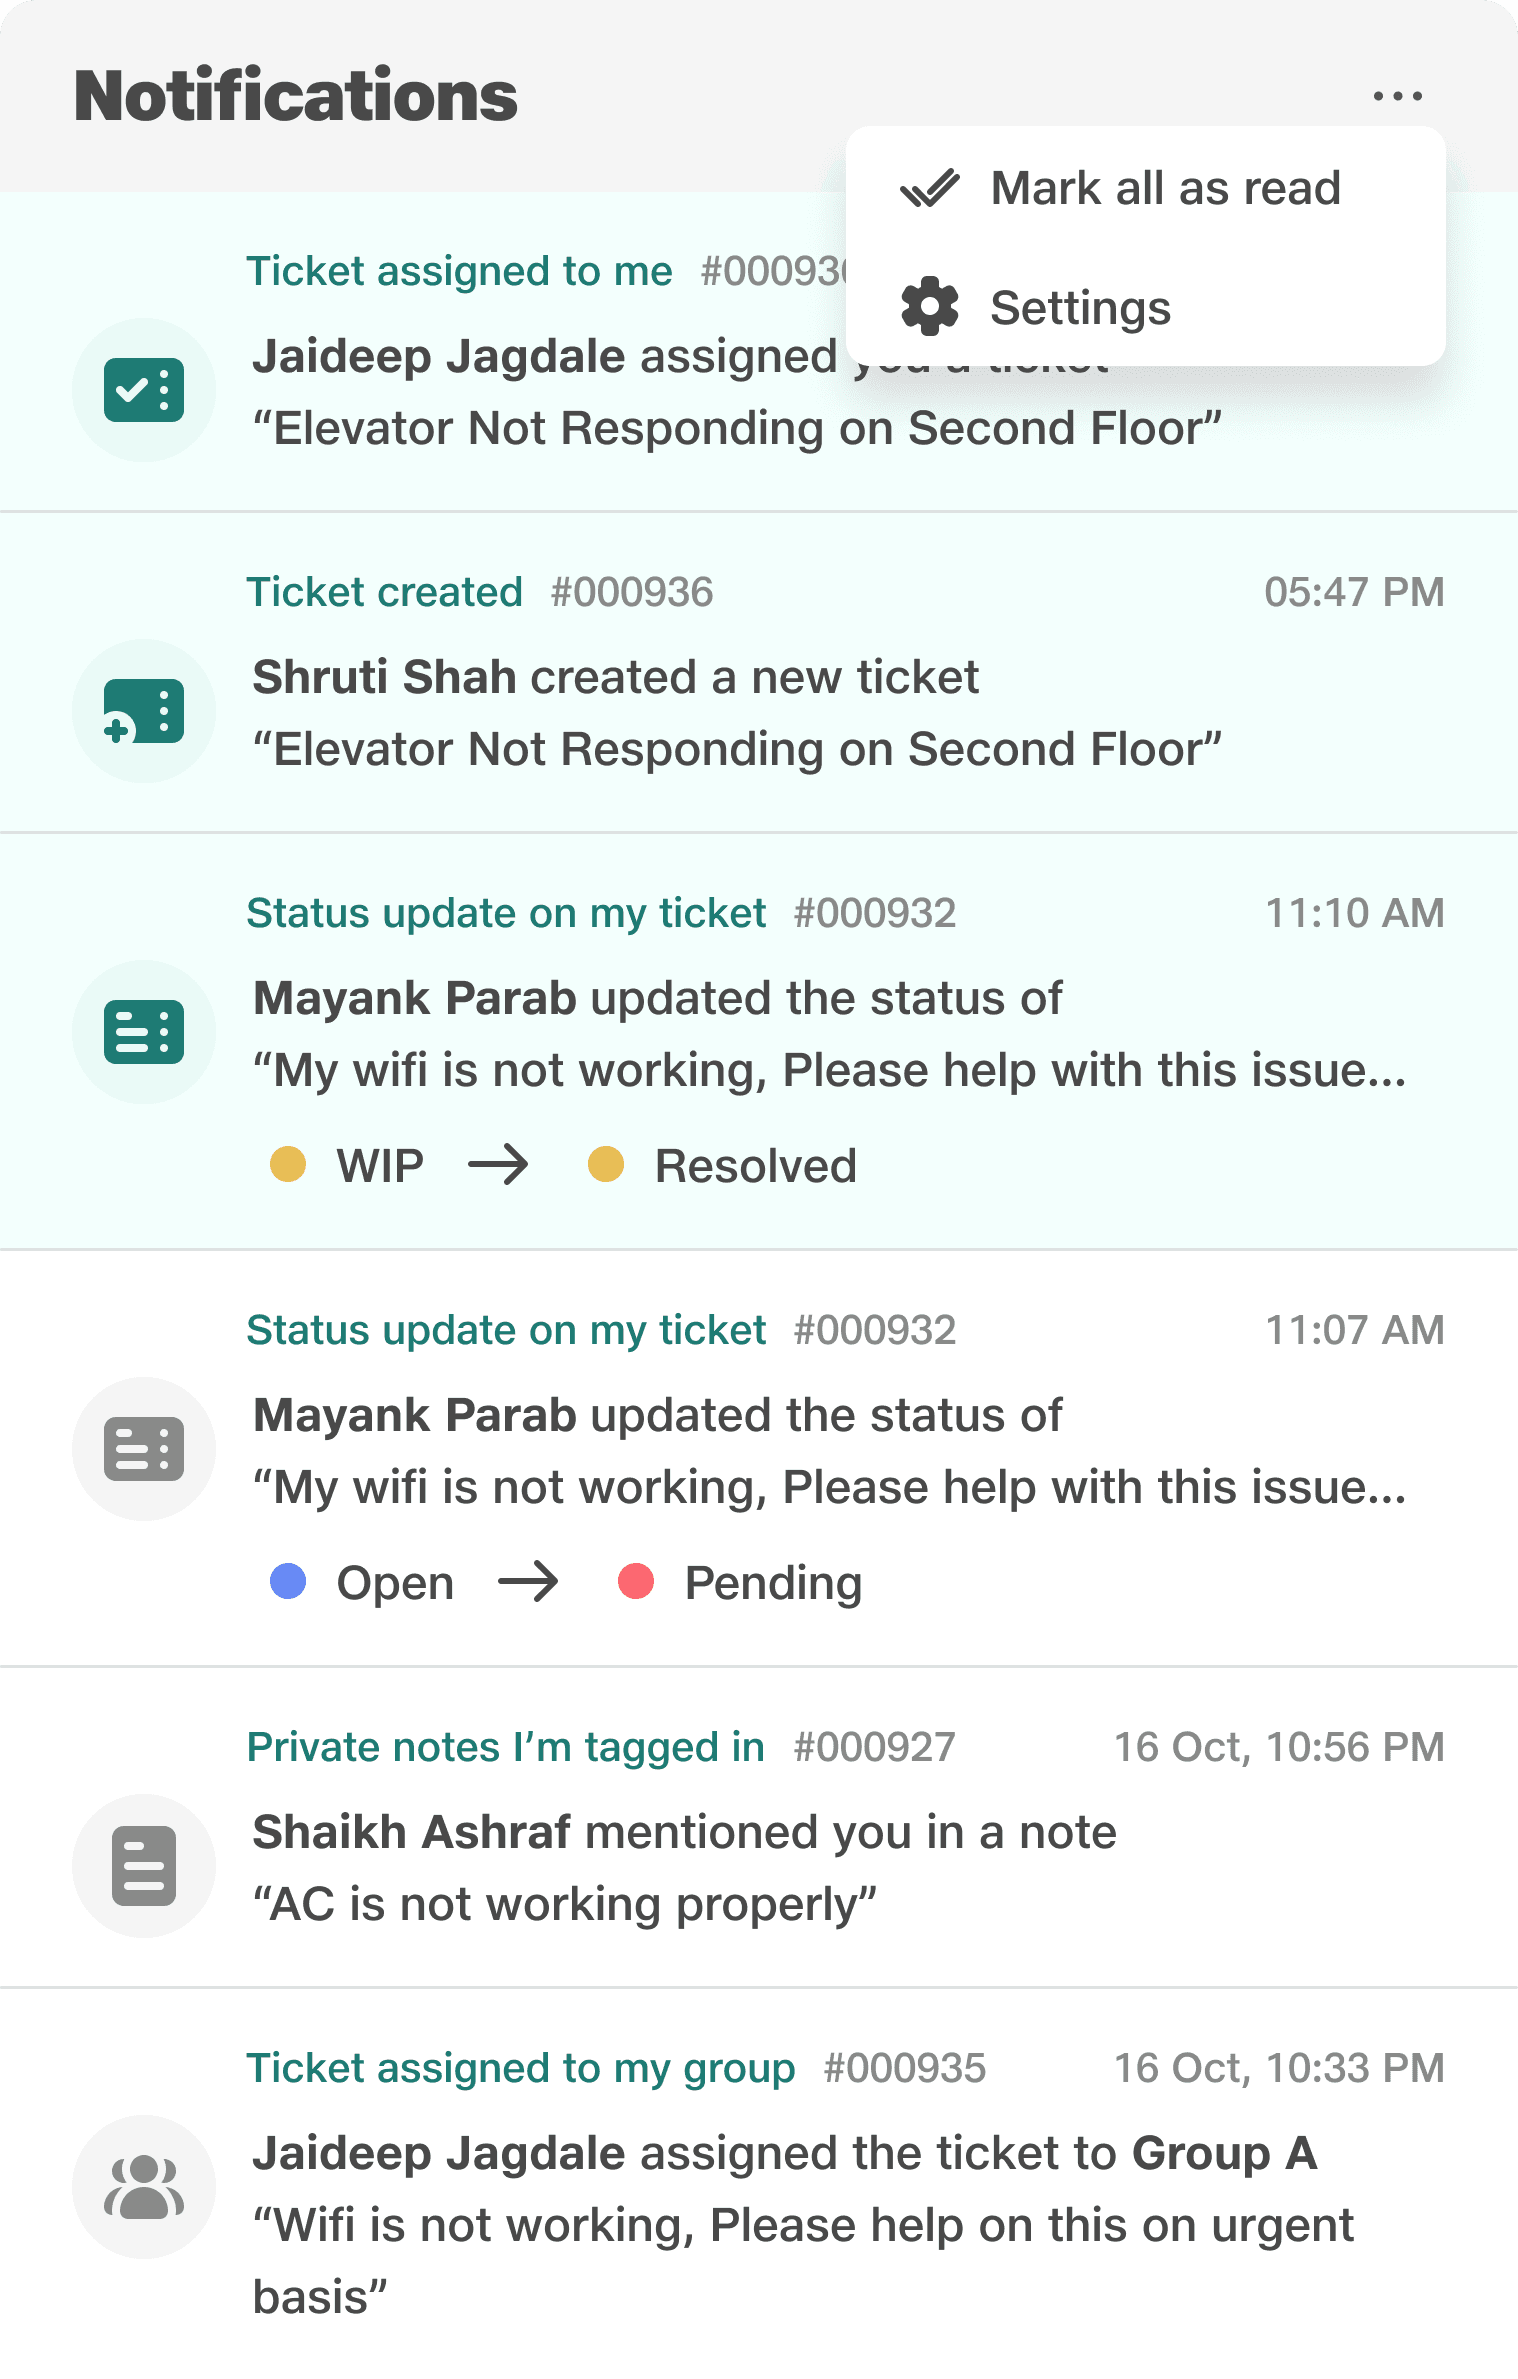
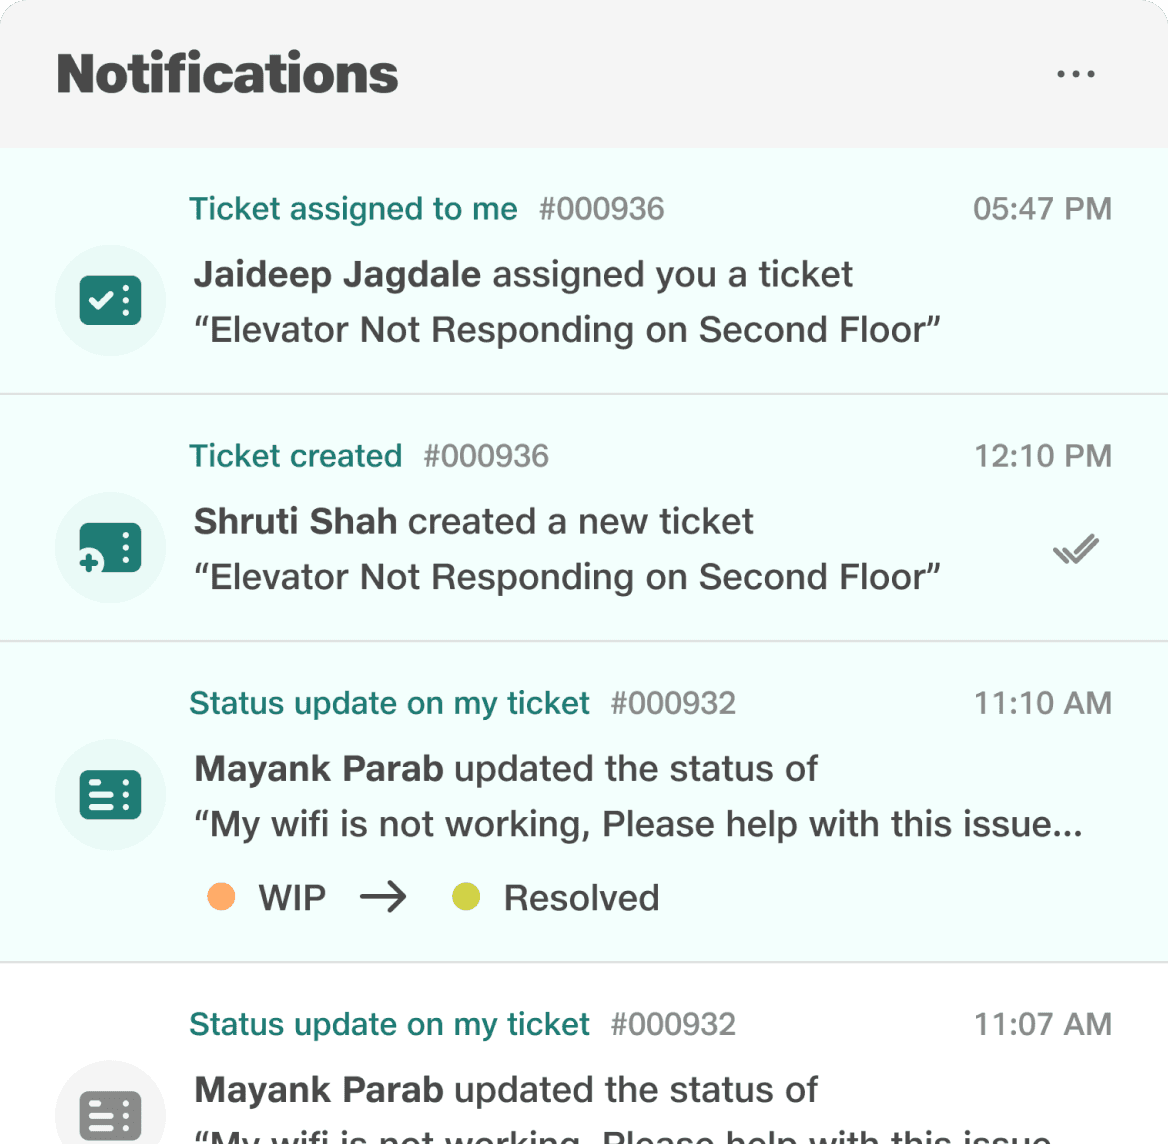
To mark an individual notification as read, simply click on the read icon that appears when you hover over it.
Notification panel
Mark all as read and Settings
Option’s in meatball menu
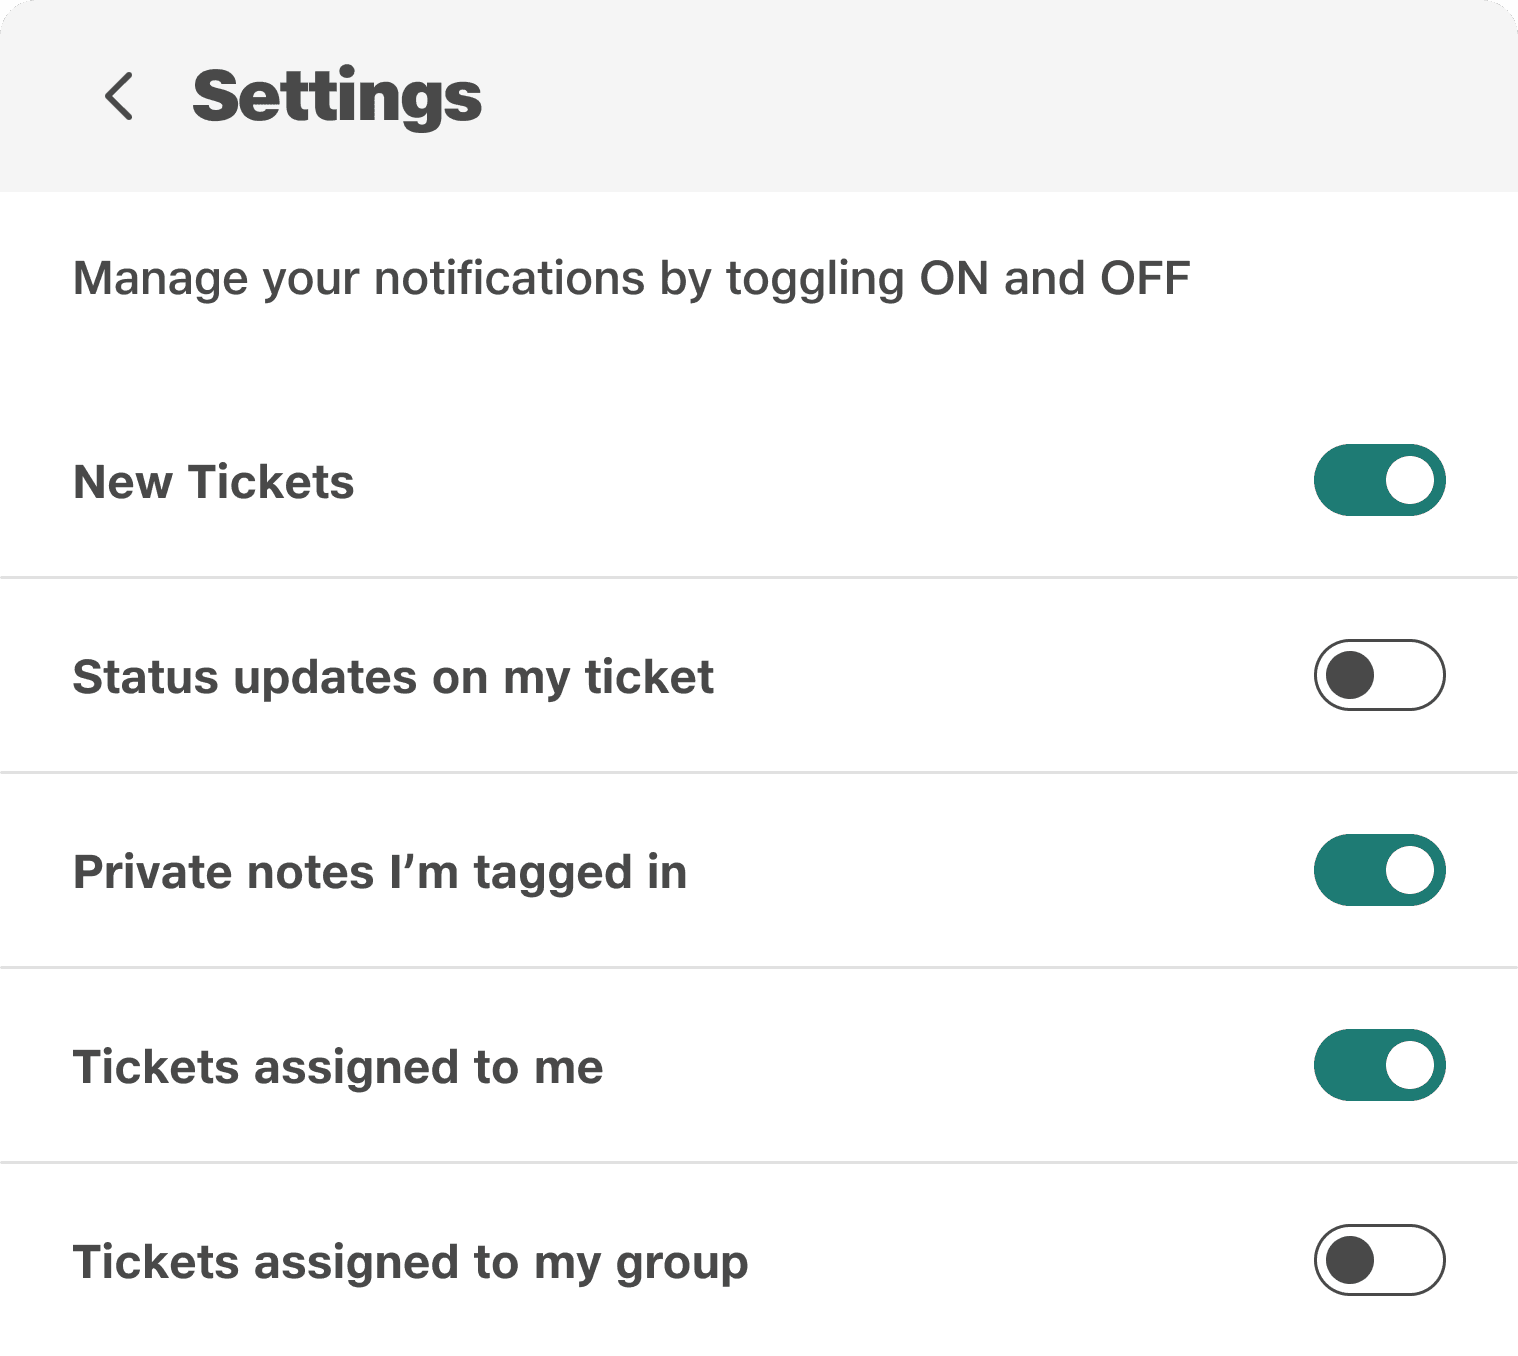
Notification settings allow agents to customize their notifications.
Useful cards in ticket page and how its helping agent
Now we will explore different cards on ticket table and how it might help to agent (Umesh)
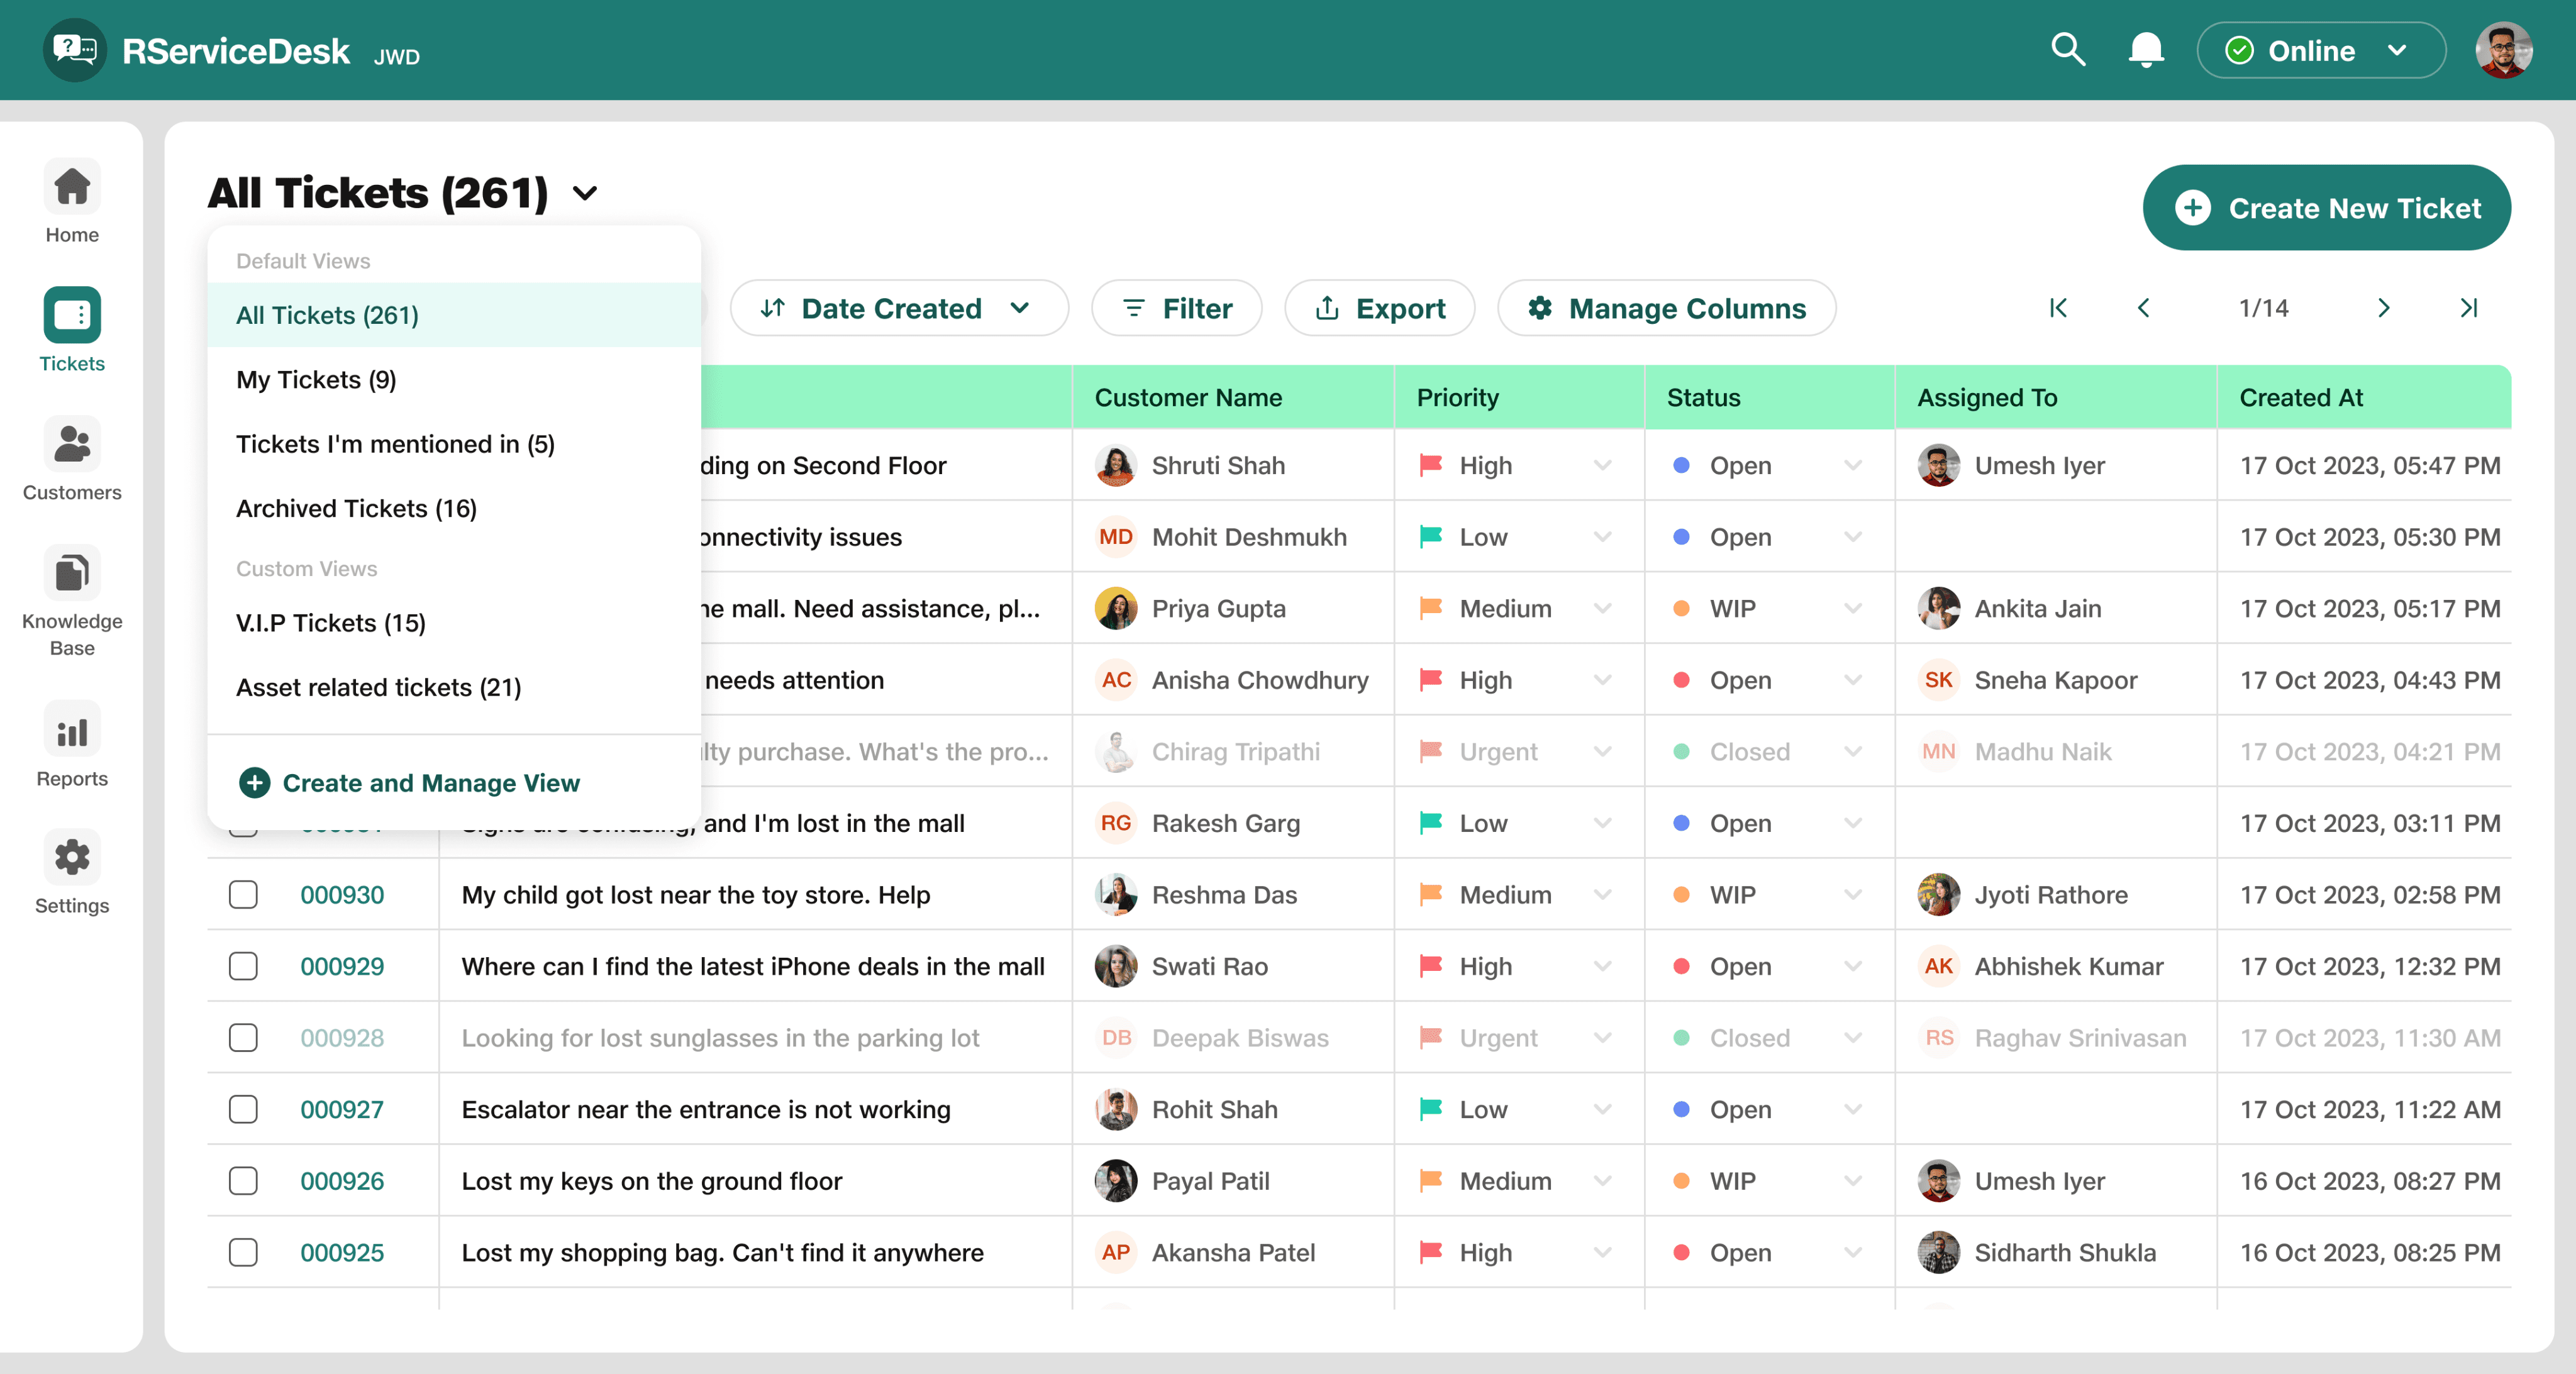
Ticket Table Views
Umesh can use the ticket table view to customize what he sees. He can filter tickets to only show those he's assigned to or mentioned in, and even create custom filters to focus on specific tickets relevant to him. This helps him manage his workload by focusing on what matters most.
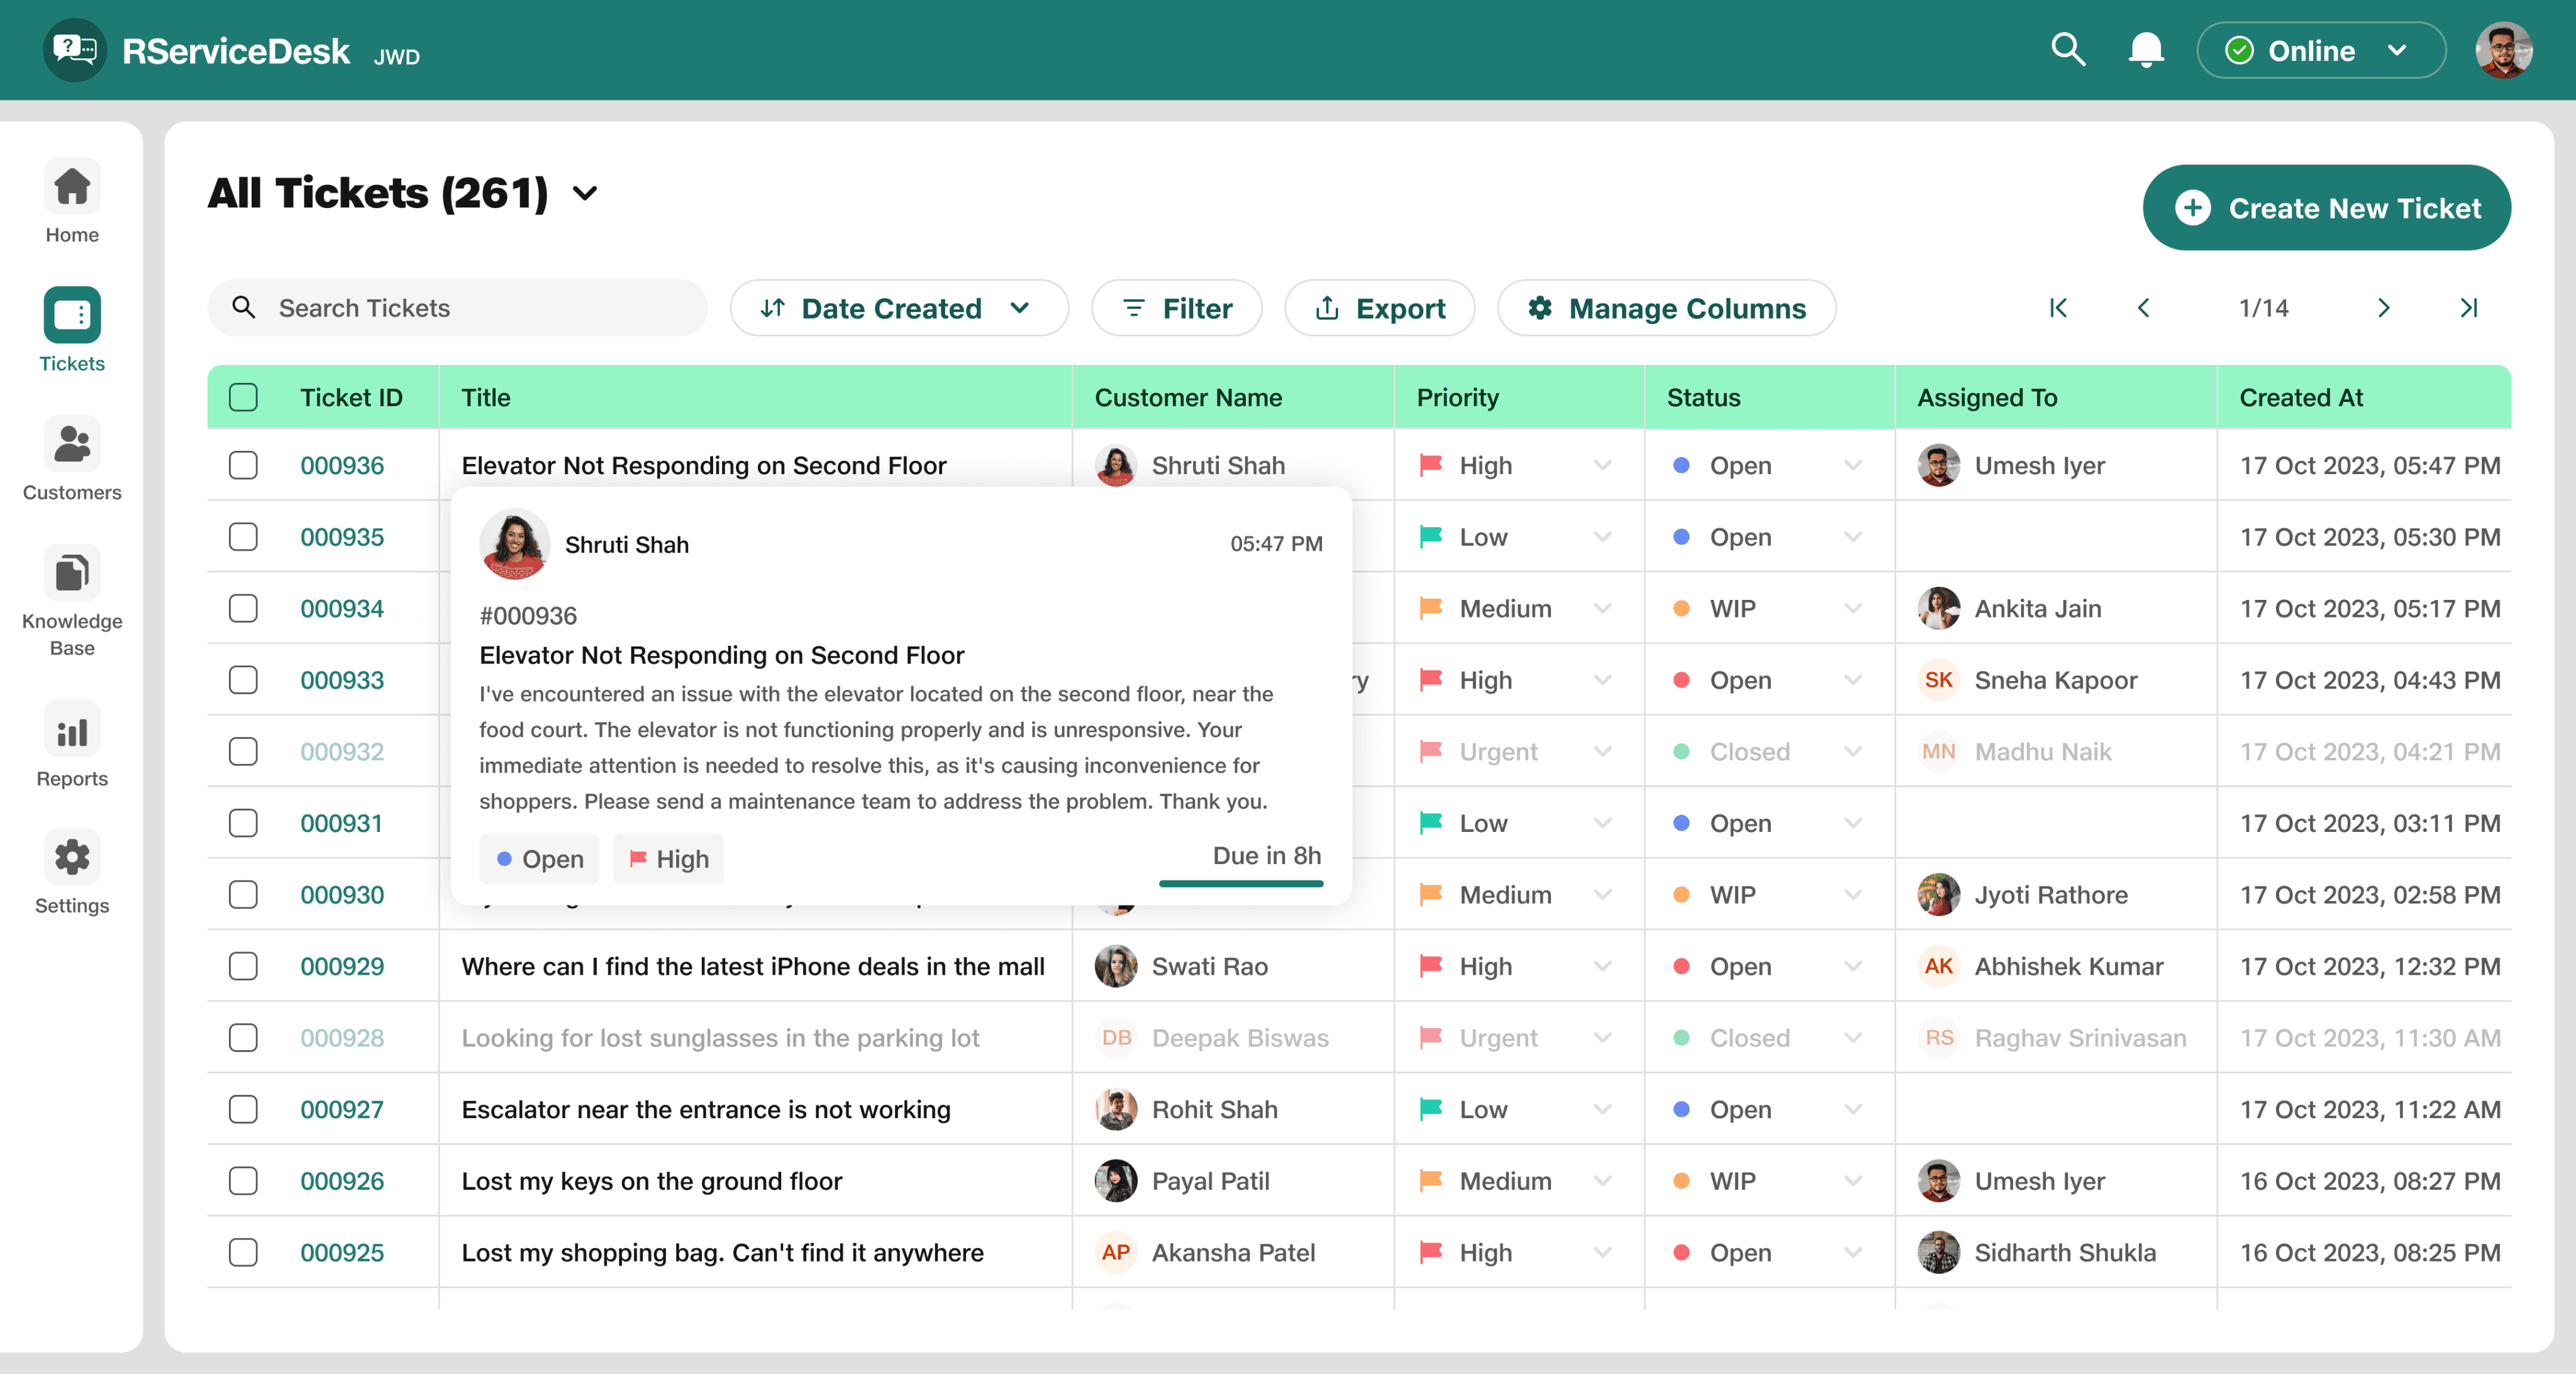
Quick Ticket Details
Opening and viewing the details of every ticket can be a tedious task, especially since there are hundreds of tickets in the portal. Here comes a Quick Ticket Details card which comes while hovering on either ticket ID or title. This card allow Umesh to see the truncated ticket title, description text, ticket creation time, due time, status and priority without opening the ticket.
Status dropdown
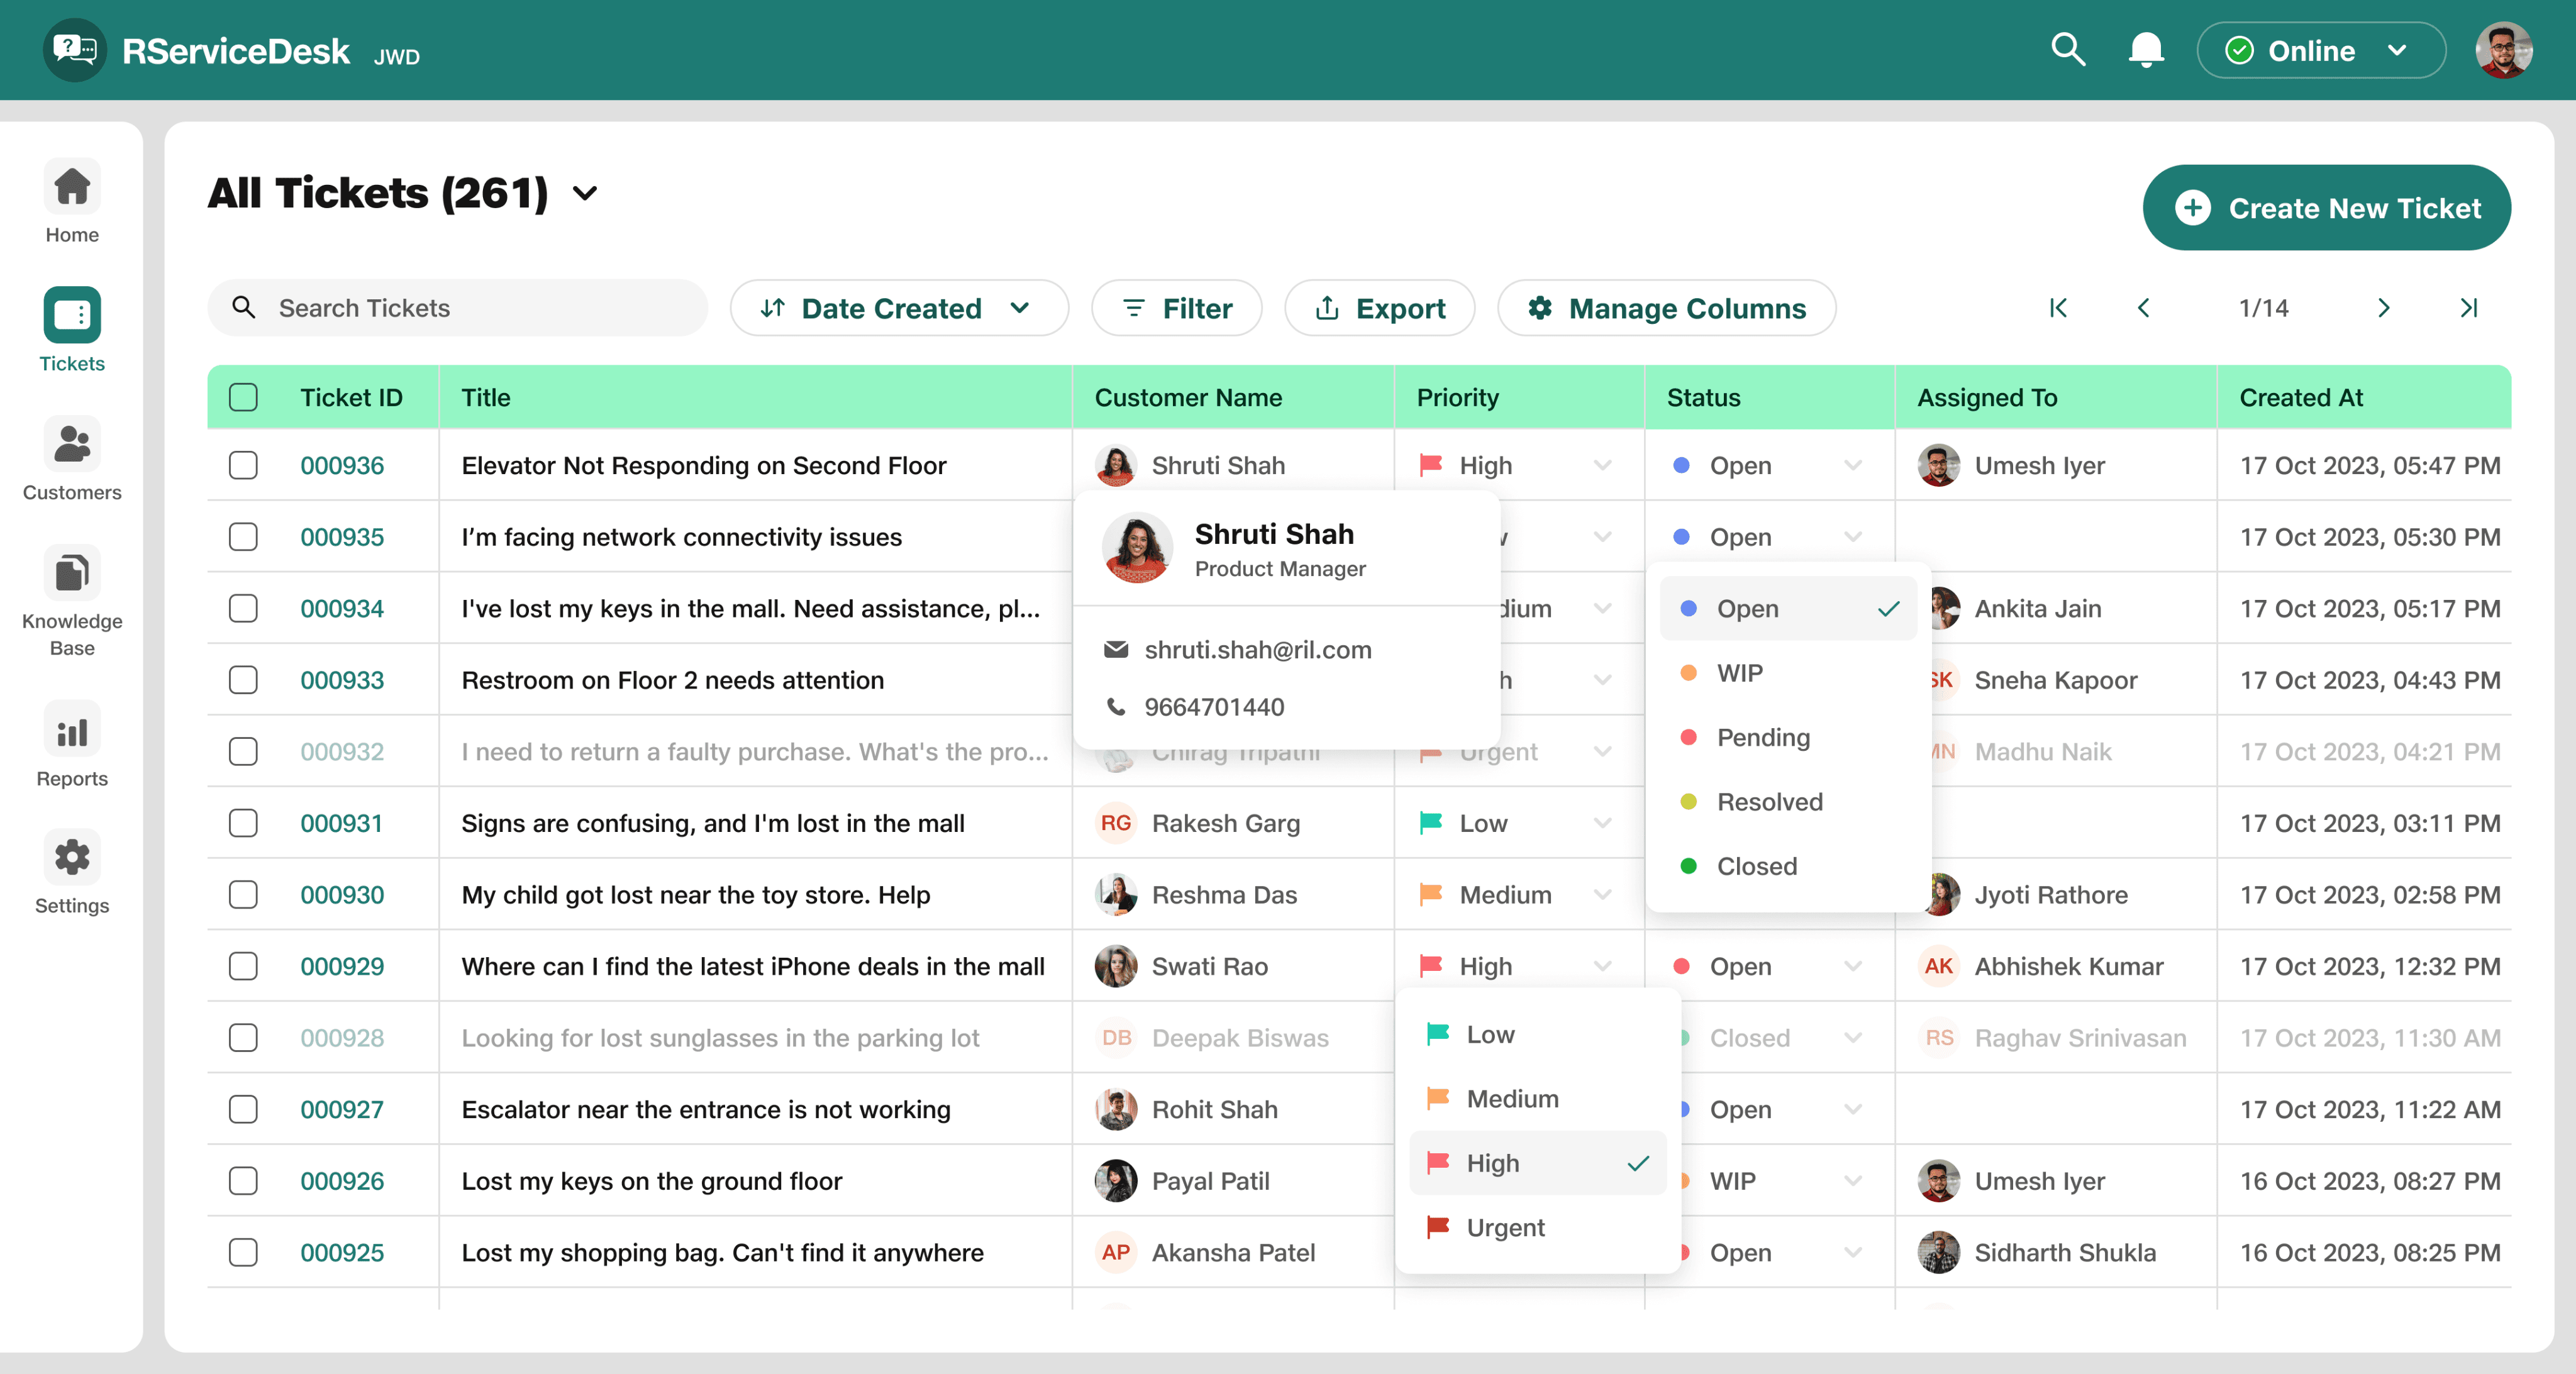
Customer details card
Priority dropdown
Customer Information and Dropdown’s
Hovering over the customer name reveals their contact details, including email ID, phone number, and designation (if provided). Additionally, the ticket priority and status can be changed directly from the ticket table, without opening the ticket.
Ticket Conversation
In the "Conversation" section, Umesh can view the full details of Shruti's query, including the ticket description,
any attached files, and the date and time it was created. He can also add private notes that will only be visible to RServiceDesk agents and admins.

Open ticket by clicking on ticket ID to see ticket conversation
Ticket Conversation in ticket details page
After reviewing Shruti's issue, Umesh will respond accordingly. He'll also mention Abhishek Sharma (another agent) in a private note, requesting his team to visit the site and fix the escalator problem.
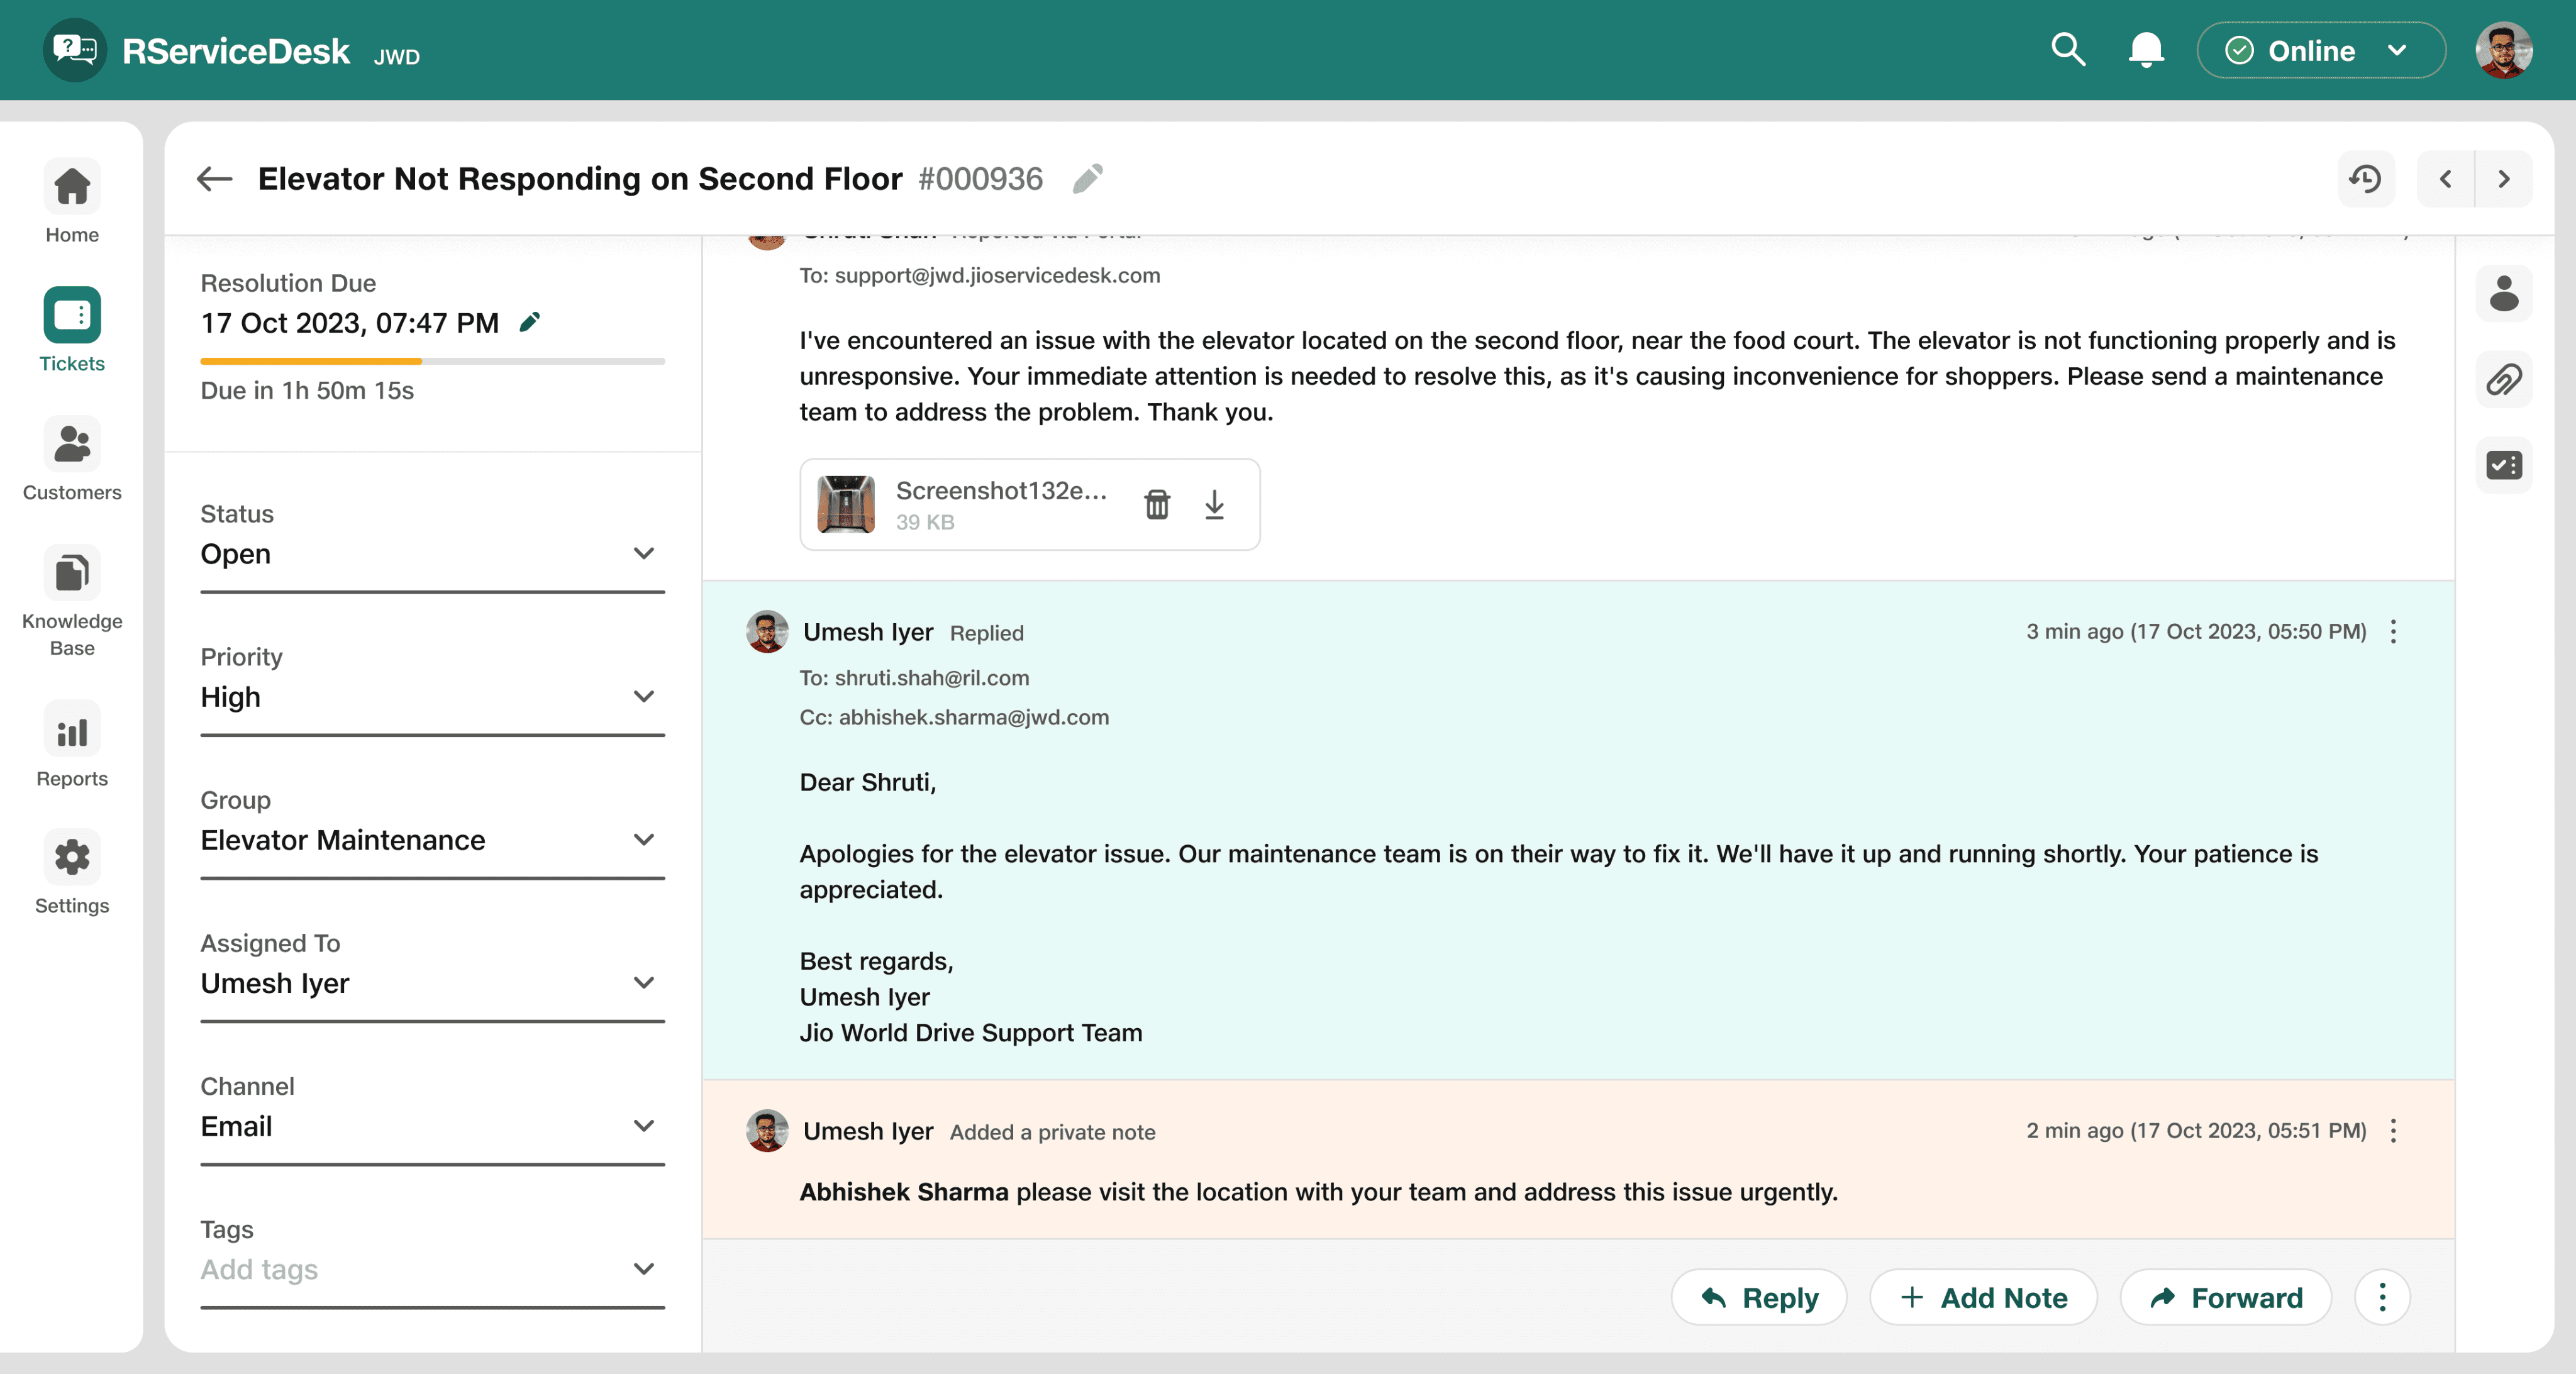
We have three types of messages: customer message, agent message, and private note. To distinguish these message types, we use background colors as follows:

Customer’s (Shruti) message
(White background)
Agent’s (Umesh) message
(Light green background)
Private note added by Umesh
(Light orange background)
From the right-side navigation bar, Umesh can access the Shruti’s complete information, including her previous tickets.
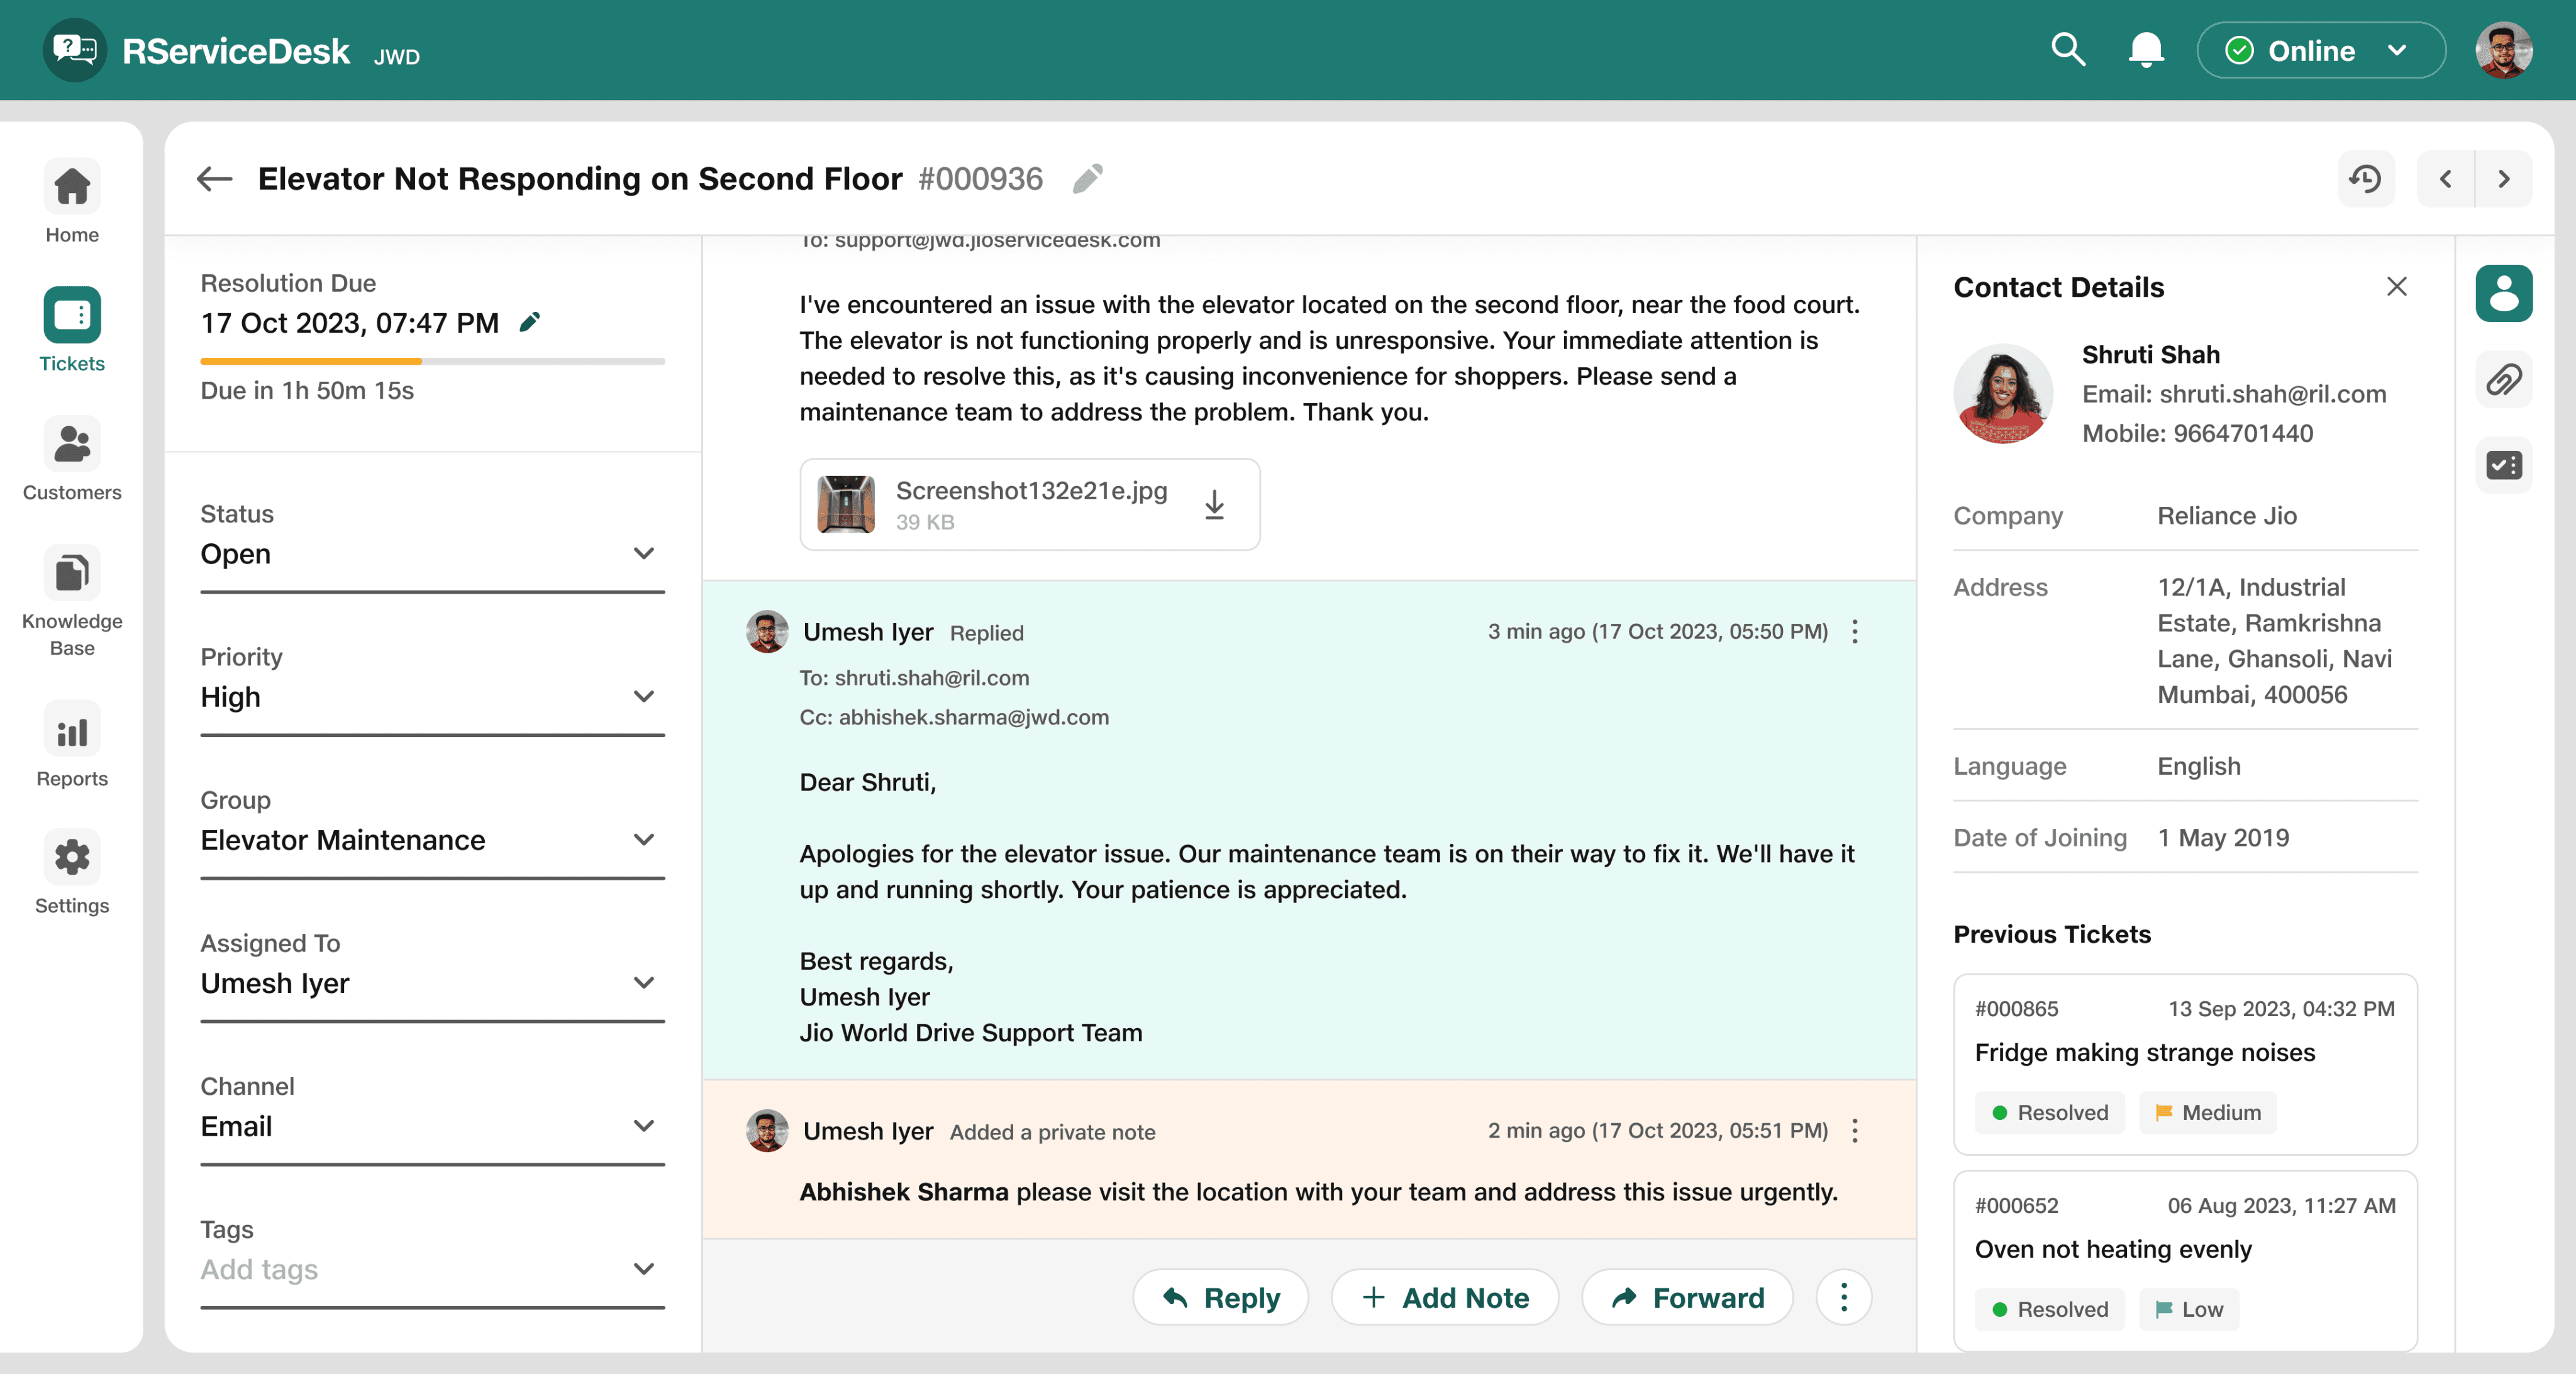
Customer details with previous tickets
Attachment section where all the attachments uploaded in the ticket conversation
will be listed.
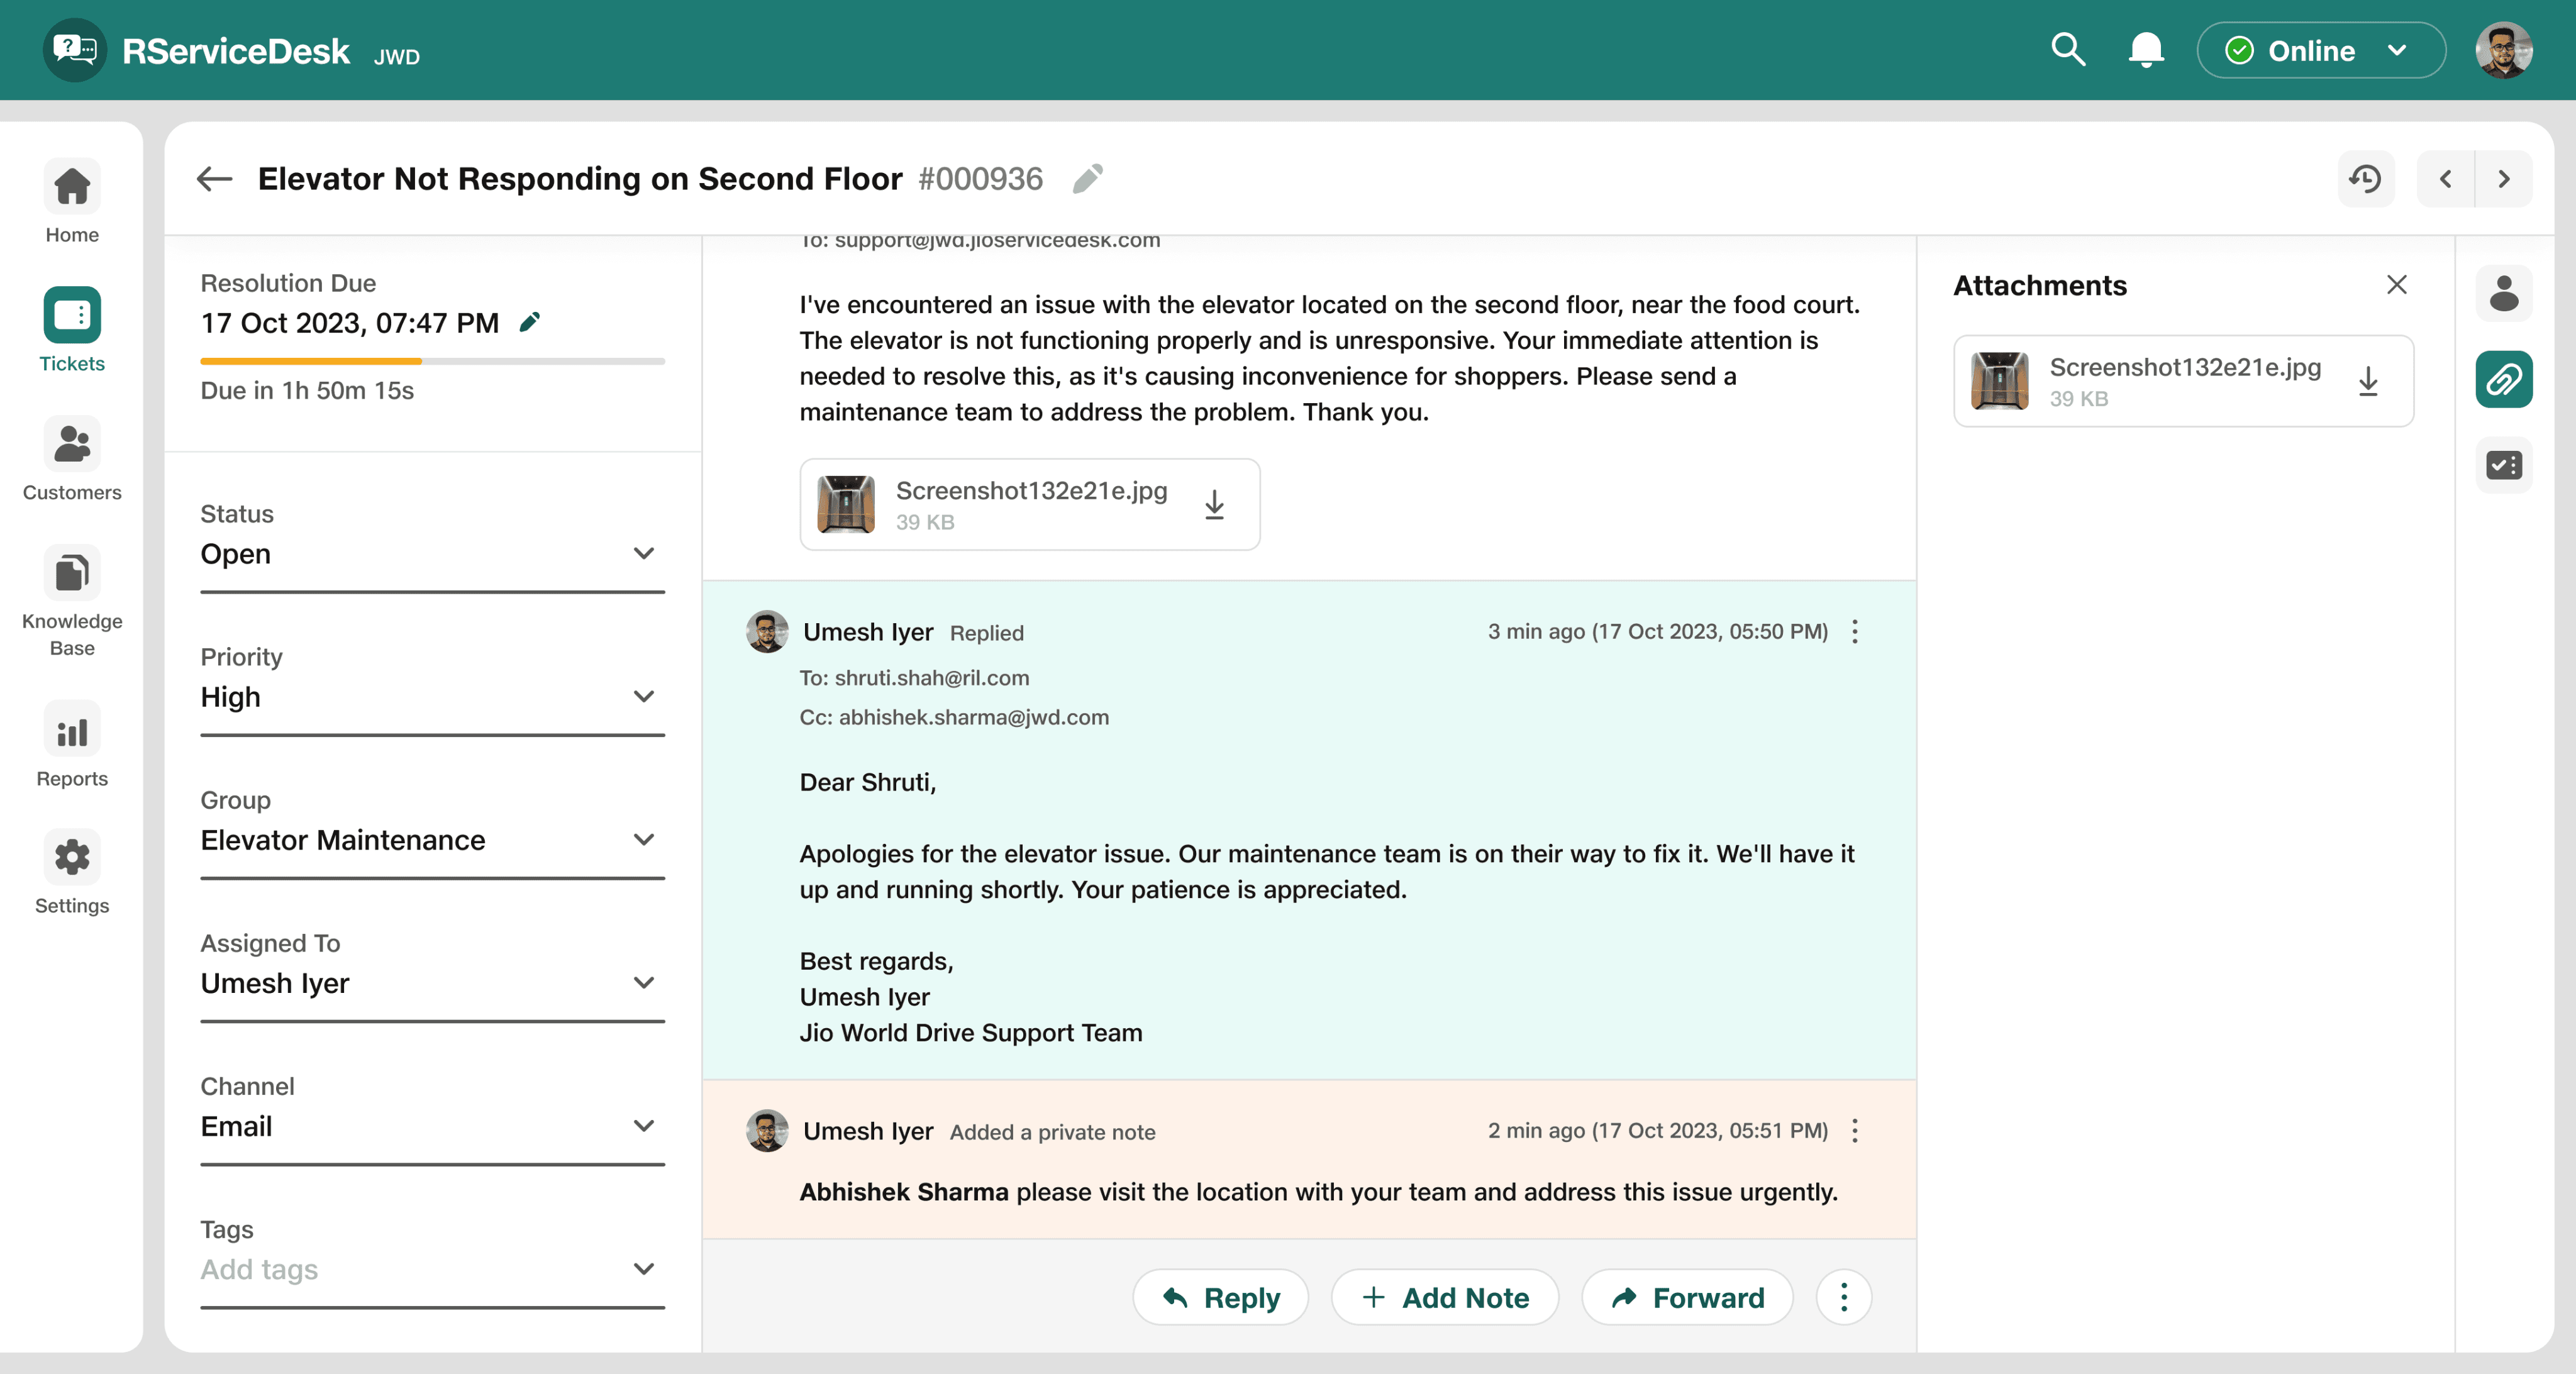
Attachments section were all the attachments will be listed
Resolve and Close Ticket
Once Abhishek and his team fix the escalator issue, Umesh will mark the ticket as "Resolved" and close it.
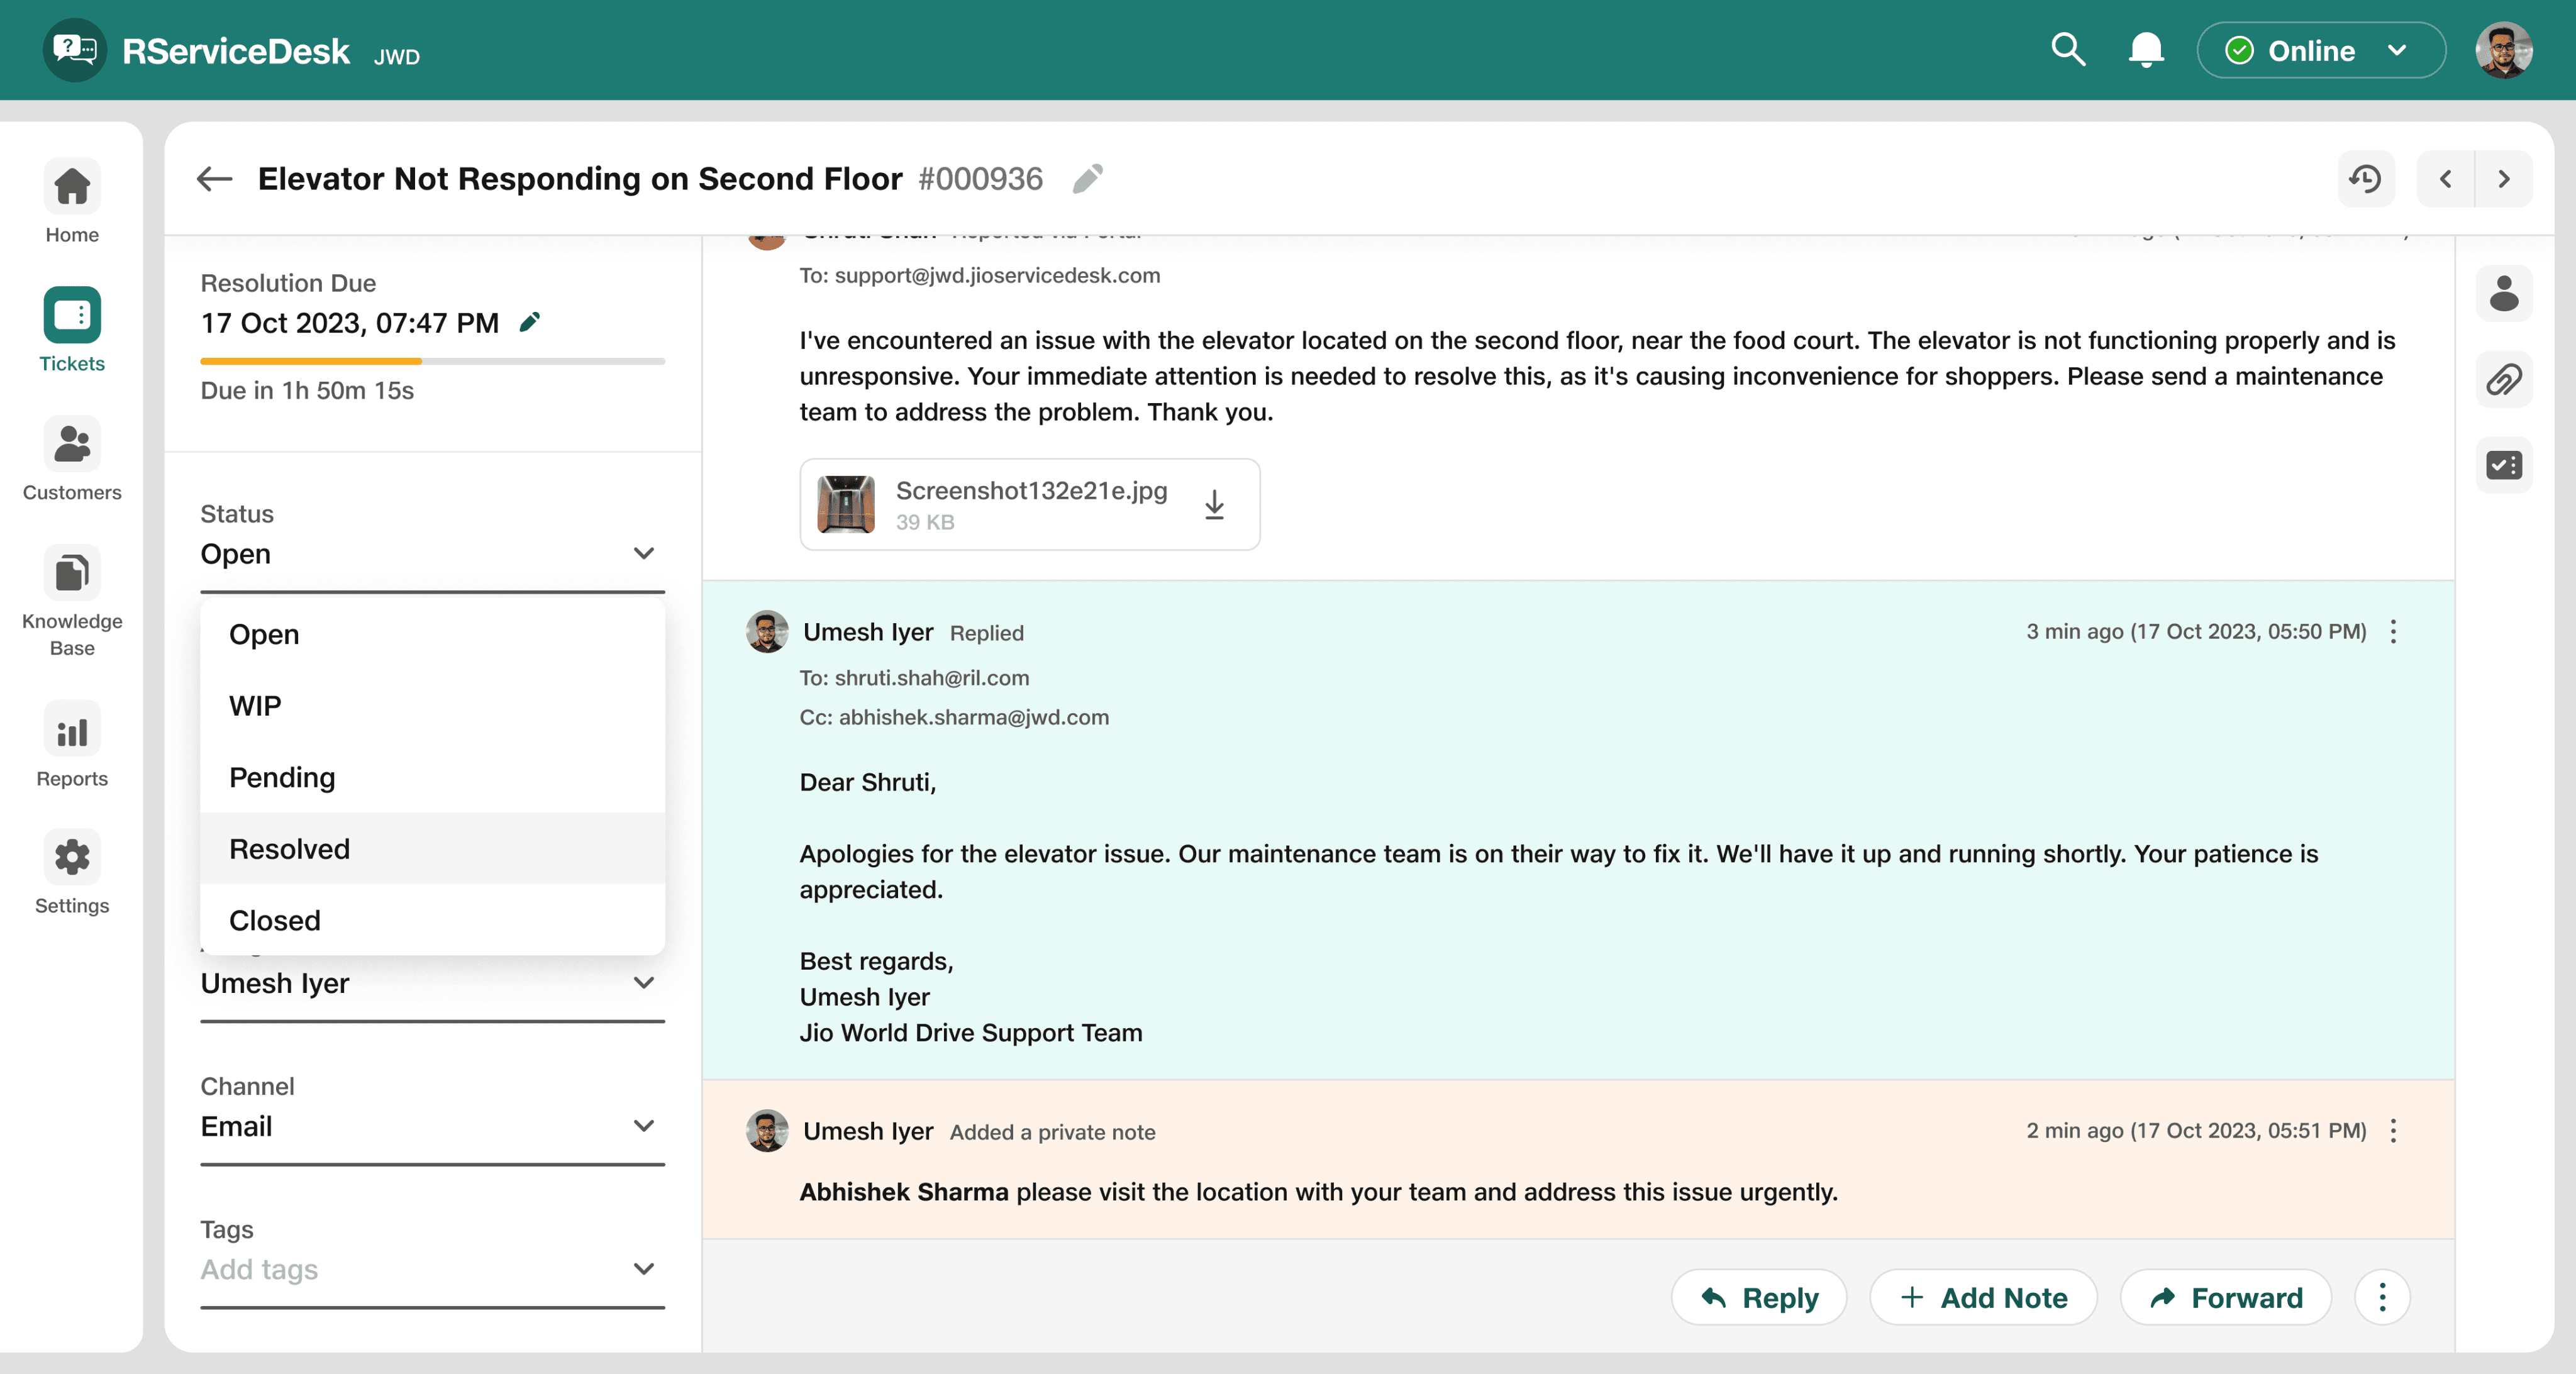
Umesh will mark ticket as Resolved
Once ticket being marked as resolved a side sheet will appear where Umesh has to fill resolution summary. in resolution summary he has to explain how he solved the issue so that it can help other agents and admins to deal with same kind of issue.
Resolution summary added
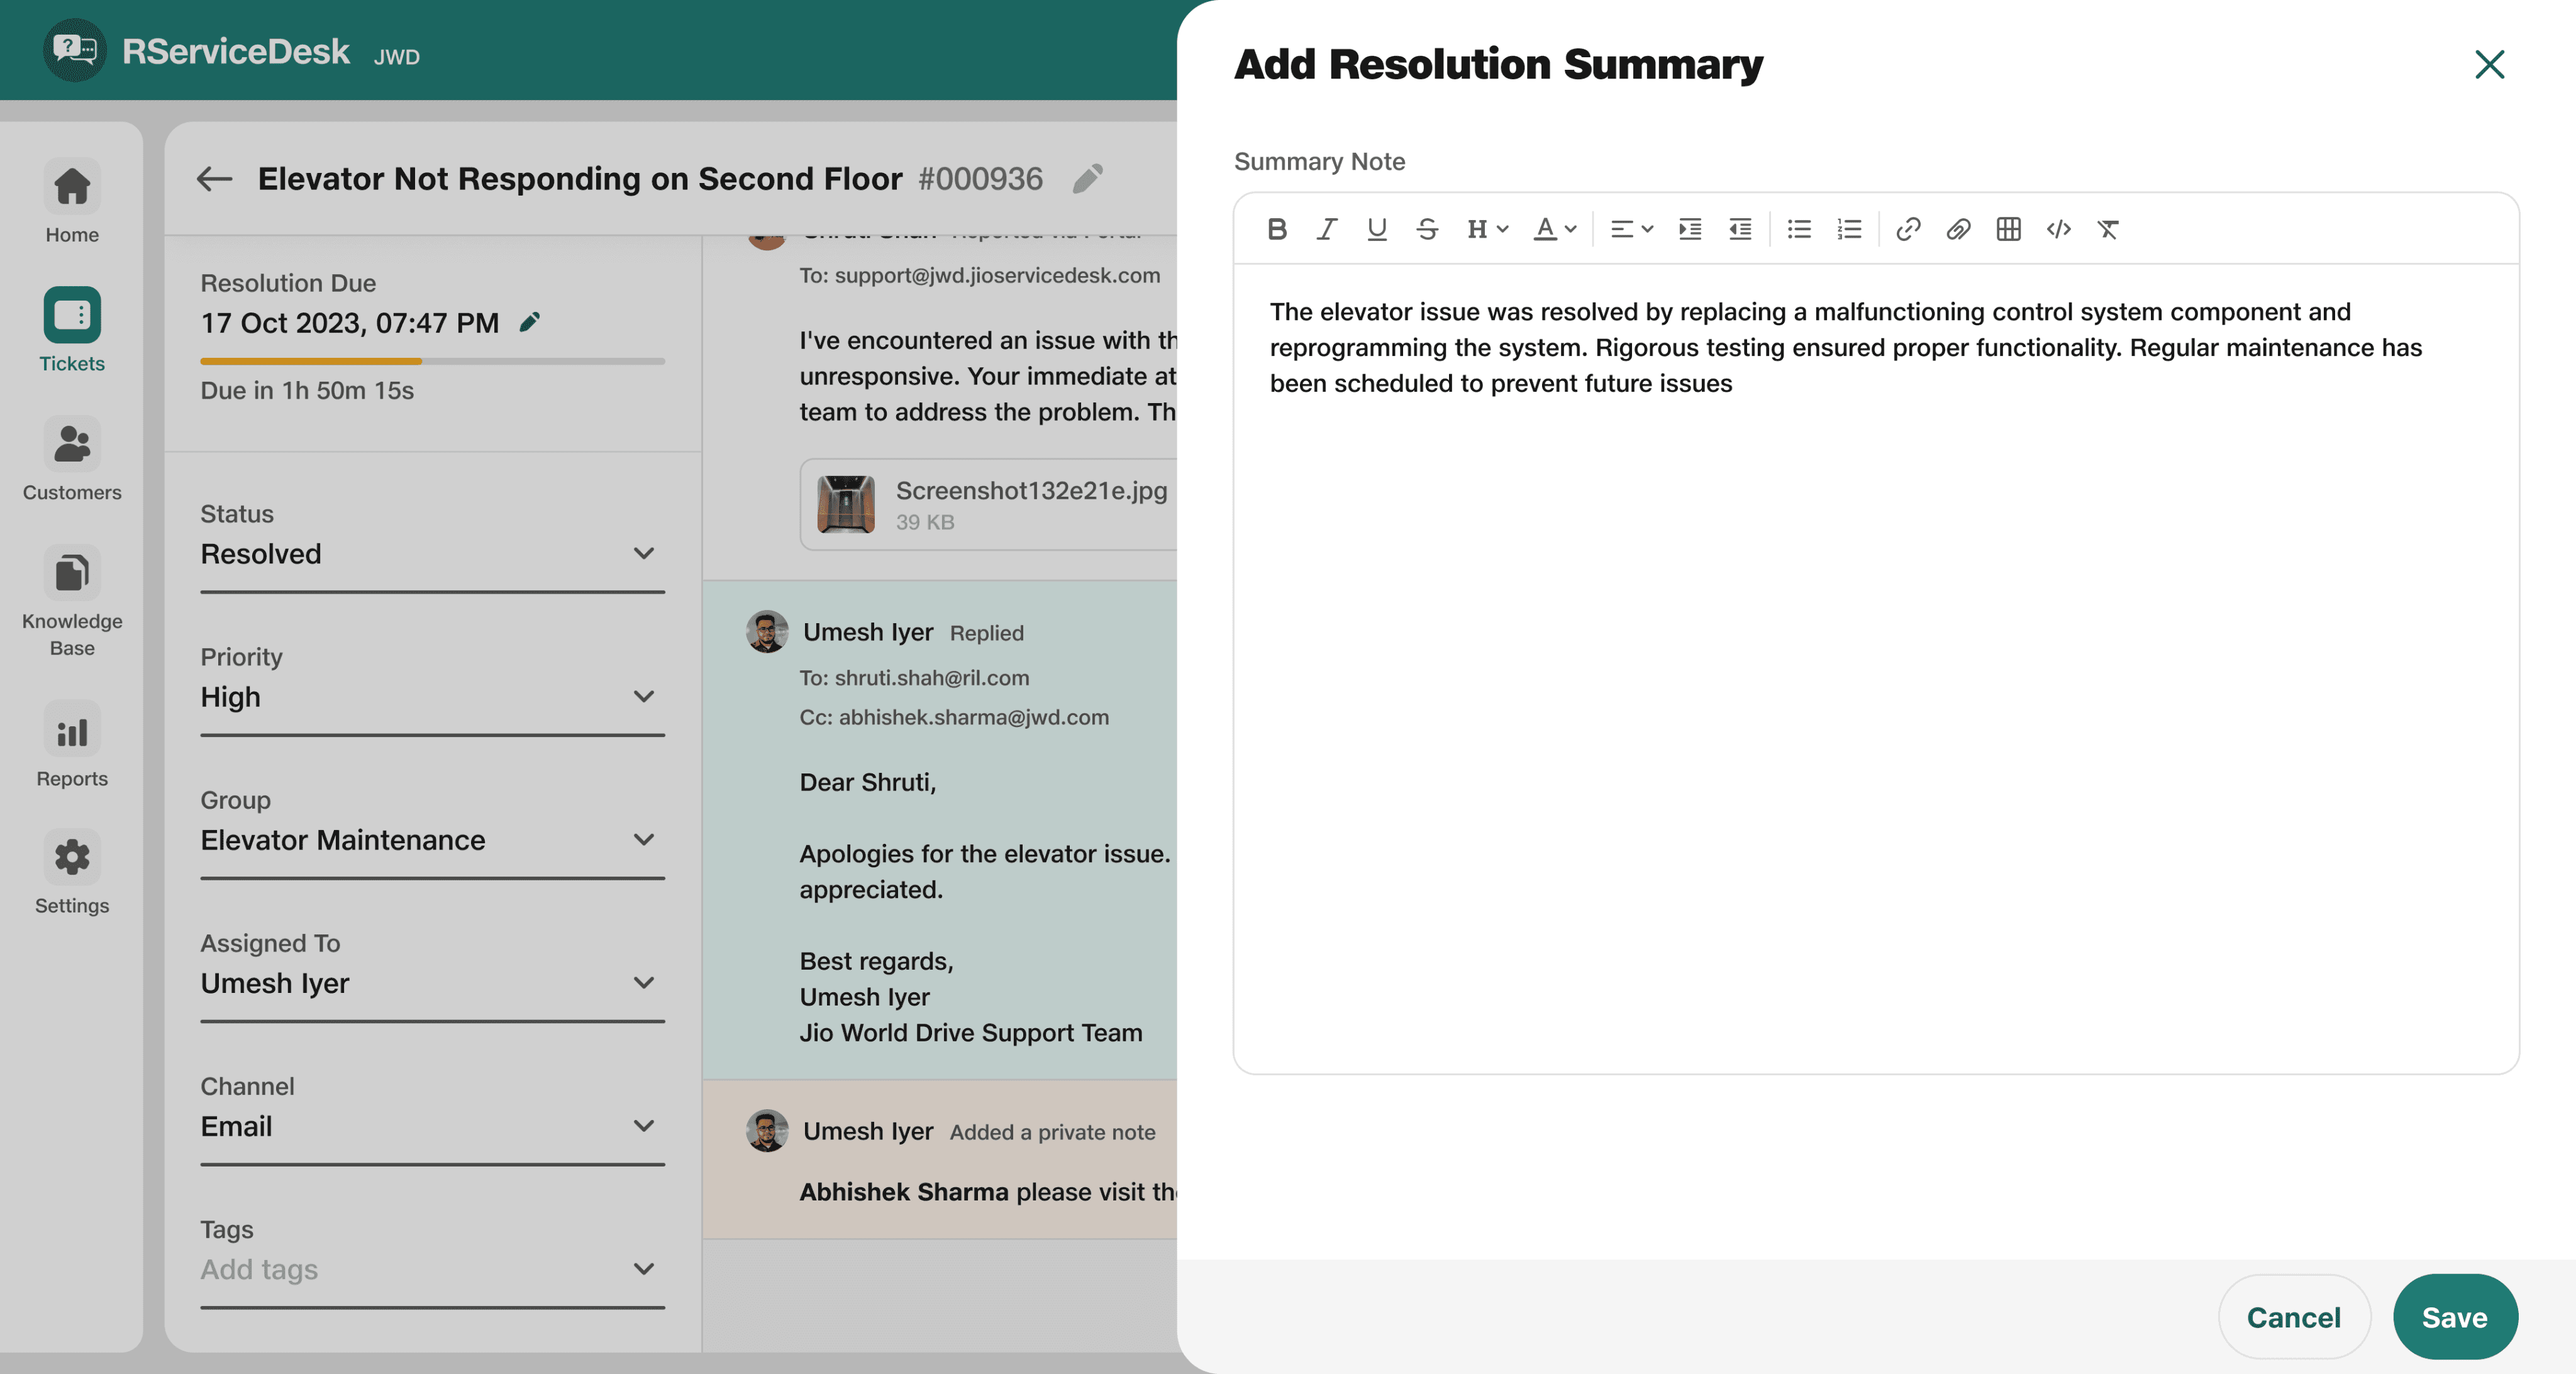
Now ticket is resolved and resolution summary added, Umesh will close the ticket.
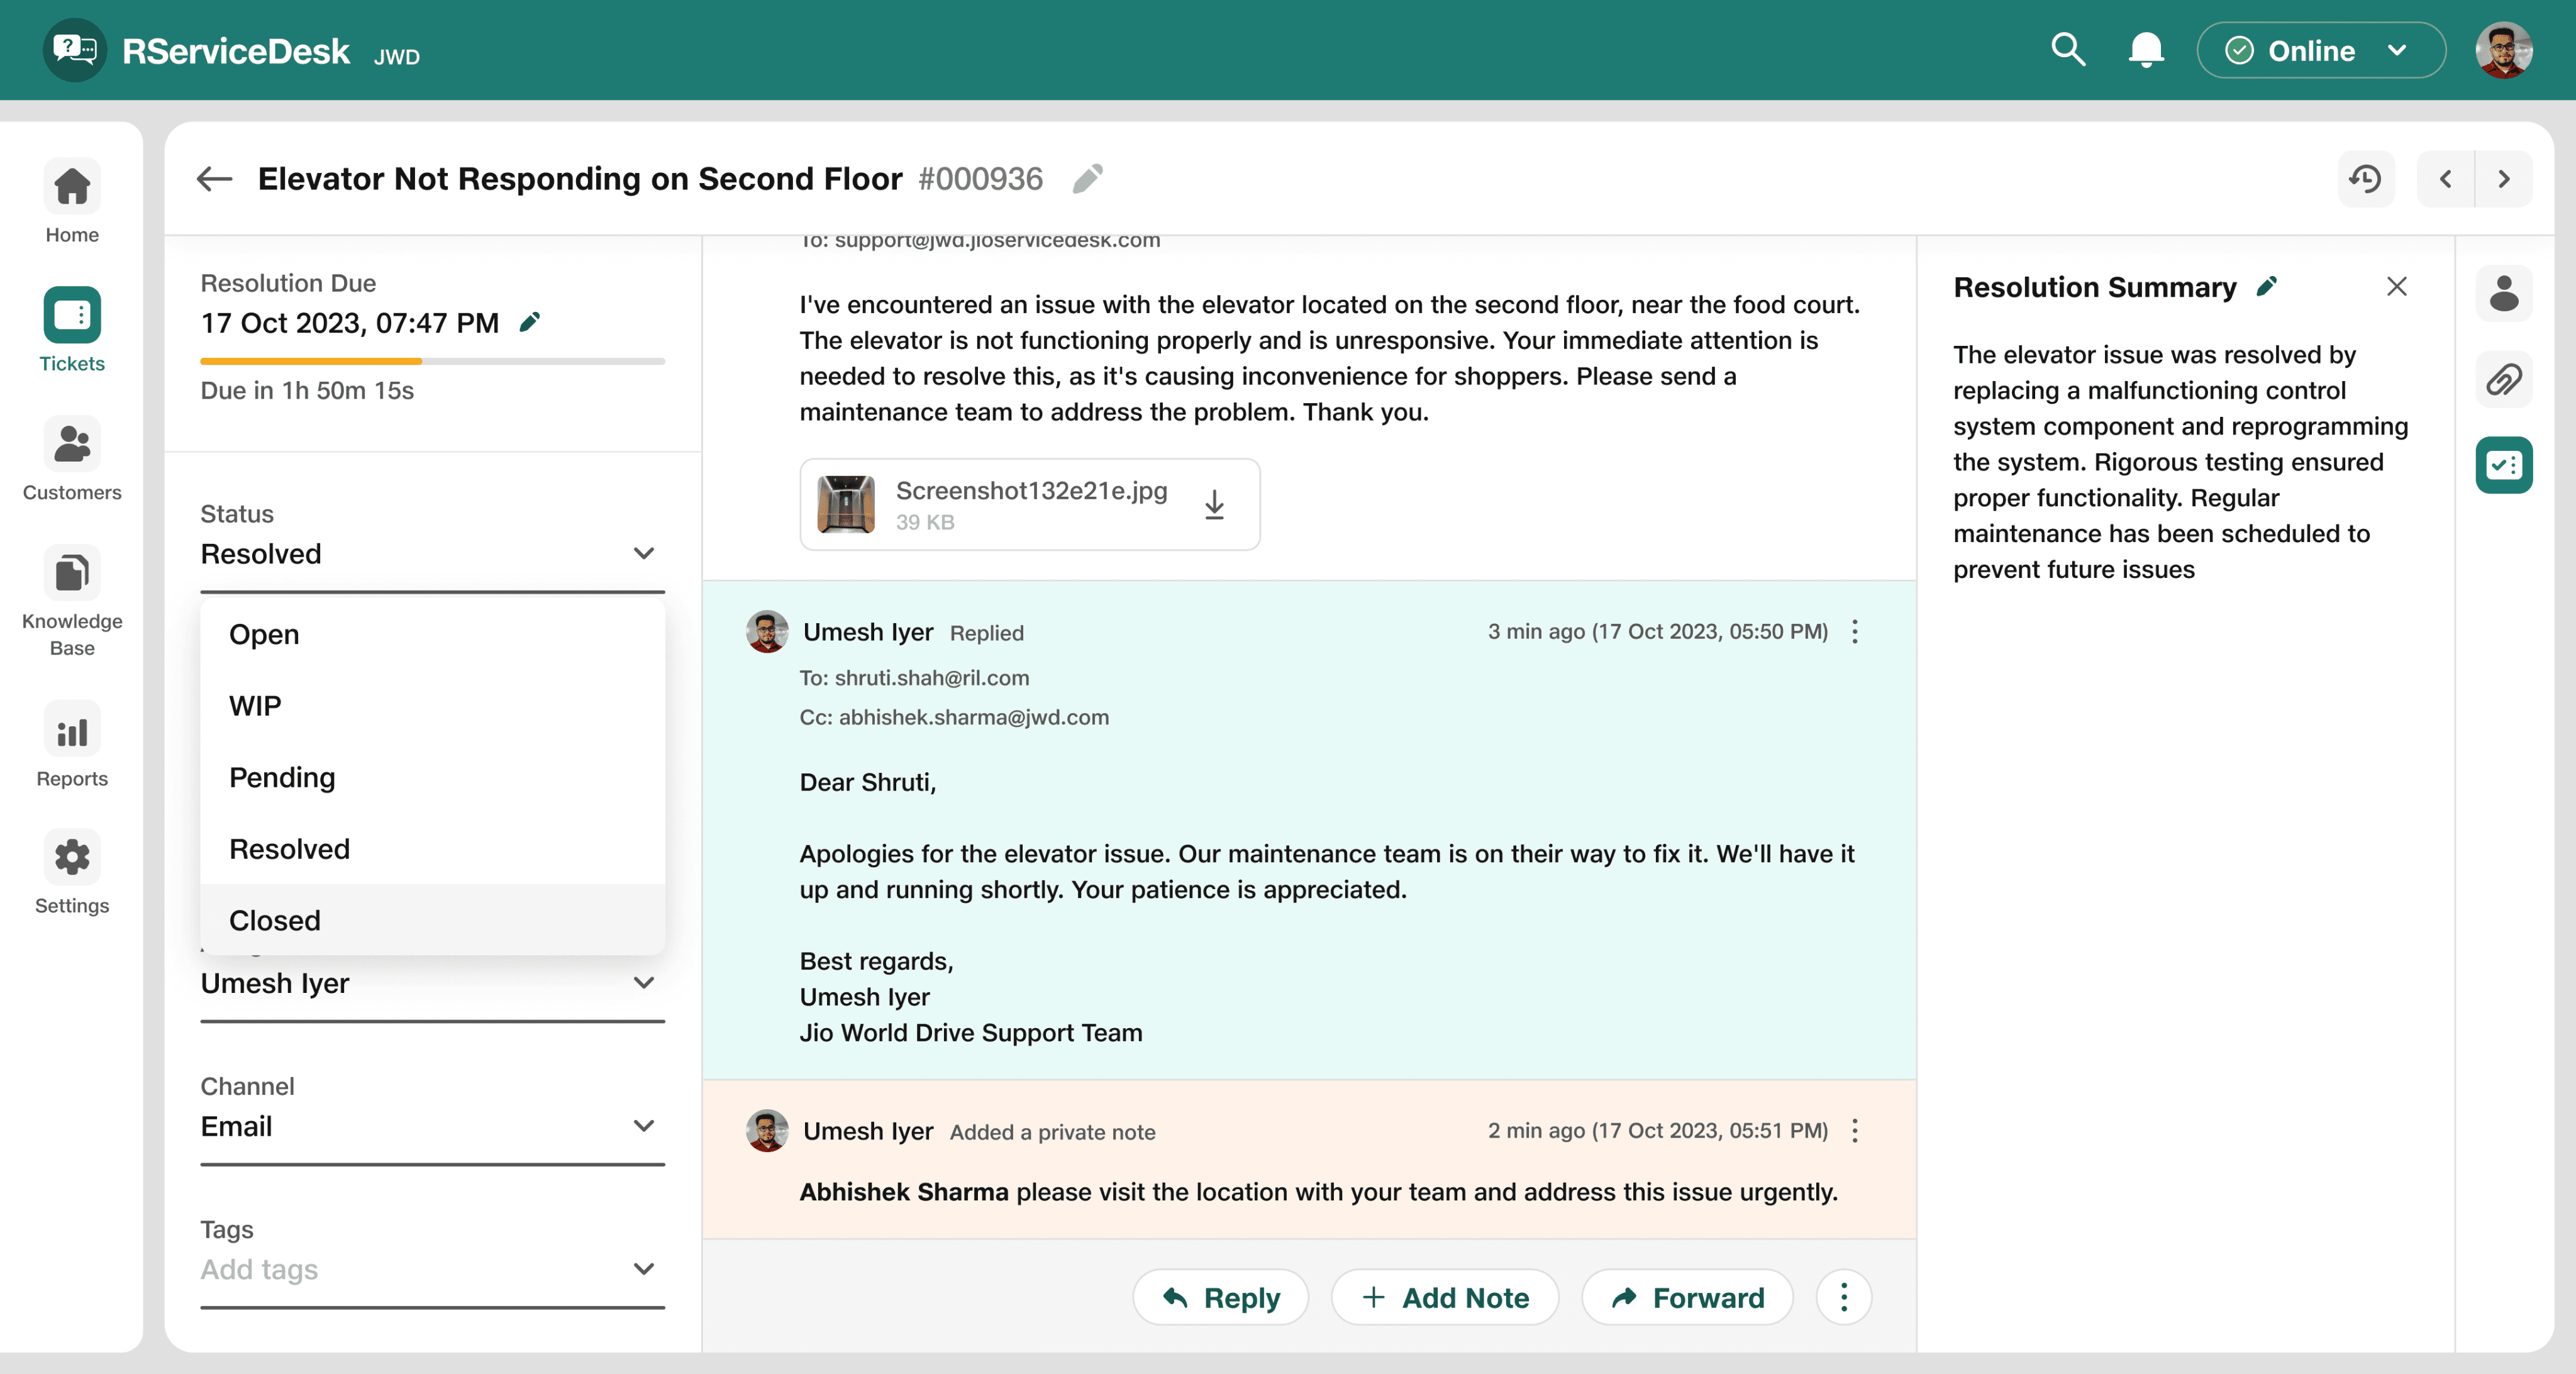
Umesh will mark ticket as Closed
Resolution summary
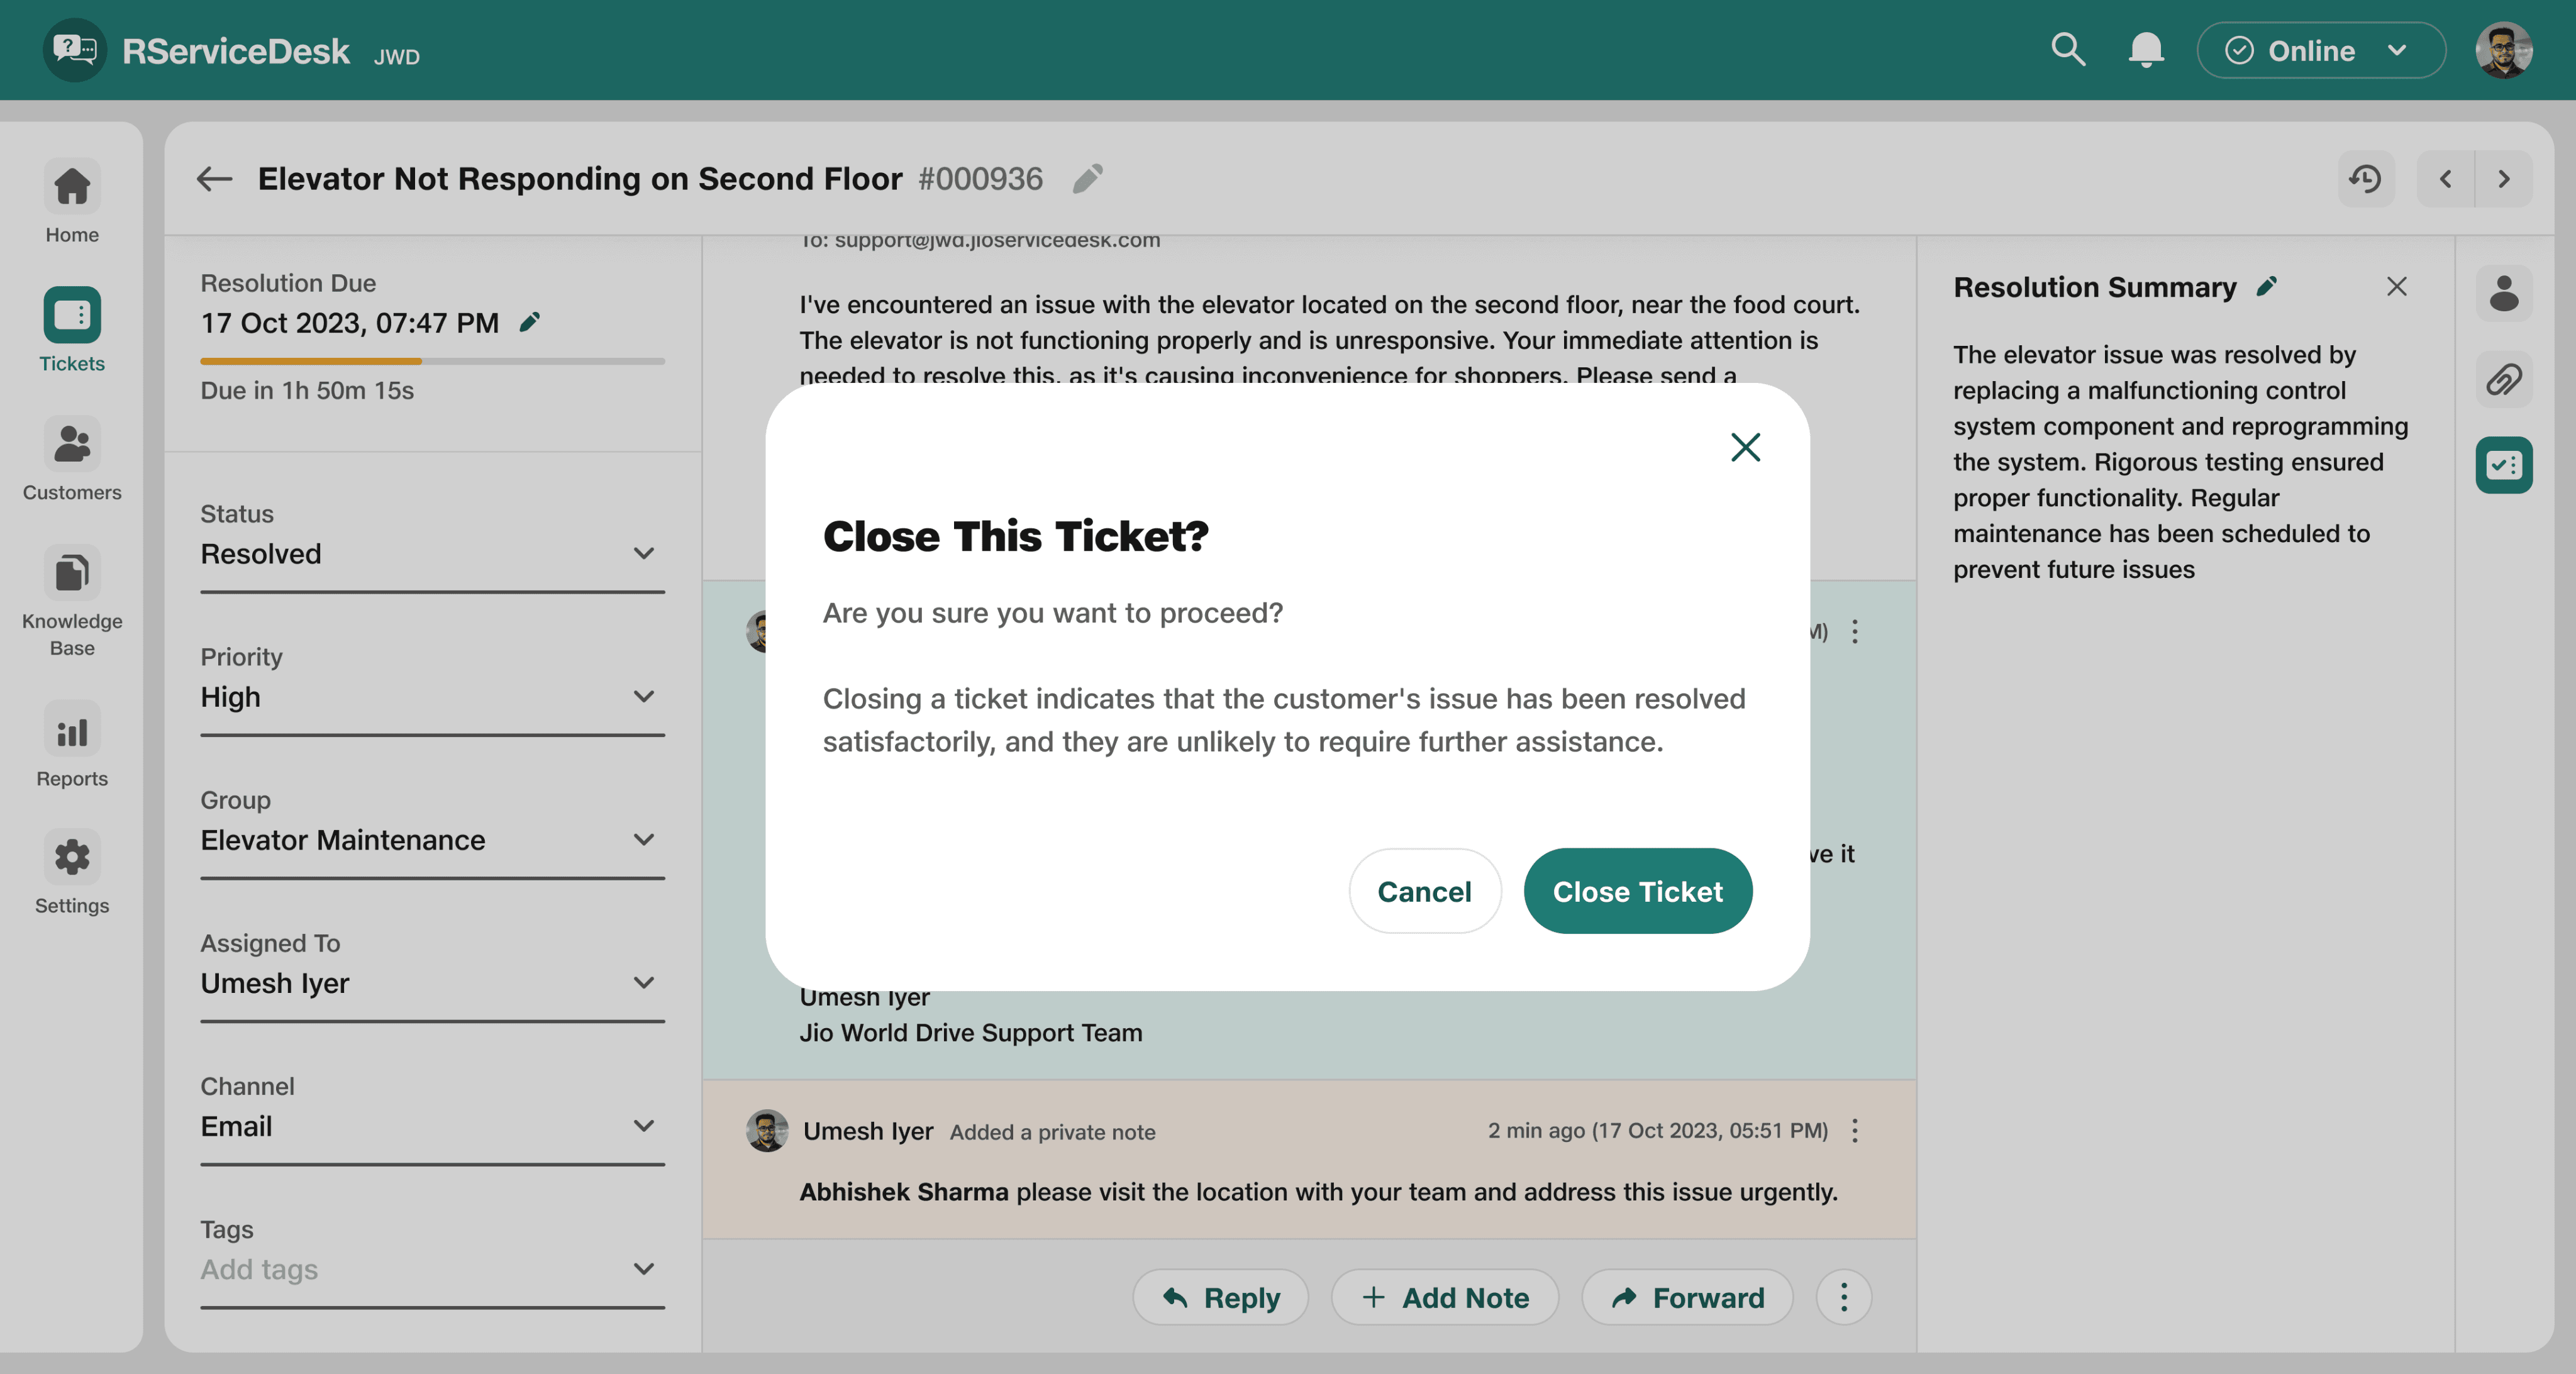
A confirmation modal will appear while closing the ticket
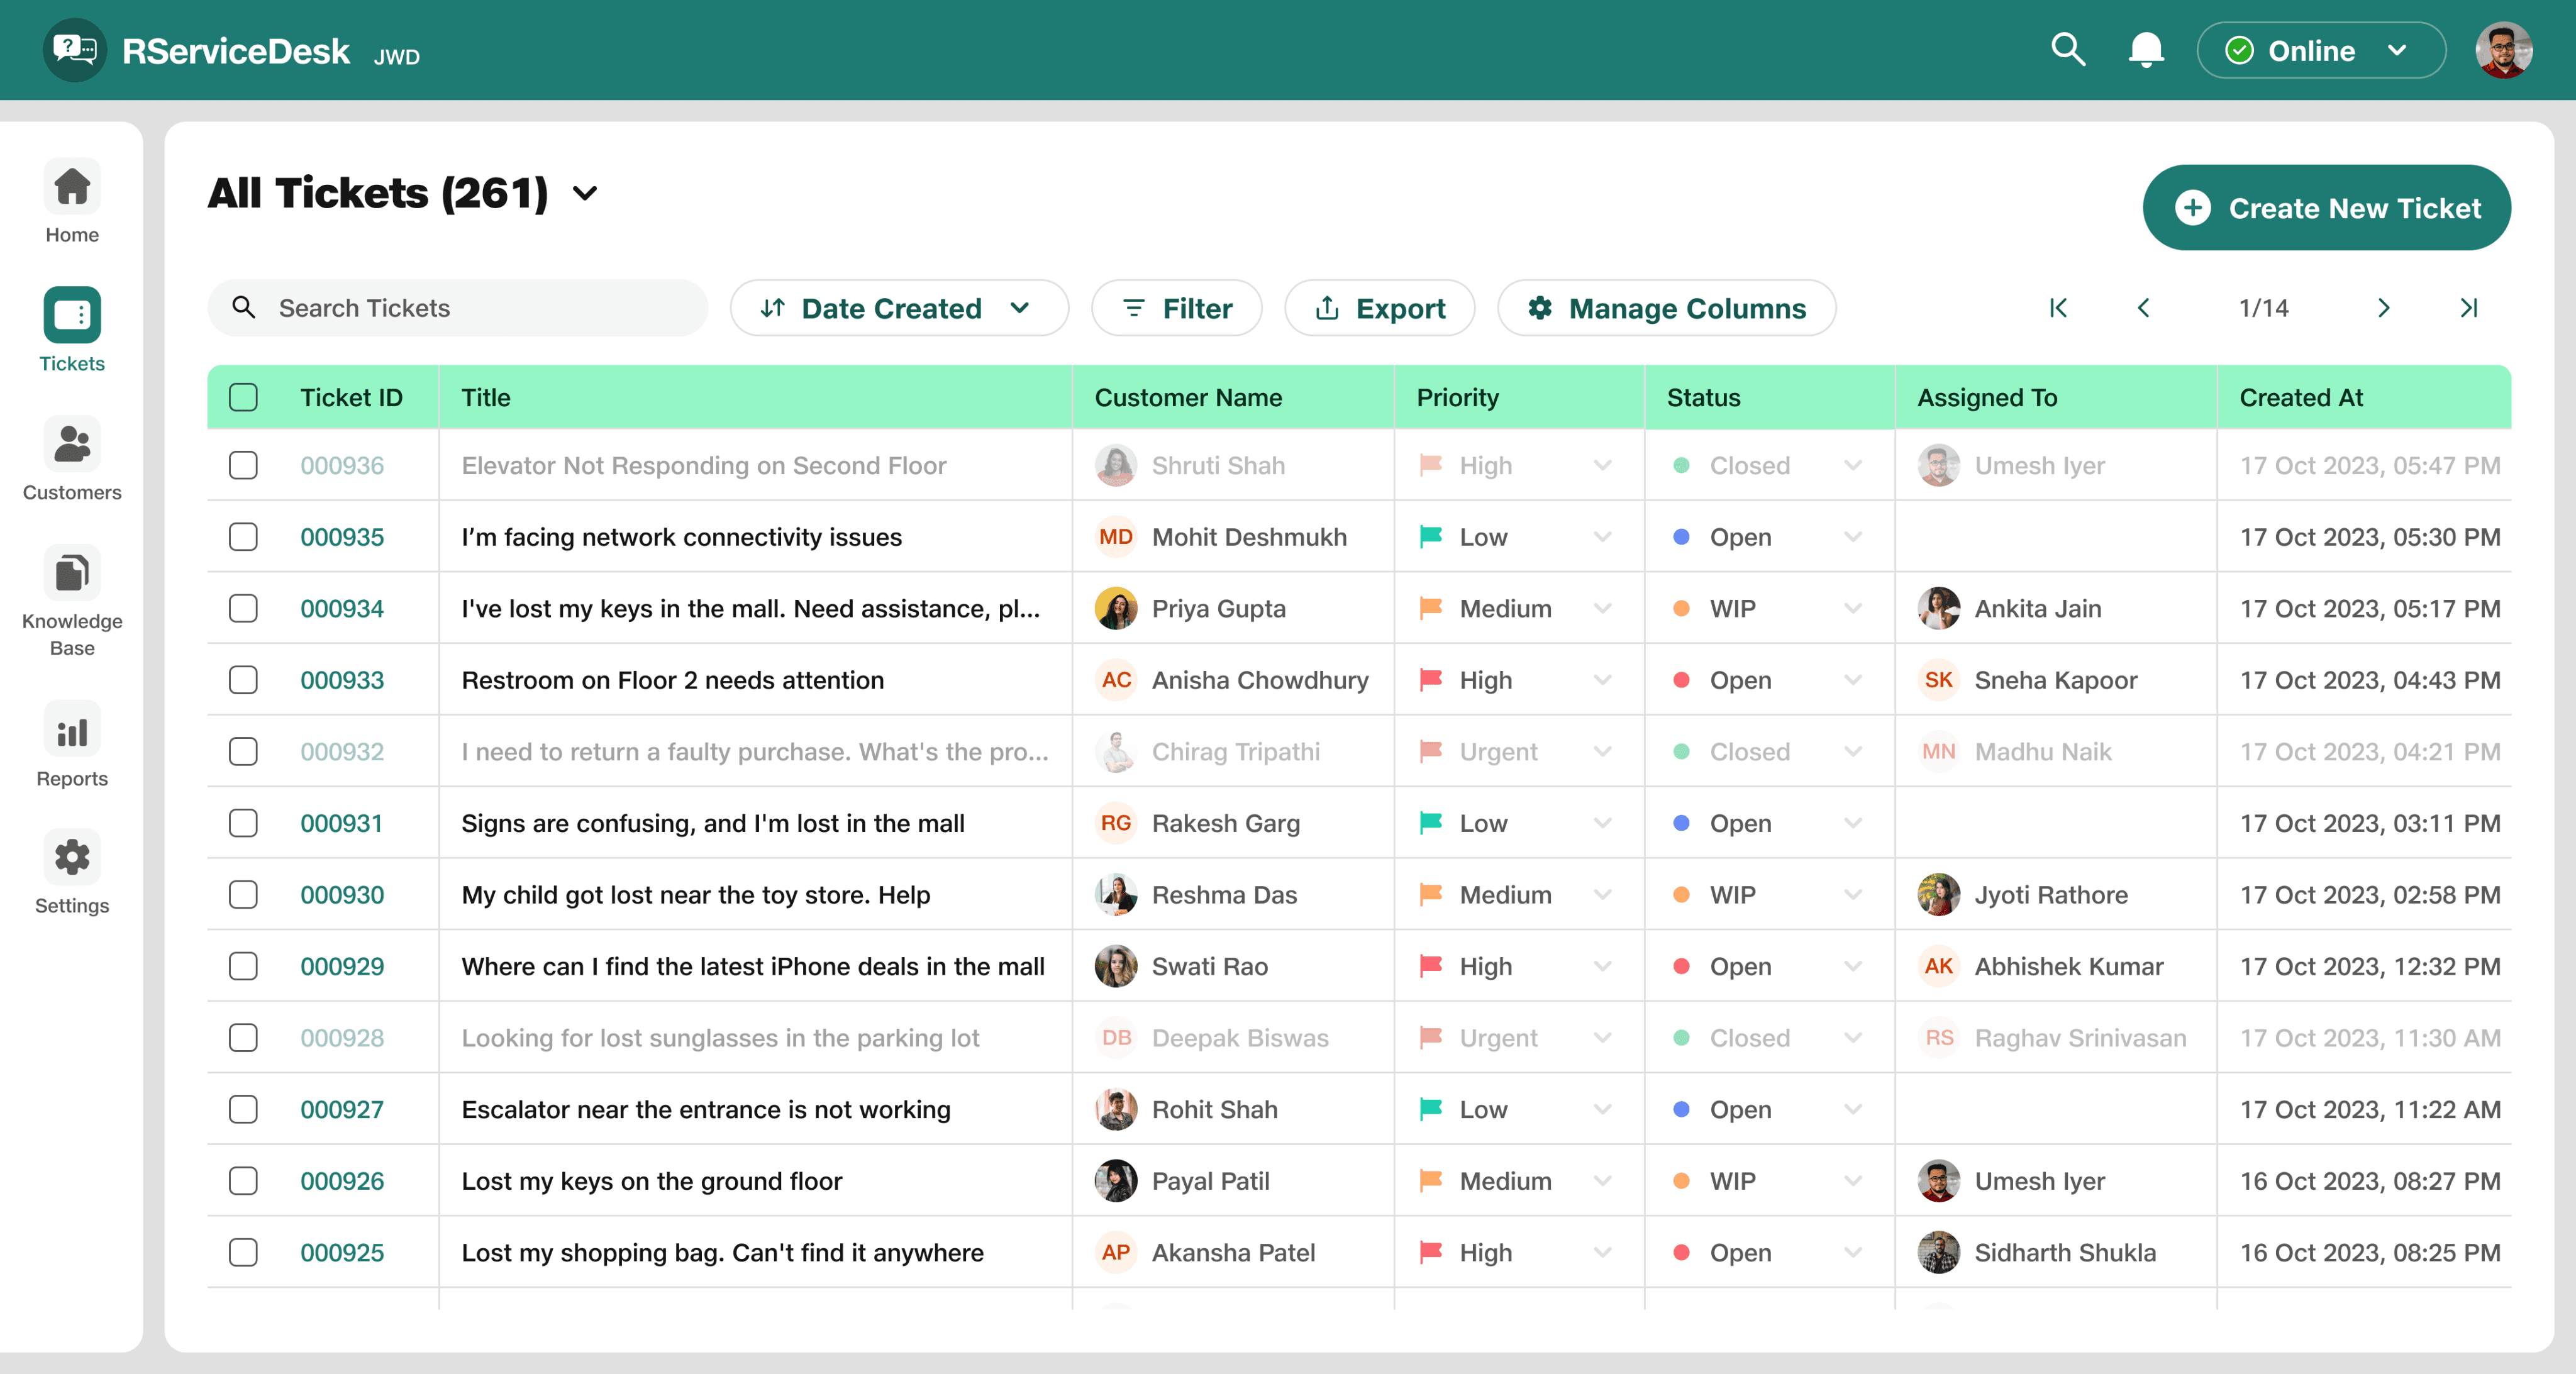
Once the ticket is marked as closed, it will be dimmed out.
Feedback Form and Rating
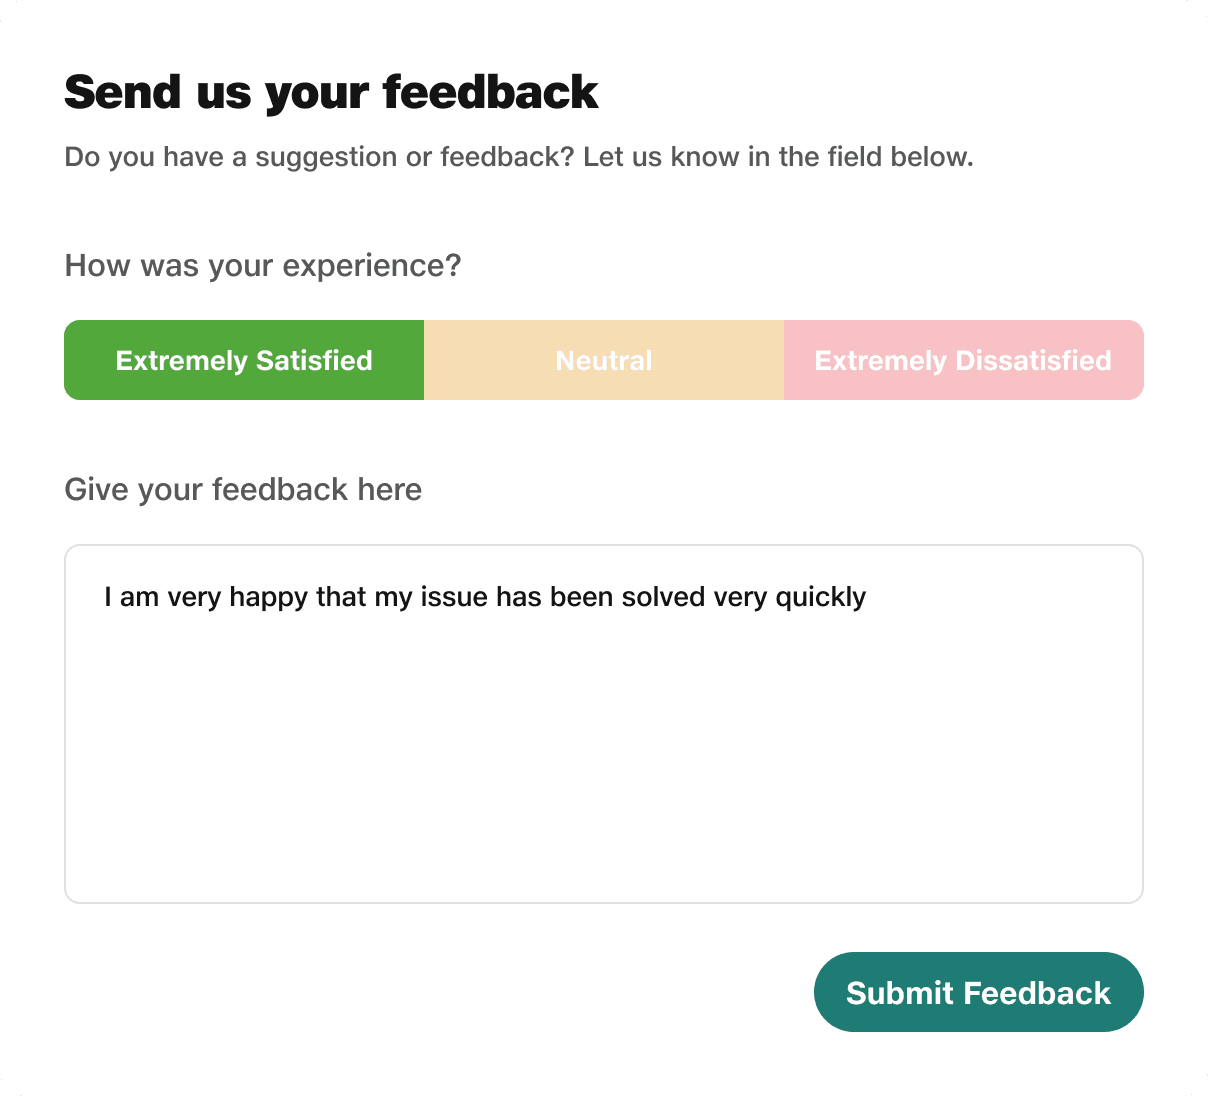
Once the ticket closes, Customer (Shruti) will receive a feedback form via email. This form allows her to rate her experience and provide feedback, which will then be visible in agent’s (Umesh) conversation record.
Feedback and Rating Form
Below is the Feedback and Rating form which will be sent to Shruti via mail.
Rating and Feedback showing in ticket conversation.
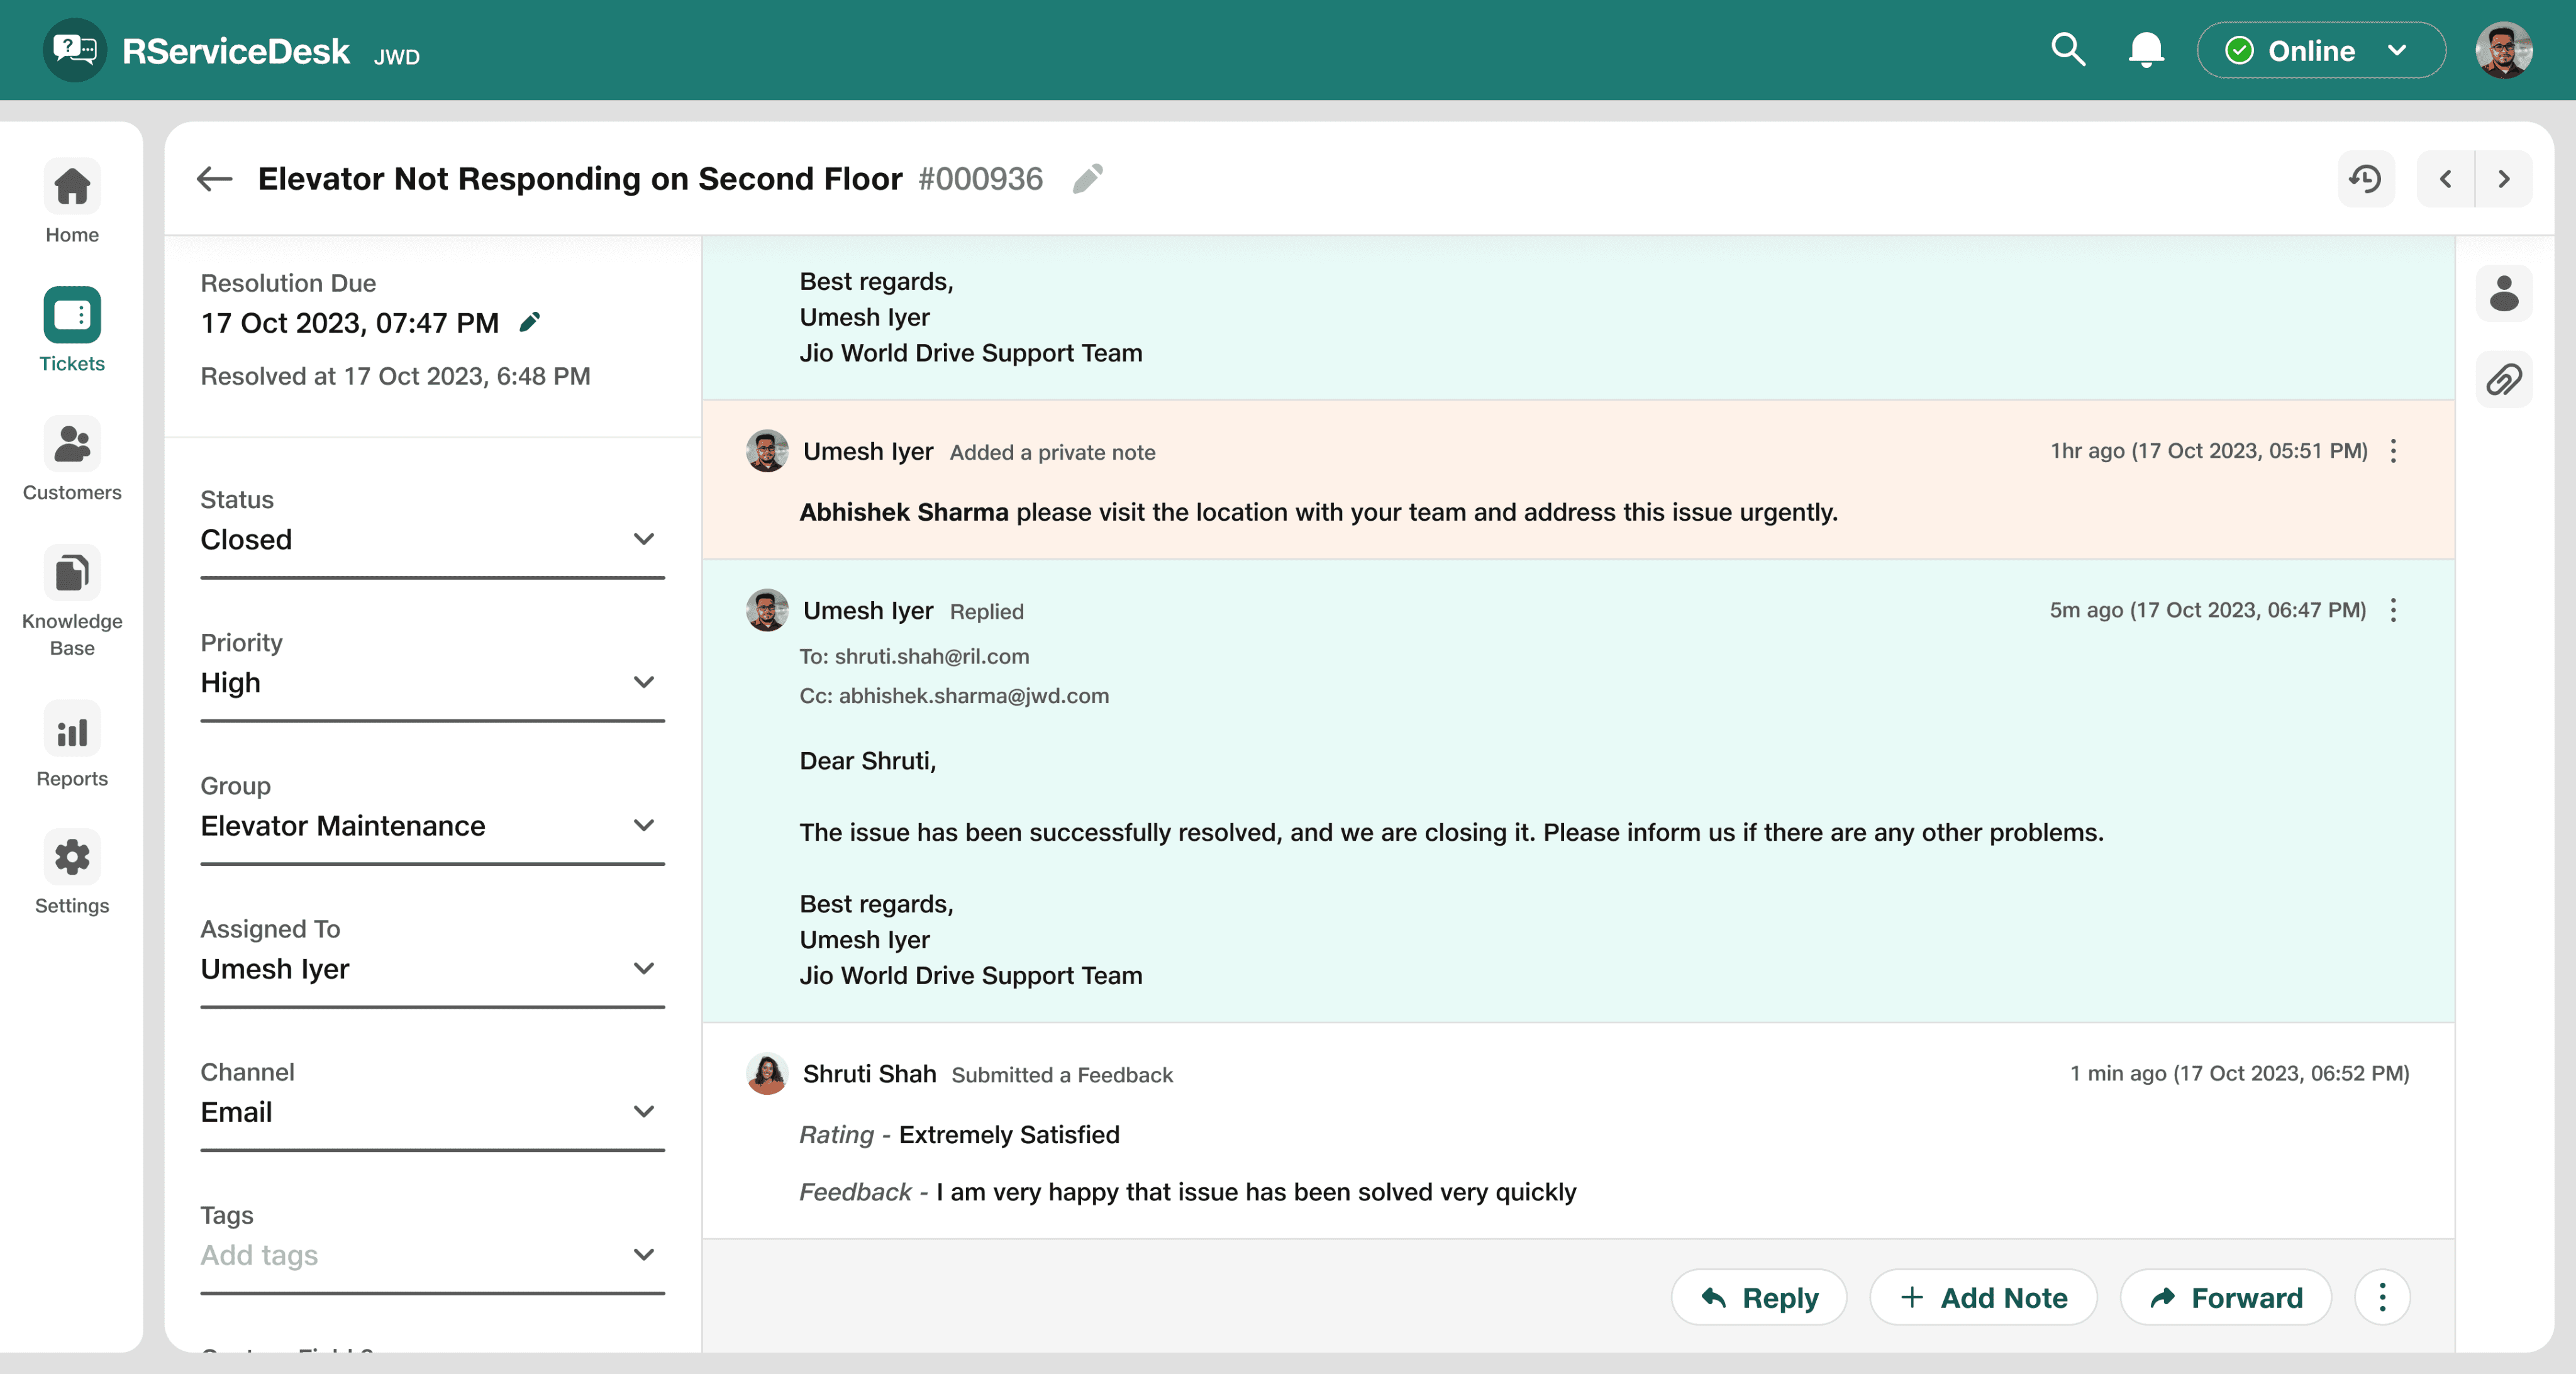
Rating and Feedback
And that’s how a ticket is being Created, Managed and Resolved in RServiceDesk
Potential Impact 💪
The "GET IT" customer support team at Reliance Corporate Park is on a roll! They've already moved 60% of their ticketing and support operations from the old HPSM system to the new RServiceDesk, and they're gearing up to go fully digital soon.
RServiceDesk Reports eliminate manual effort by offering in-platform report generation. In HPSM, they need to export the data to Excel, apply formulas, and then generate a report.
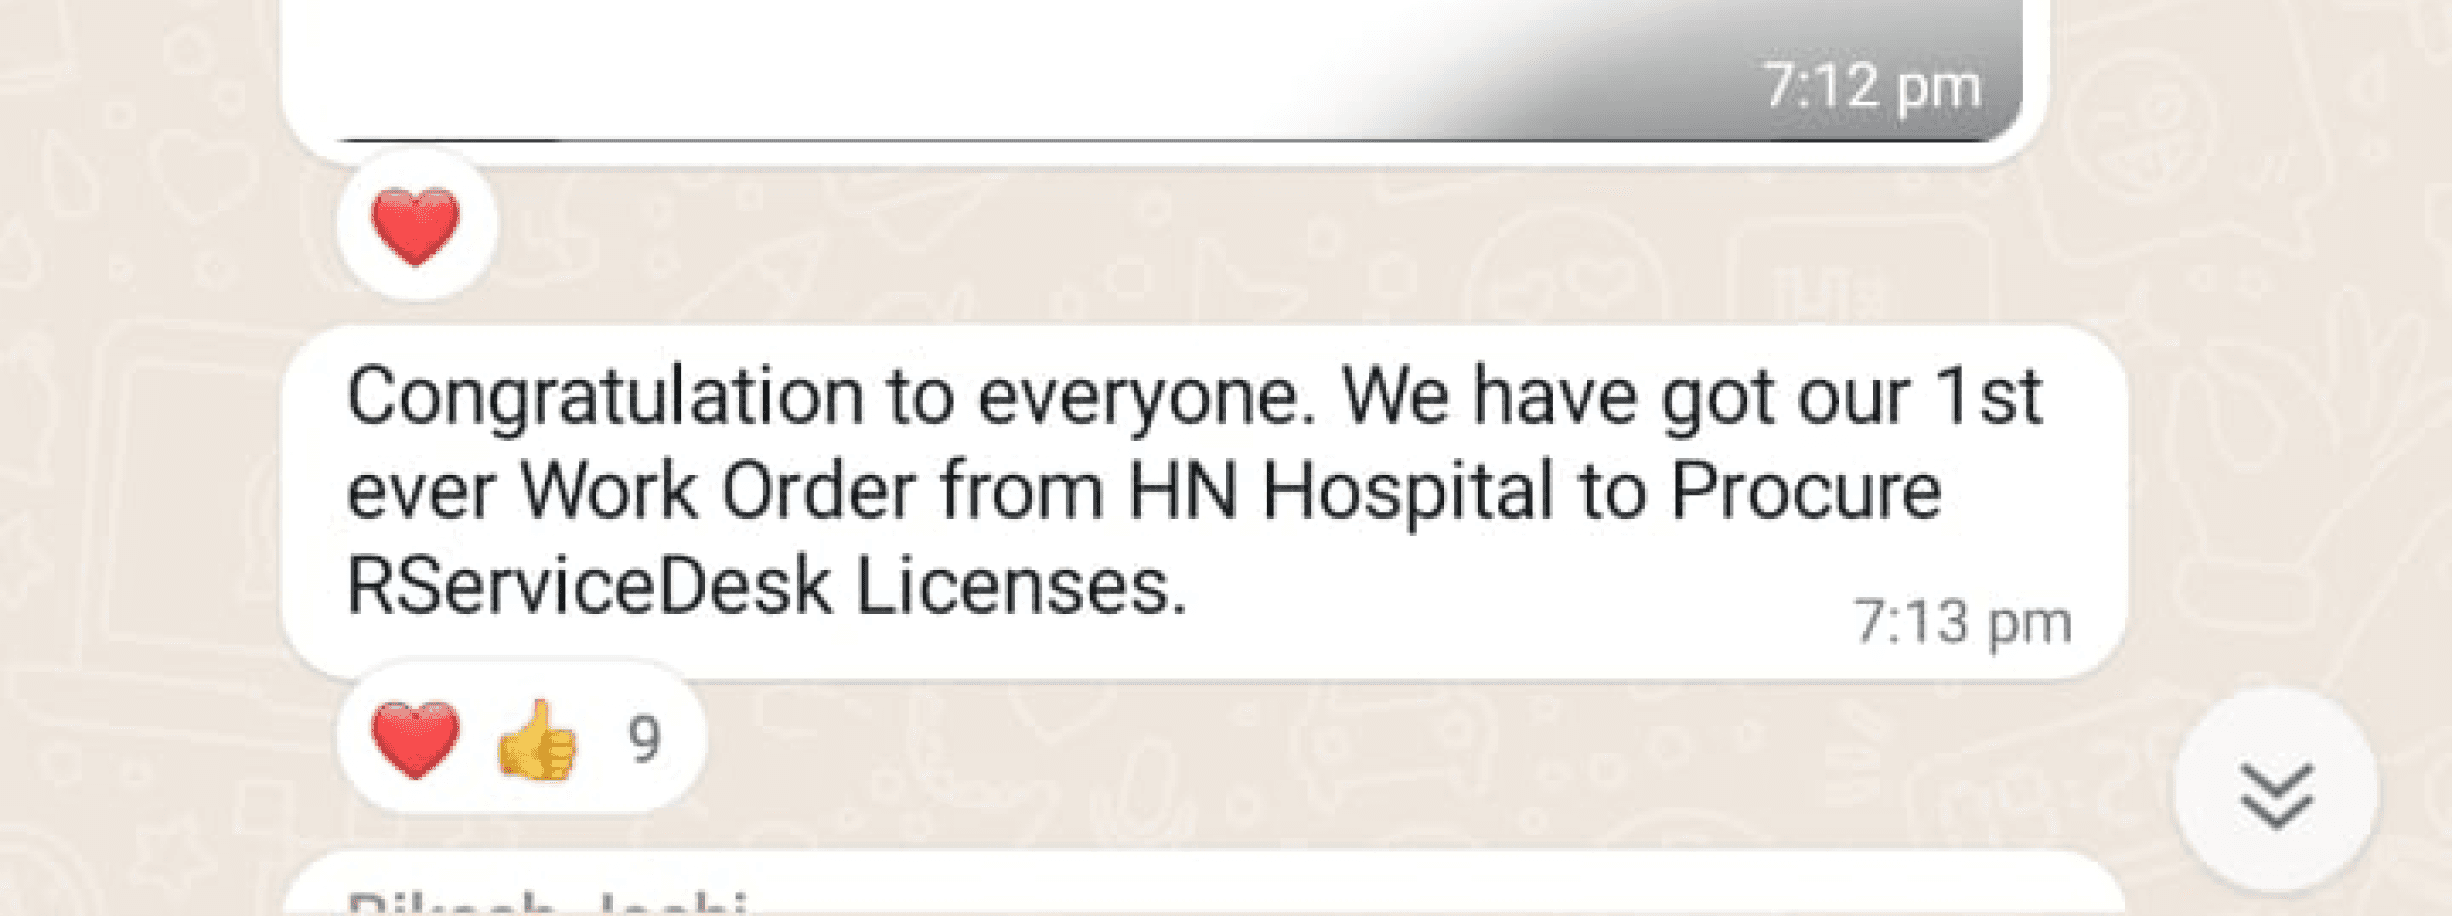
Jio World Drive, Jio World Center, and Sir H.N. Reliance Foundation Hospital are now using RServiceDesk for customer support.
Stakeholders loved the product as UI was clean and modern and learning curves was very easy.
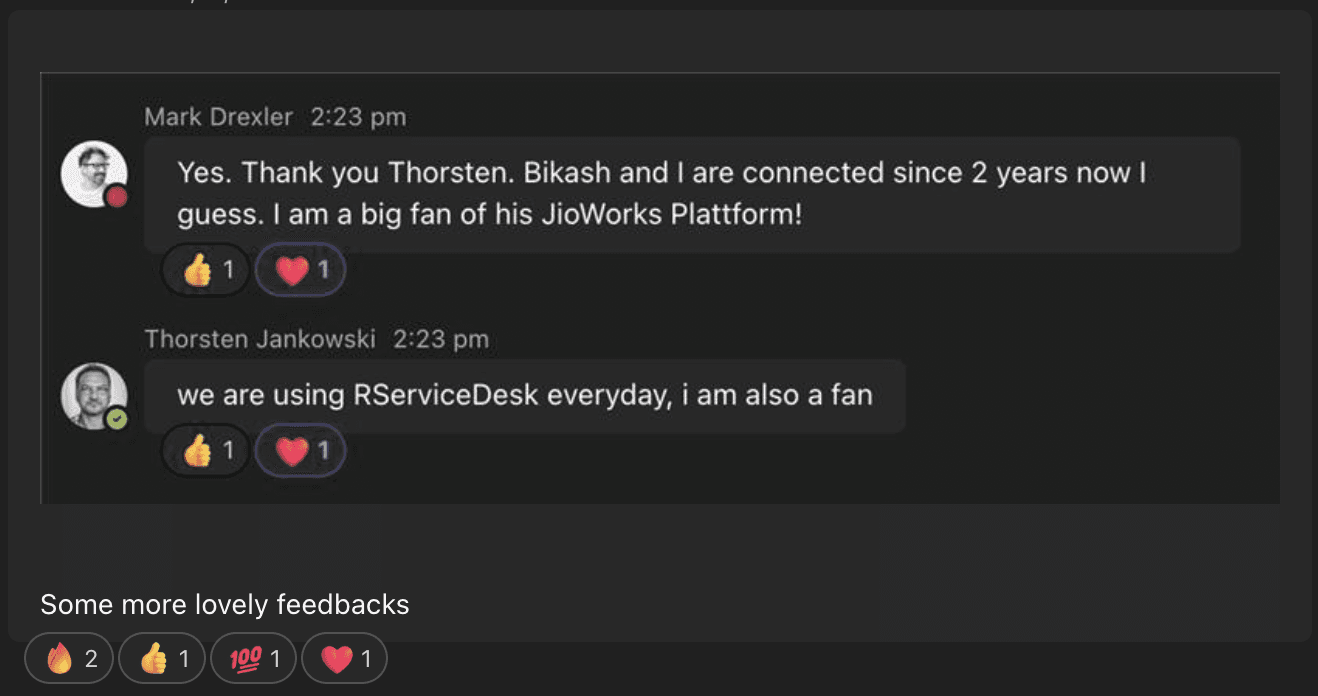
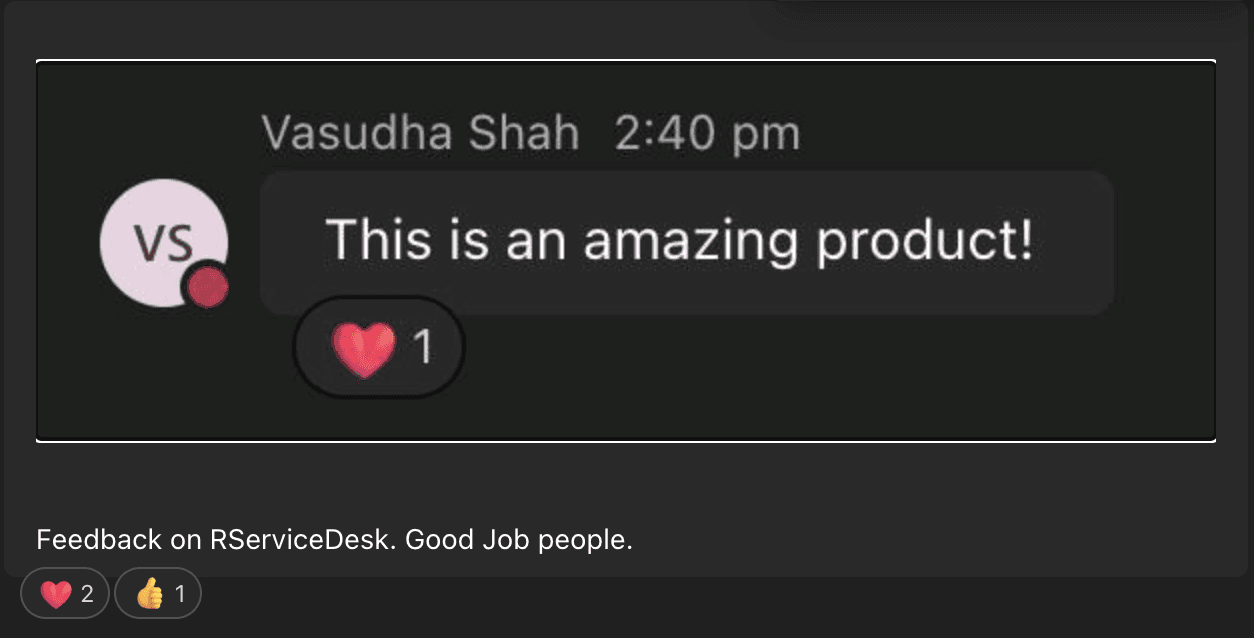
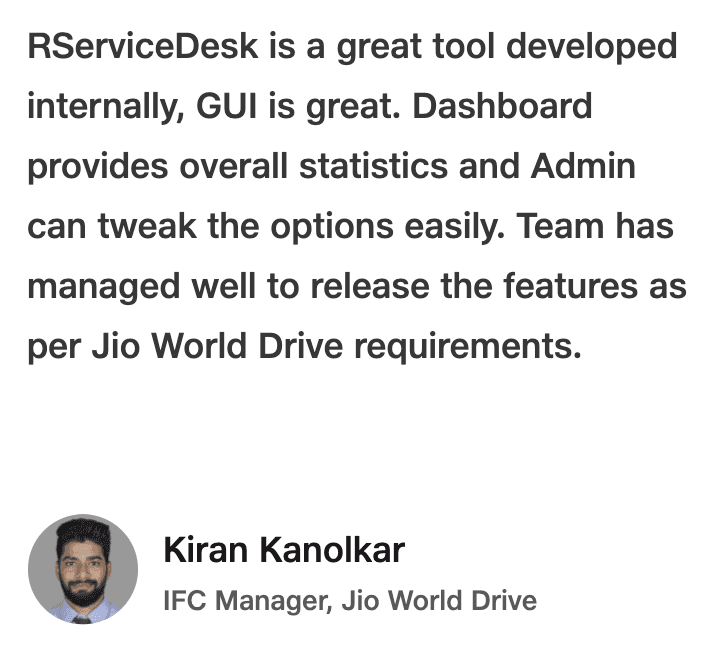
Some lovely feedbacks and achievements ❤️

And… That’s a wrap!
This project was a real eye-opener for me! It pushed me to refine my design process, and I learned that every project throws its own curveballs. But the coolest part? It's not a solo show! Product design is all about teamwork, bouncing ideas around, and constantly tweaking things based on everyone's input. It's like a constant loop of learning and improvement, and it's honestly one of the most rewarding things I've ever experienced.
I hope you guys found this case study useful and informative. Thank you! ✌
Feel free to connect with me on LinkedIn if you have any questions or feedback!